My last post for Module 7 on Composition was about rules for composing great photos, but there are times when you should ignore the rules ( well some of them) and experiment with creative shots like intentional blur to get a painterly impressionist image or abstract photography
Rules that can be broken
Rule: The Rule of Thirds
Rule: Fill The Frame to Draw Focus on the Subject
Rule:Leading Lines
Rule: Shoot With the Sun Behind You.
Rule: Avoid Shooting Portraits at Midday.
Rule: Blur is Bad
Rule: Keep Your Horizons Strait
Rule: Never Shoot From Behind Your Subject
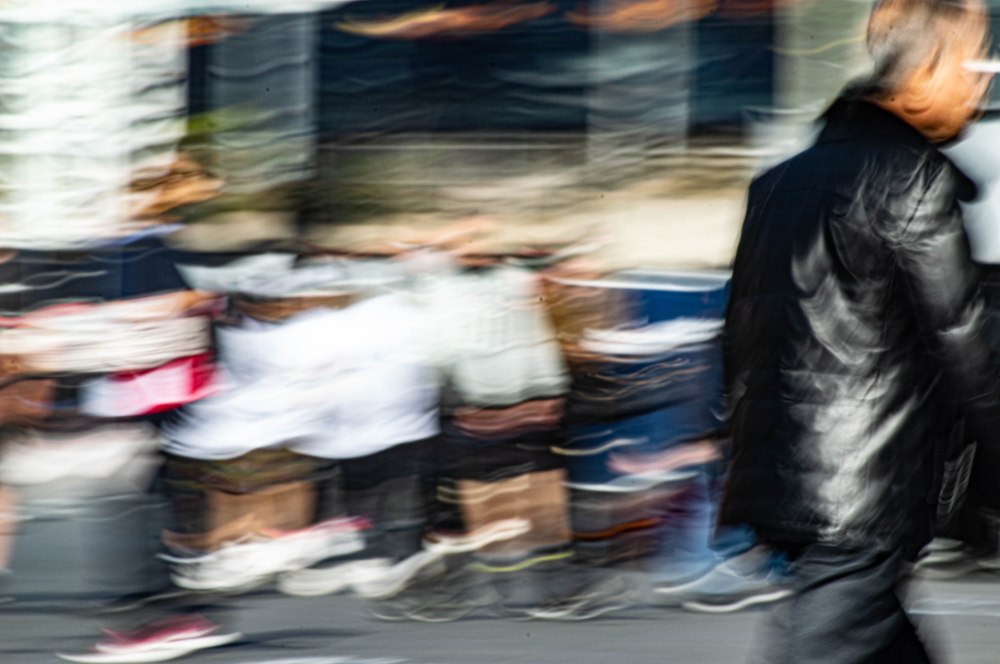
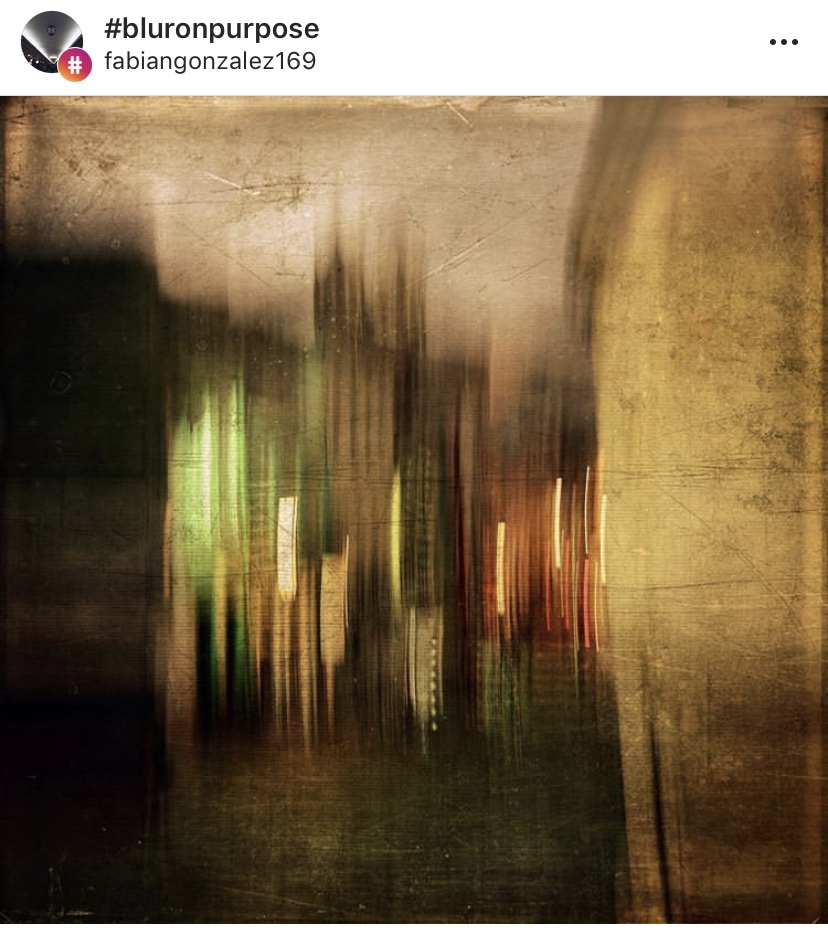
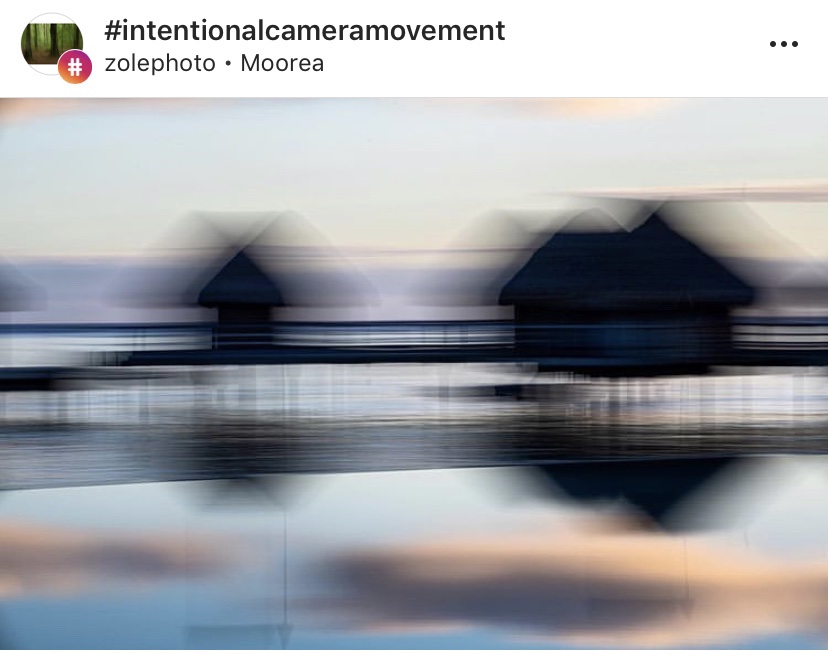
Intentionally Blurred Subject gives an impressionist painting or abstract feel to a photo. I took this shot a few weeks ago demonstrating shutter speed , I like the way the people passing through the plaza leave colour light trails of skin and clothing and the one man who was standing fairly still until I’d almost finished and then started to move so you can see it’s a person but there’s no fine detail just movements Instagram post by Fabian Gonzalez Instagram post by Zolephoto
There’s a great article on National Geographic on breaking the rules and I encourage it for further reading
For this activity, pick 2-3 ‘rules’ of composition and capture a series of images that deliberately break them.
Analyse the results. Did they work or not? If so, why? If not, why not?
The Results
I chose to create a series of intentionally blurred images with crowd movement as I really like the impressionist/abstract painting look. Heres two that i shot around Parramatta CBD
As the world go by
Sometimes intentionally blurring a subject doesn’t work, long exposures during the day can be destroyed by too much light into the camera, or it just looks badly wrong and not artistic, this can be overcome with ND filters and UV filters, by putting tape on the viewfinder and using live view to focus.
With parts of architecture it can look weird focusing on one aspect of a building if the shot is badly composed. Just because your breaking rules doesn’t mean you can, not compose the image in a visually pleasing way.
ISO is one of the most important aspects alongside Shutter Speed and Aperture.
If you can master ISO then congratulations as you’re now one step closer to acing manual mode on your camera.
When I started taking photos with SLRs over two decades ago in art classes at school ( yes I’m older than the internet and probably dinosaurs) there was Black and White film processed in a dark room and mini lab processing for Colour C41 films ( Wikipedia :- C-41 is a chromogenic color print film developing process introduced by Kodak in 1972, superseding the C-22 process. C-41, also known as CN-16 by Fuji, CNK-4 by Konica, and AP-70 by AGFA, is the most popular filmprocess in use, with most photofinishing labs devoting at least one machine to this development process.) ISO was a very critical part of photography which included selecting the right film as well as the right ISO setting on the dial of the camera.
Kodak UltraMax C41 Film 24 exp 3 pack
But I digress, A lot of people are confused as to what ISO is, how it works, and how they should use it.
ISO stands for International Organisation Standardisation and gauges how sensitive your camera image sensor is to light or to how sensitive film is to light if your using film.
ISO is important in getting a correct exposure, with the right level of sharpness to illustrate your image, choose the wrong ISO and it can ruin your picture.
On DSLRs and mirrorless cameras (and also some compact cameras) there is an ISO setting that can be adjusted ranging anywhere from between 100 to 12,800 or greater depending on your camera. ISO numbers, or “stops”, go up in incremental amounts, doubling your sensor’s sensitivity.
stop sequence :
100,
200,
400,
800,
1600,
3200,
6400, and so on
The higher the ISO, the more chance you have of a loss of definition at the edges of objects or noise into the image.
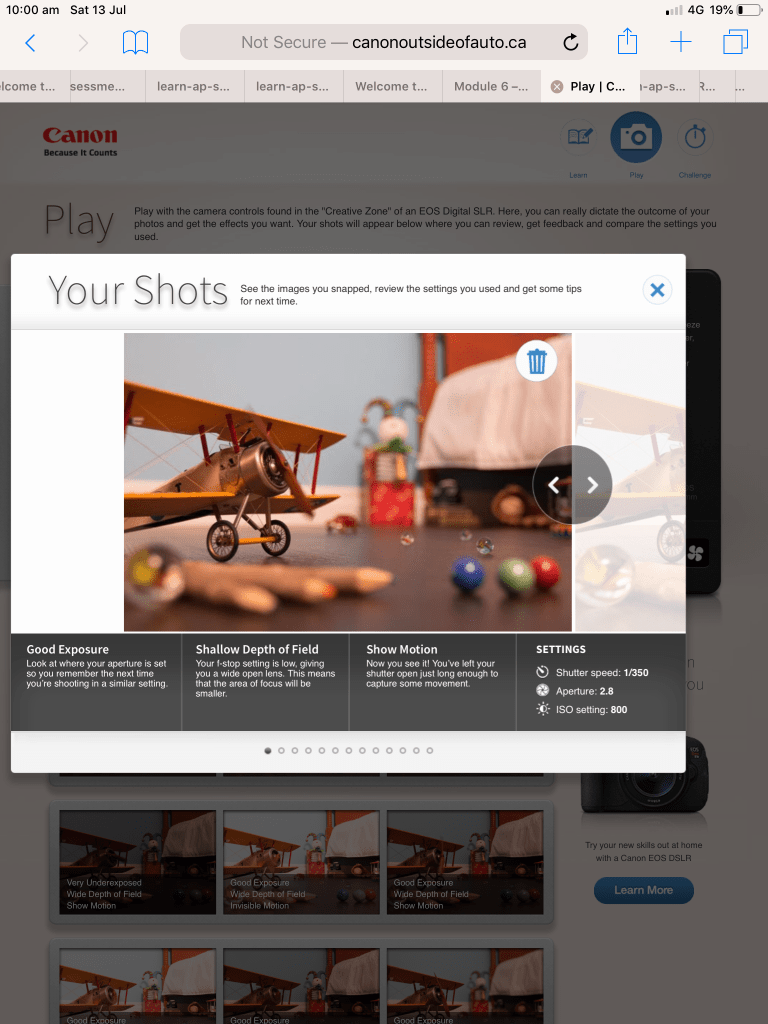
Activity 6.1: ISO test
Our first activity for this module is to experiment with different ISO settings in order to test your camera’s limitations and assess image quality.
Capture a scene or subject of your choice in good, even lighting with your ISO set at its lowest value. Take a series of images, each time increasing the ISO by one stop (e.g. 100, 200, 400, 800, 1600).
Repeat the activity in different lighting conditions, using different scenes and subjects, and compare the results.
At which ISO setting did quality begin to noticeably suffer? Was digital noise more obvious in certain images or in specific lighting? How would you describe your camera’s high ISO capabilities?
The Results
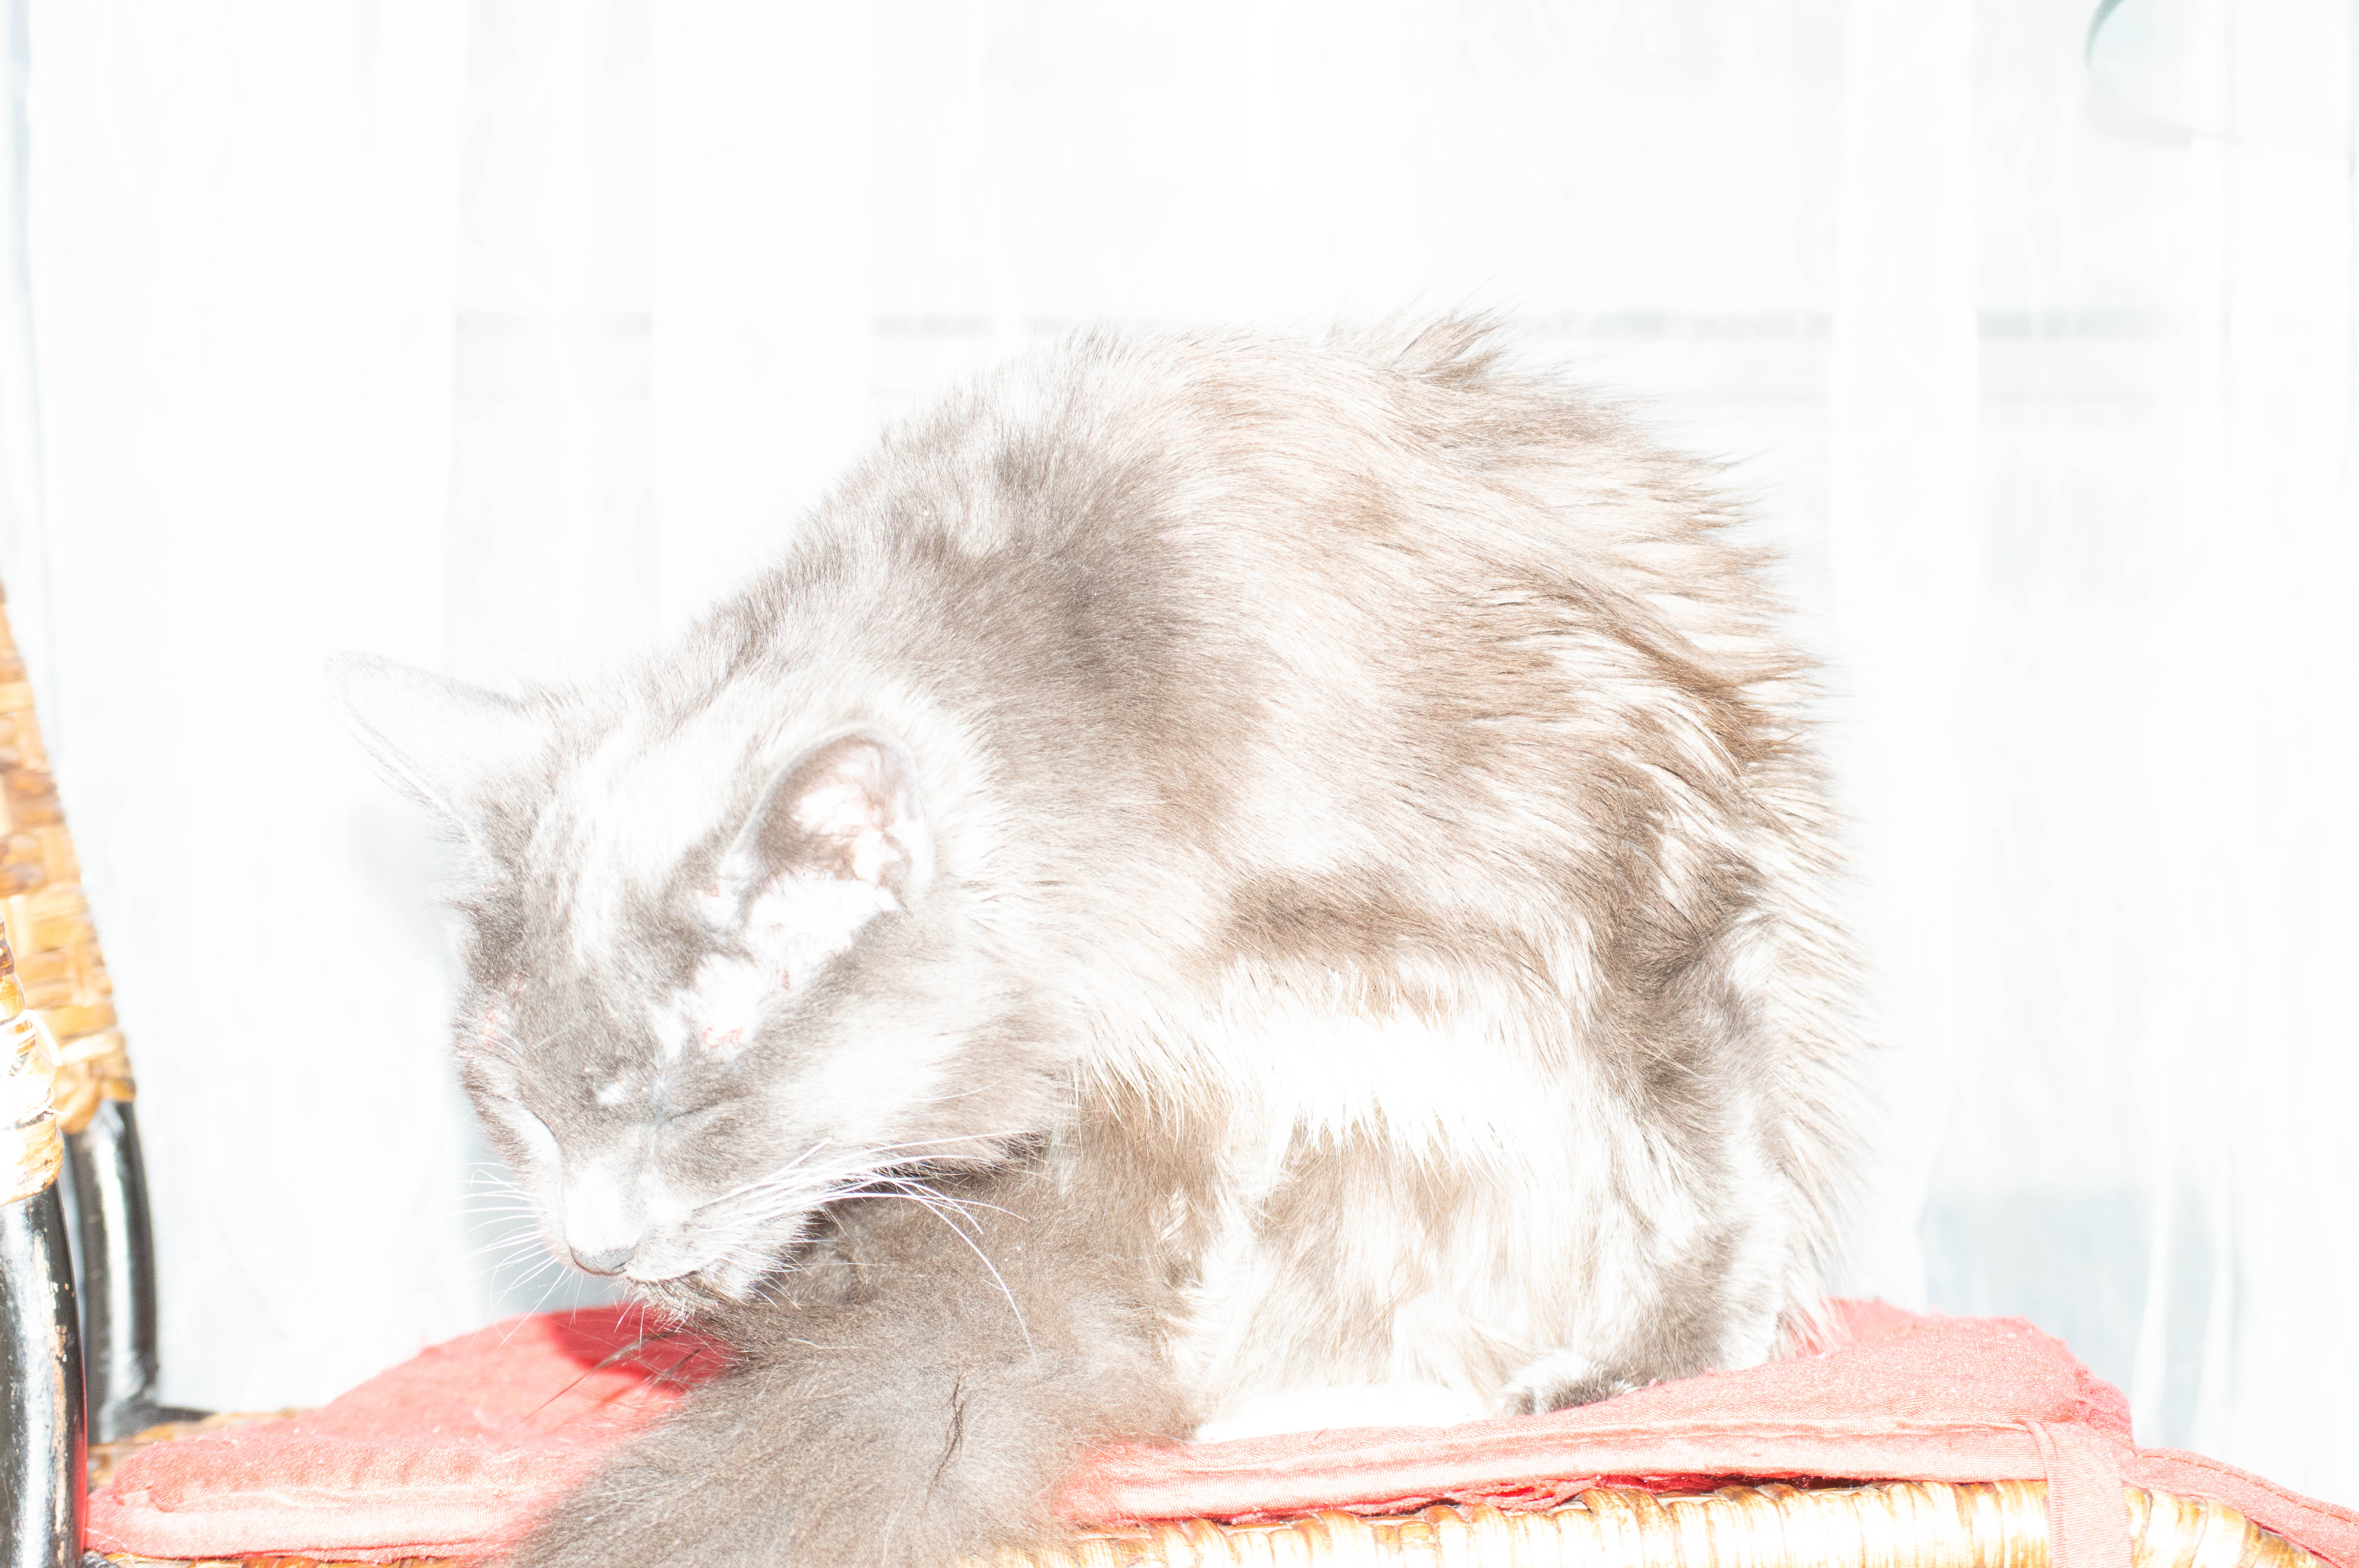
As you can see with the higher ISO in the images I. Doors near the wi Dow with my cat the higher ISO blew out the image so it was mostly highlights and un useable at 1600 ISO even 800 was a bit high. 400 was pretty good but I feel the the best exposure was at 200 ISO. I used wi Dow lighting behind the kitten to emphasise the effect too much light will have and it also depends on the lens and aperture as to how much light gets in and the effect the ISO will have. The lens I used for the shots with Ashy was my Nikkor 55-200 mm lens, in the next set of shots I used 18-55mm Nikkor lens to compare different quality of light into the sensor.
For these it was late afternoon at around 4.30 so the sun was getting fairly low in the sky, The difference in ISO in this set of images is more subtle but at the lower ISO’s the shadows and the colours are darker and more golden as the higher ISO’s the highlights are more pronounced and the image is a lot brighter. There’s not too much colour noise at this time of day as there’s still quite a lot of daylight to work with it’s just not as bright as a backlit image and balanced differently for a different light and exposure.
Getting a good exposure is a balancing act between aperture, shutter speed and ISO. If you change the value of one, you might need to adjust the others to capture the right amount of light. Camera simulators are a fun and easy way of seeing how the three exposure parameters of aperture, shutter speed and ISO work together.
The Results
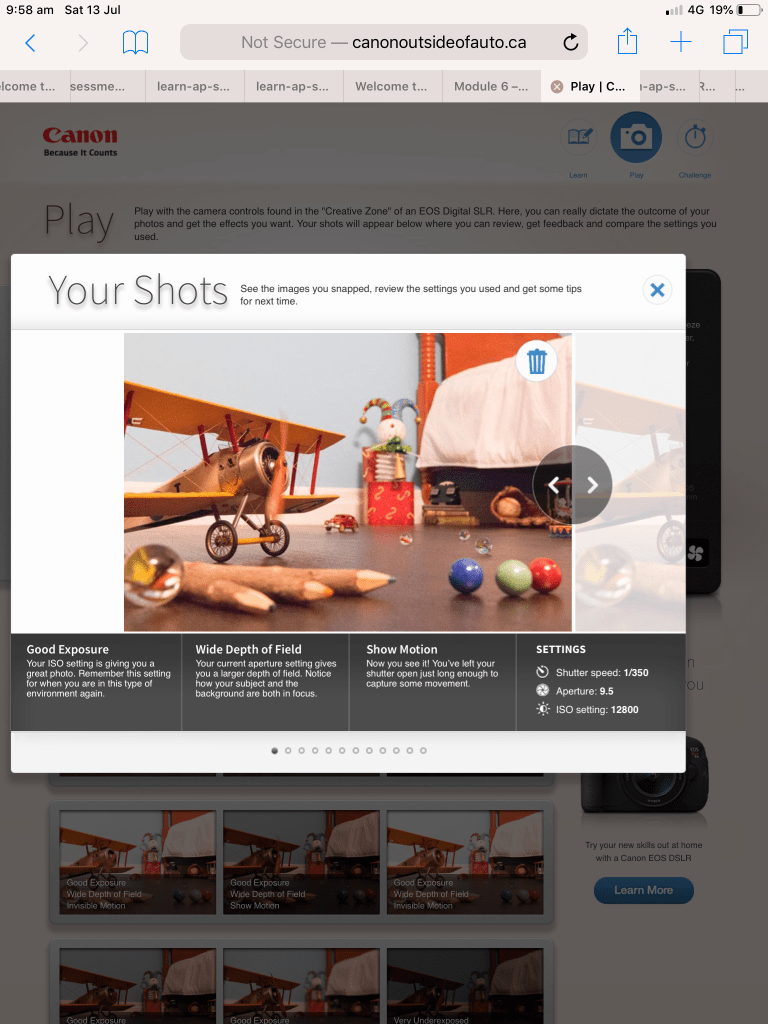
This exercise is a lot of fun and I thoroughly recommend it to anyone wanting to simulate camera effects. I’ve included the link below and I encourage you to have a play. I sat there for about an hour just moving the sliders around and I’ve included some screen shots from my ipad with some of the results.
Having moved to a Nikon from always shooting with Canon cameras from my compact IXUS , my original Canon EOS 3000 SLR Film Camera, Canon EOS 1100 DSLR ( my daughter now shoots with this while she’s learning she takes photos primarily to use a backgrounds for her animation and digital art) and My 5D mark lll (which I sadly had to sell when my daughter and I resided at Westmead Childrens Hospital for lengthy periods of time when she was first diagnosed with Crohns Disease at 9 years old) I found playing with the Canon simulator very comforting like visiting an old friend you haven’t seen in quite a while.
To adjust apture , ISO and shutter speed on the simulated just slide the controls and then click or tap the blue capture button and it will generate your result as pictured below with weather it was a good exposure and how the settings achieve the image.
The other people who reside in my house weren’t as easily amused and fascinated by the canon simulator but they’re all Minecraft addicts so pot kettle black🤪😜
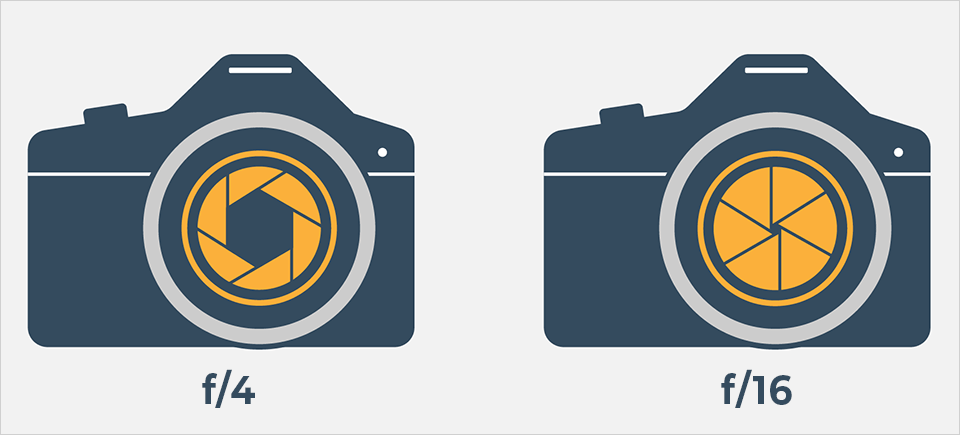
Aperture refers to the hole in your lens that allows the light into the camera. The size of the hole affects the amount of light coming in and the depth of field. It’s measurement is called an F Stop. An F Stop is a fractional degree of light so to explain simply, the bigger the opening the smaller the F number and the larger the opening the larger the F number. Aperture works Incrementally so therefore with each step down the aperture blades let in half as much light.
From top to bottom I have listed F Stops from large to small. Starting at f/1.4 which is a very large opening of your aperture blades and lets in lets in a lot of light to f/32 which lets in barely any. Each stop let’s in half the amount of light.
These are the main aperture “stops,” but most cameras and lenses today let you set some values in between, such as f/1.8 or f/3.5. Which I will demonstrate with my camera in exercise 4.1 below.
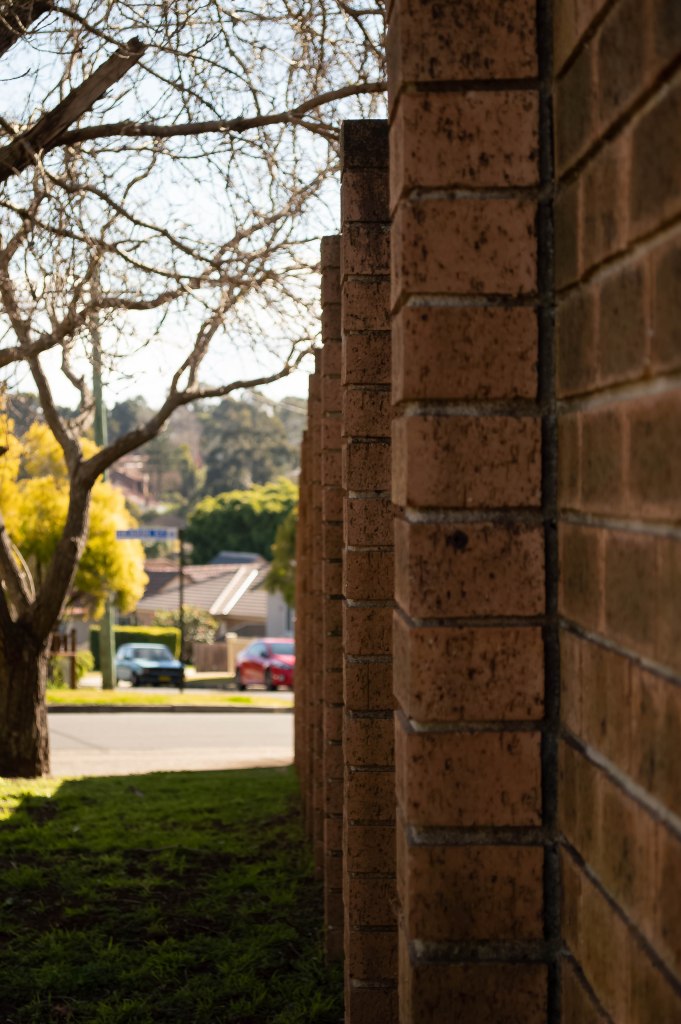
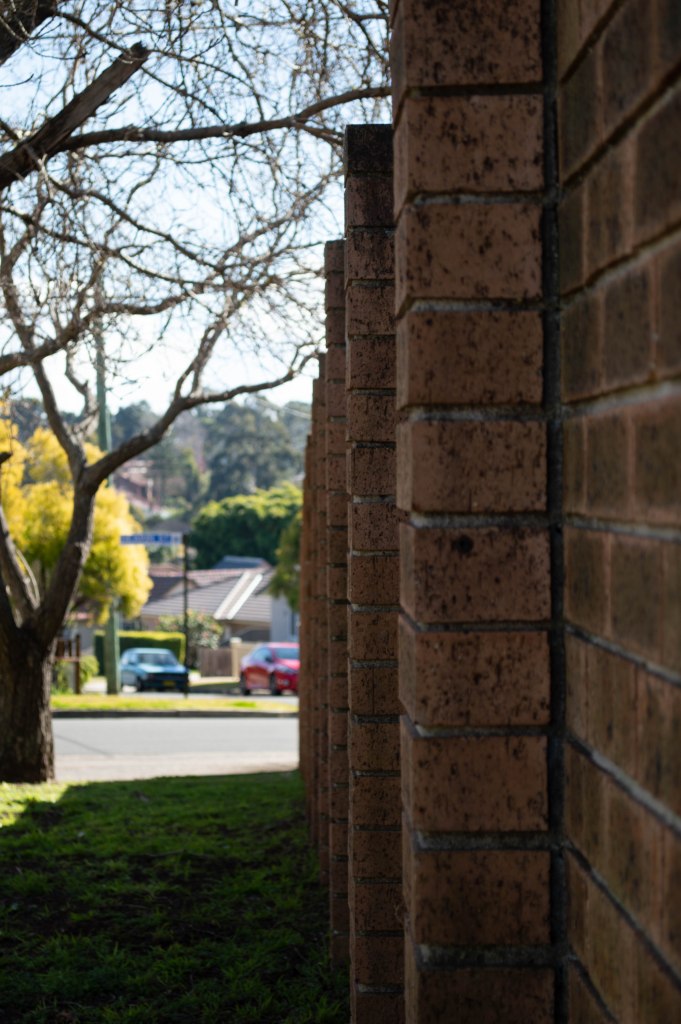
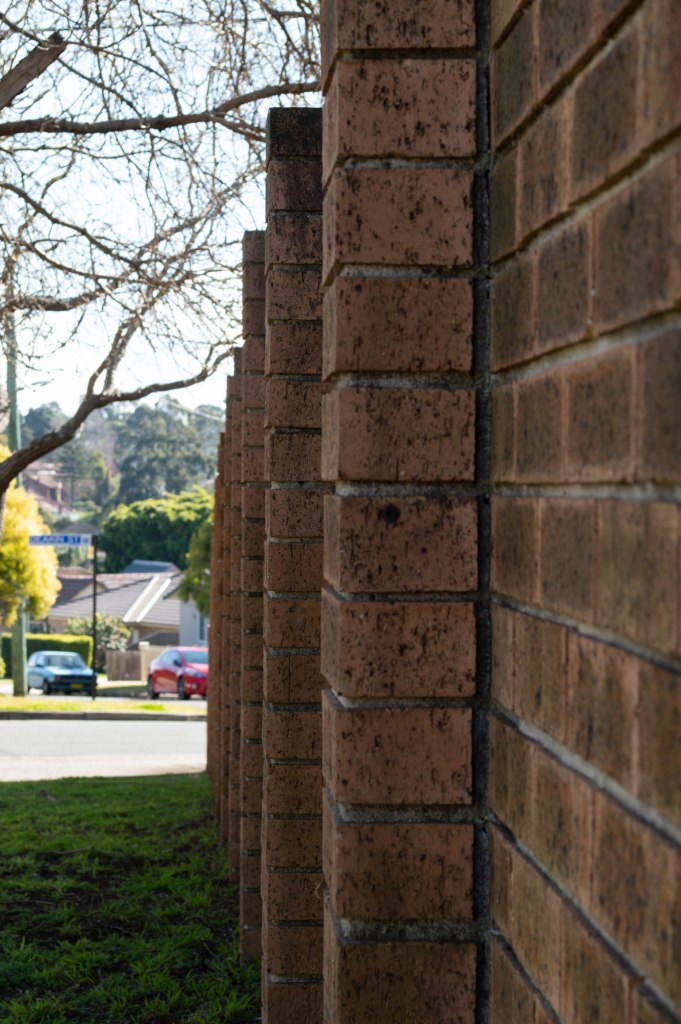
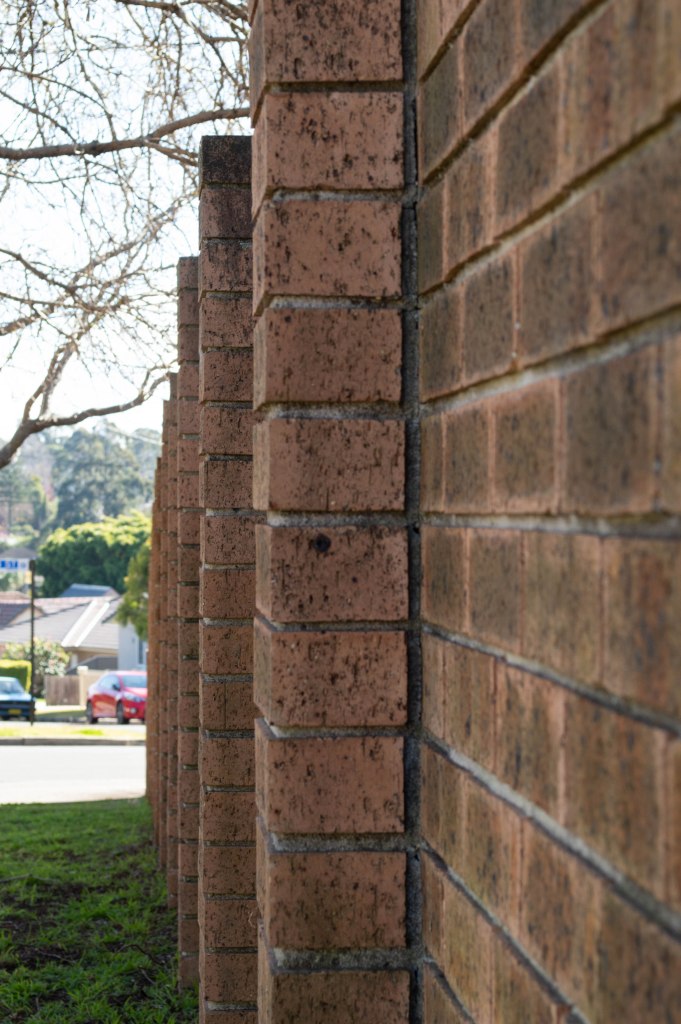
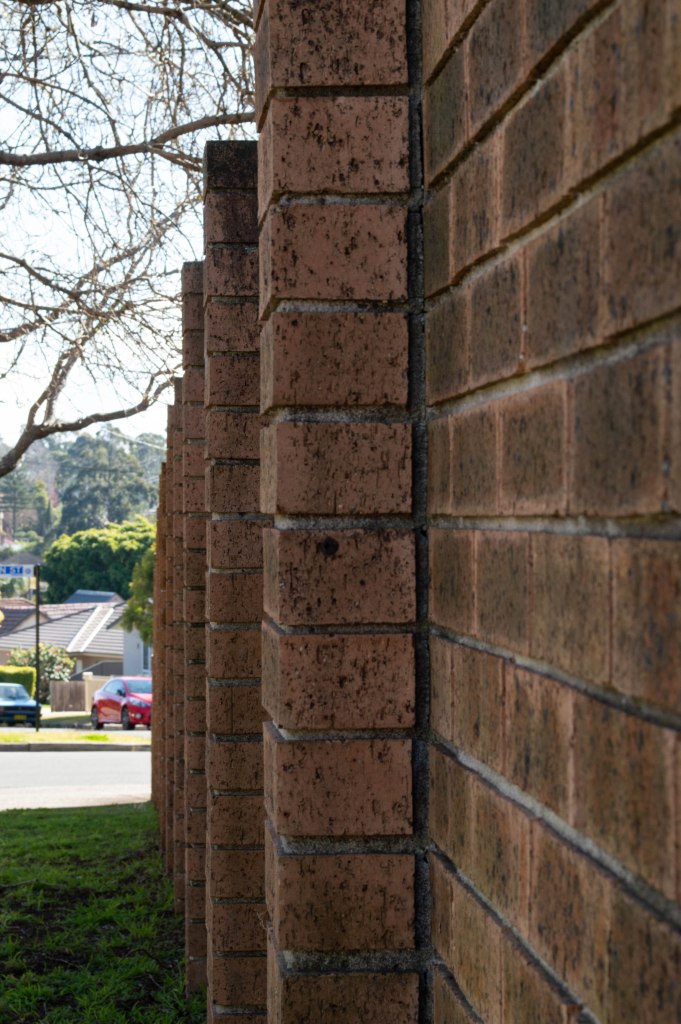
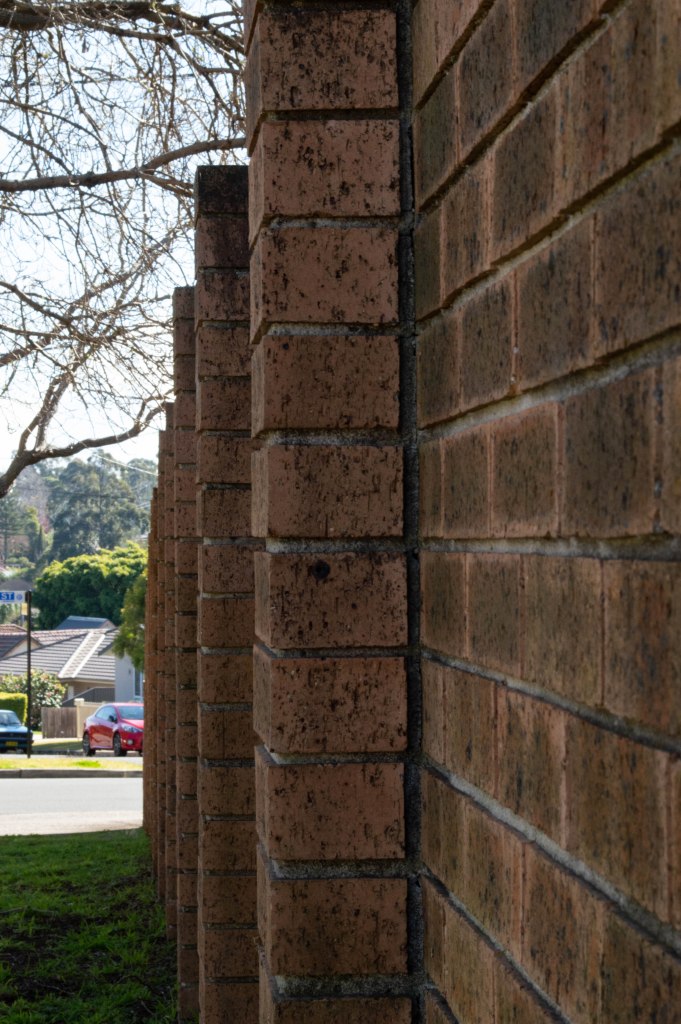
Activity 4.1: Aperture and depth of field
For this activity you will need to find a long, uninterrupted subject or scene such as a fence, ladder, ruler or path. Using this subject you will shoot a series of images utilising your full available aperture range.
Set your camera’s shooting mode to Aperture priority (A/Av) and begin with the widest aperture available on your lens (e.g. f/1.4, f/3.5).
Without moving the camera, shoot multiple images throughout the aperture range (i.e. f/4, f/5.6, f/8, f/11, f/16, f/22).
Compare the final images. How did your aperture settings affect the depth of field in each image? How did each aperture adjustment affect your other exposure settings (i.e. shutter speed, ISO)
The Results
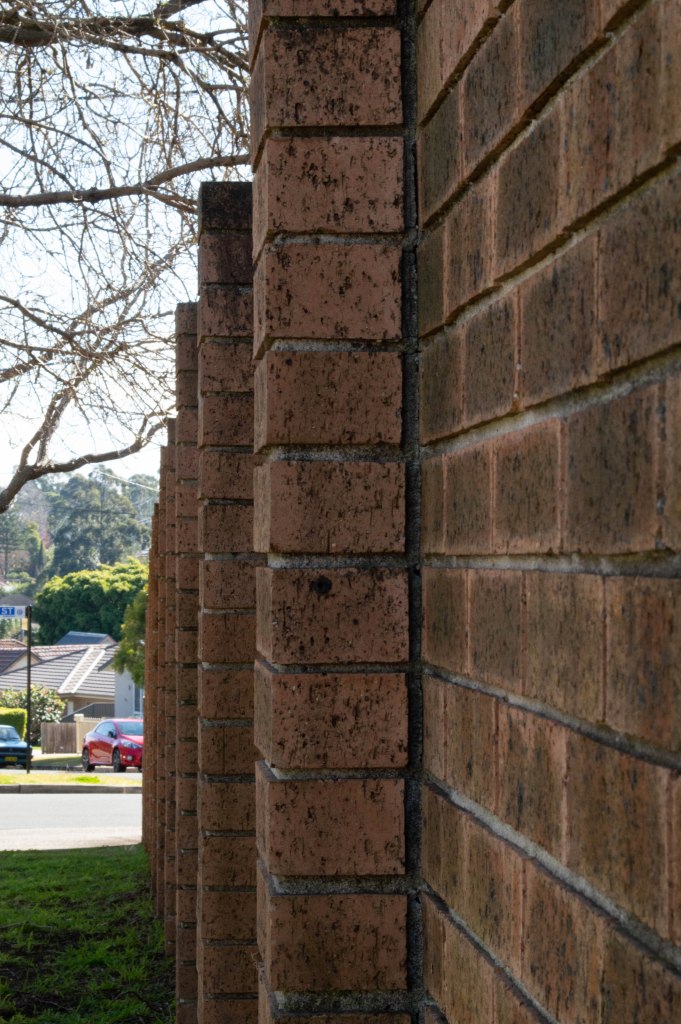
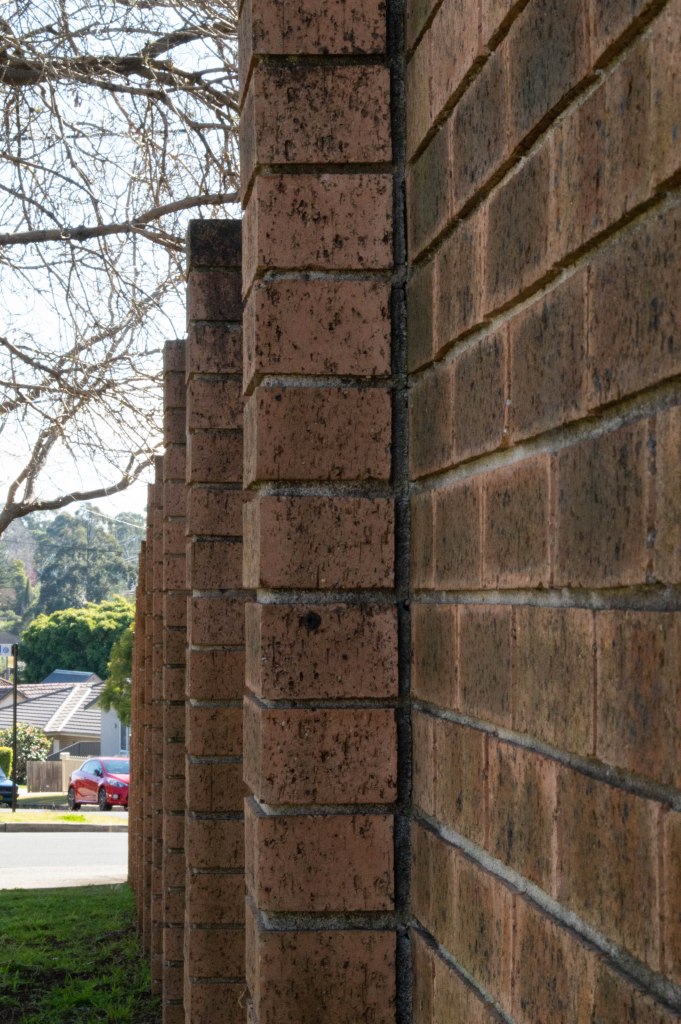
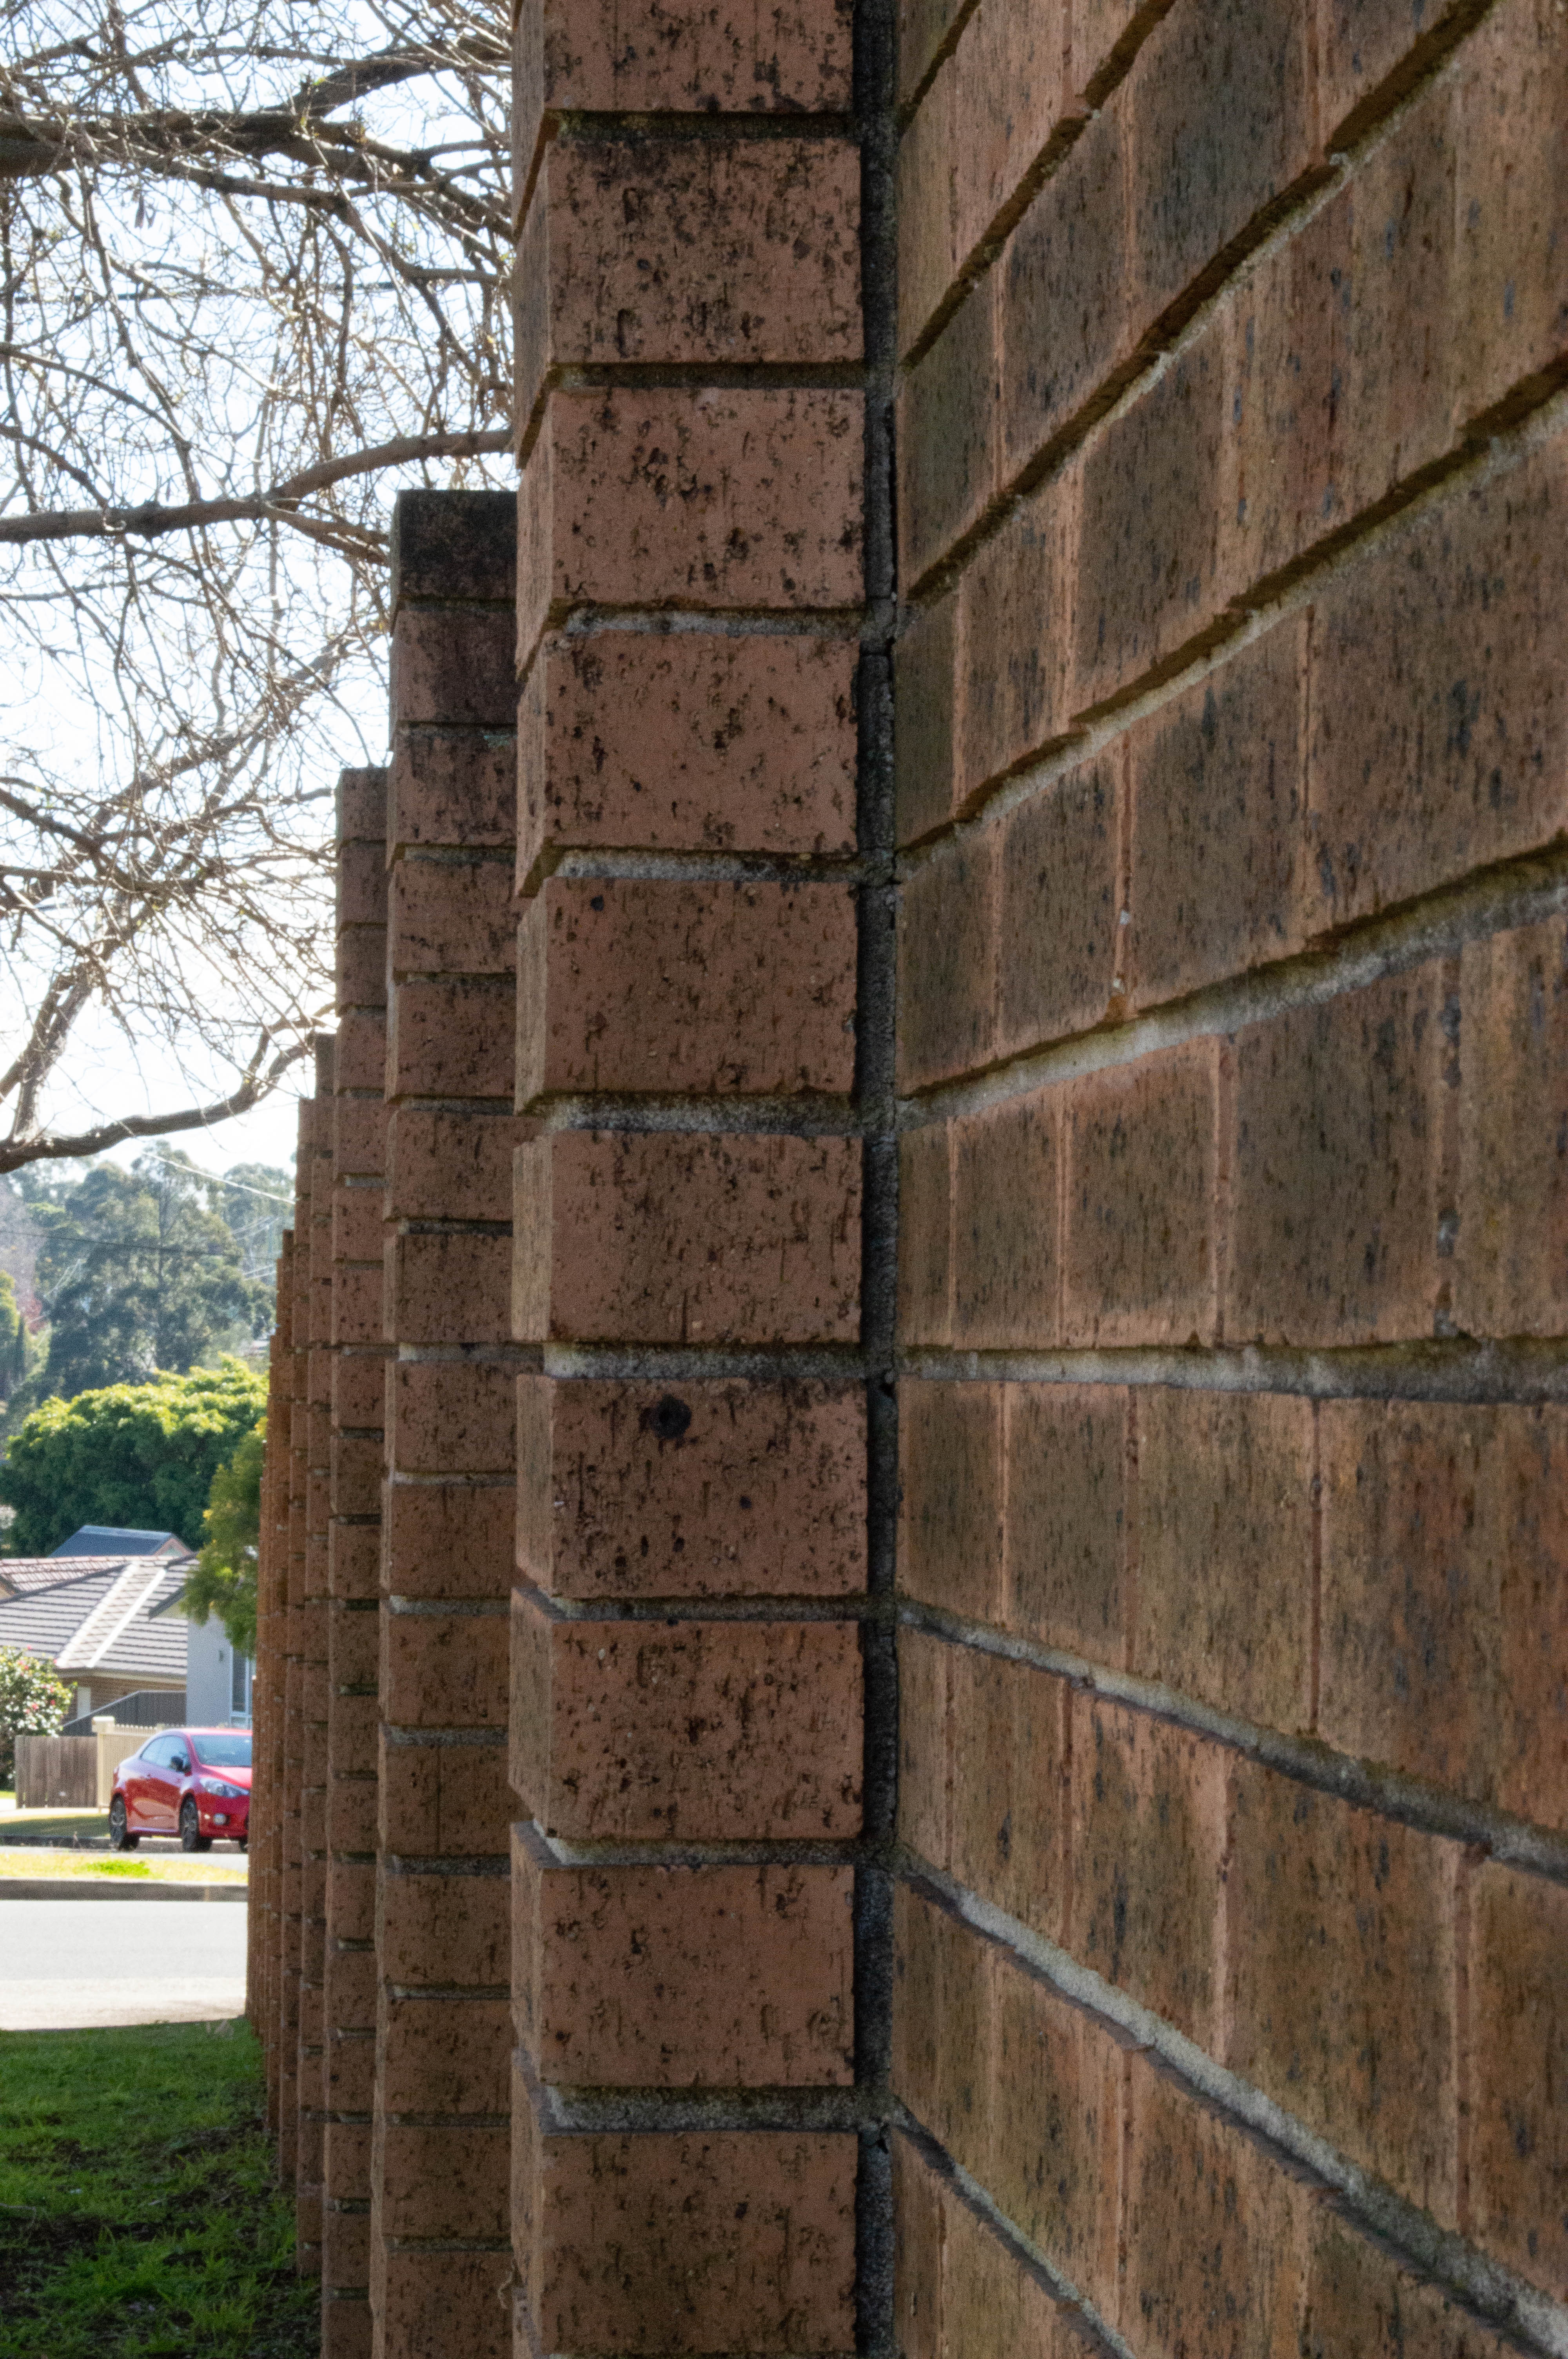
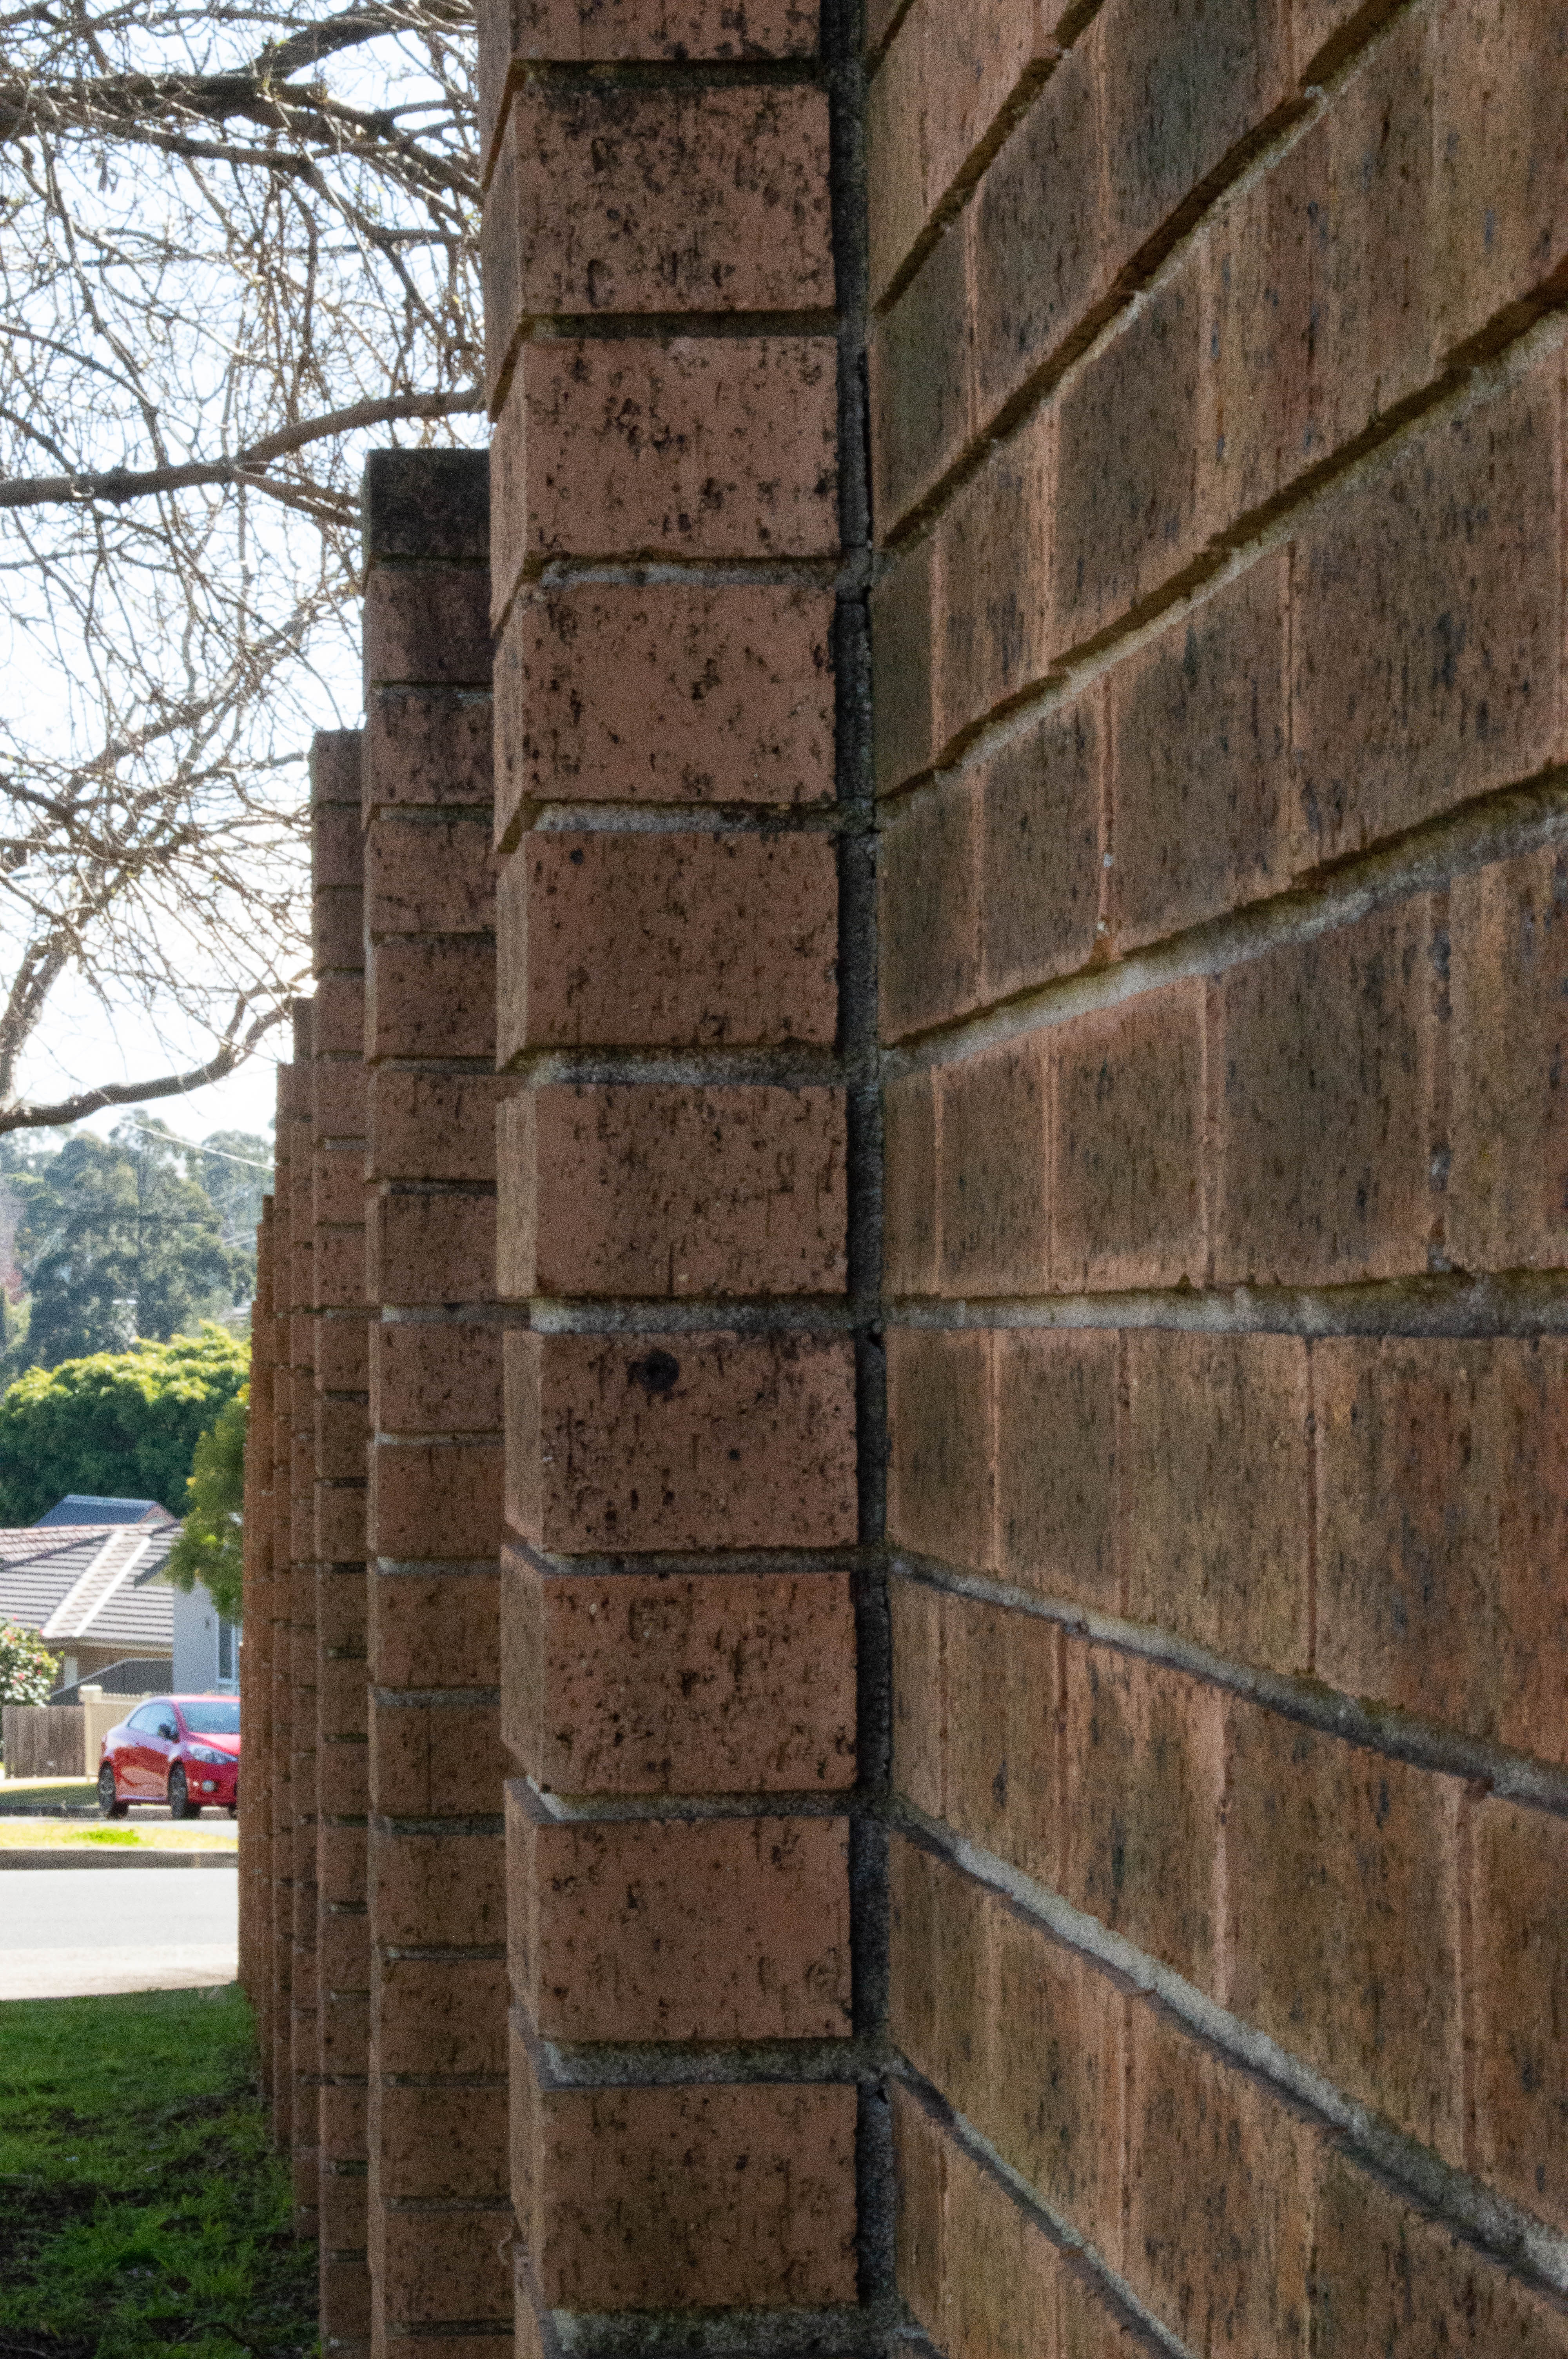
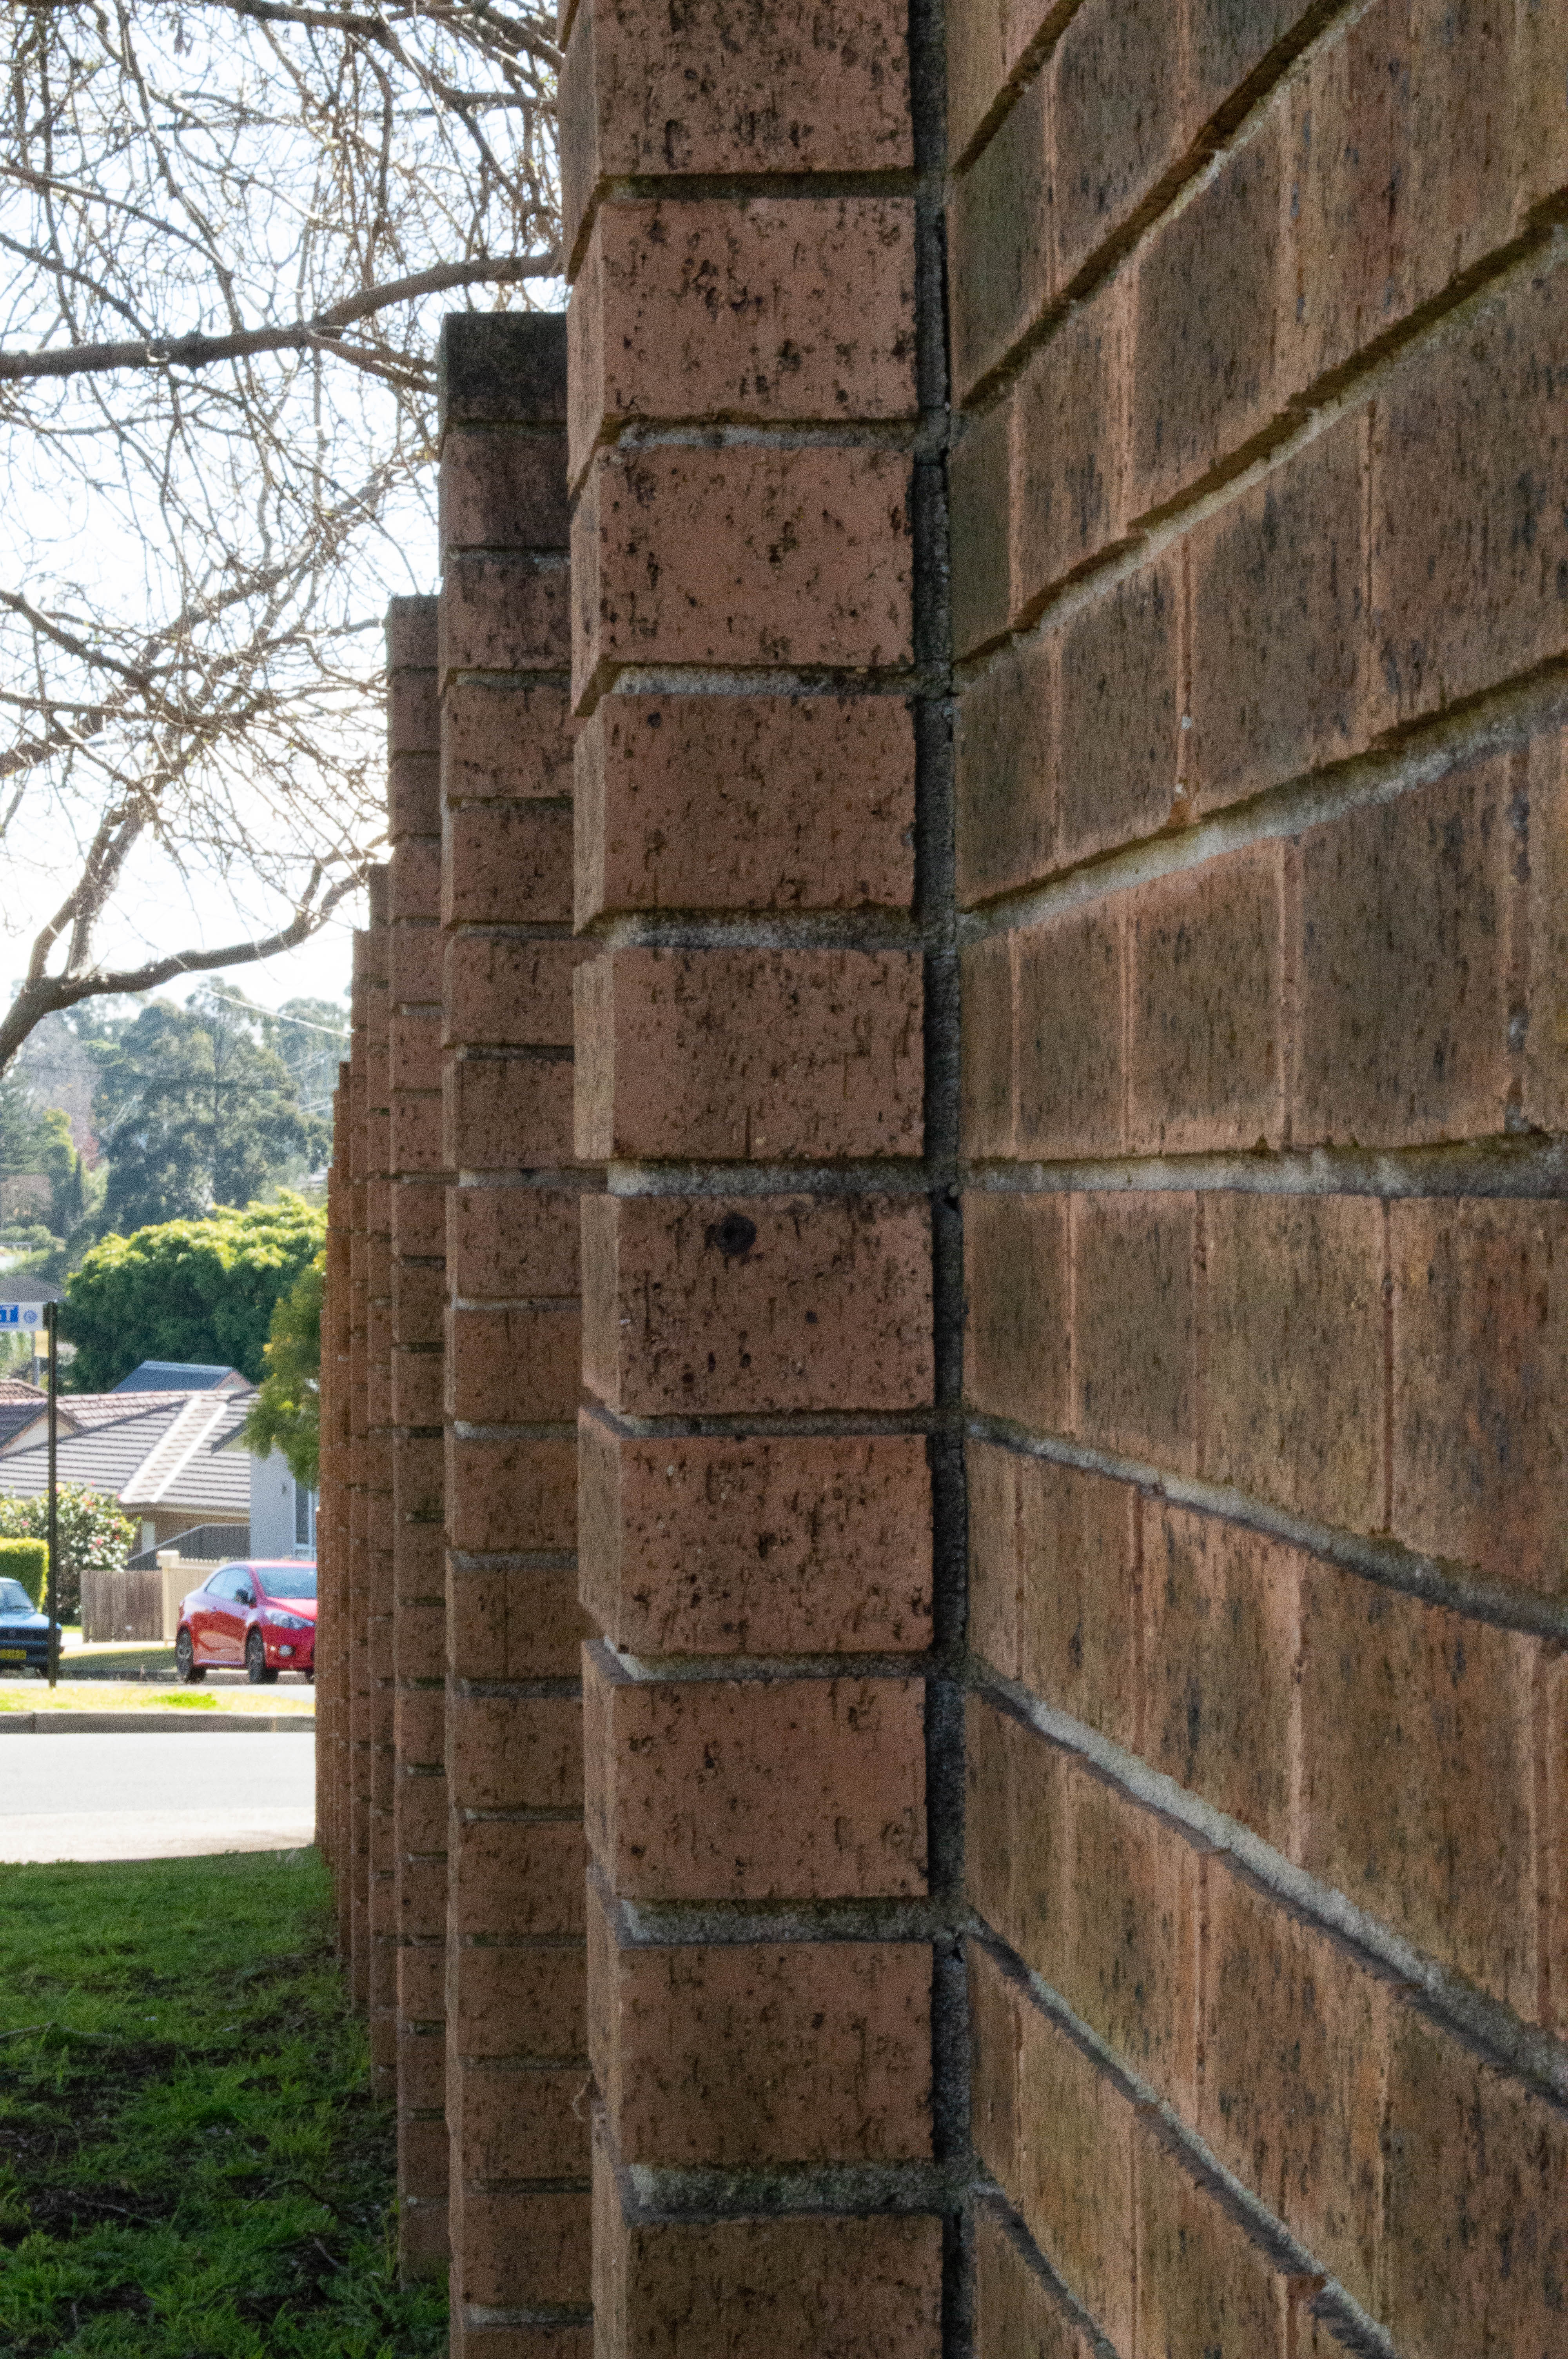
I set my camera to Aperture Priority mode, selected the largest aperture on my f/5.6 18-55 mm kit lens and walked down to the front of our complex where there is a long brick fence so I could demonstrate this exercise. The largest aperture I can set this lens to is F/5.6 so I started with that and cycled through 17 shots to F/36. As you can see with the gallery below the depth of field , sharpness in the foreground and background as well as colour changes slightly with each image. For the metadata on each image if you click on an image in the gallery it will display it with a larger image on a side scrolling gallery with the Focal length and aperture as well as ISO for each shot. All images are unedited and loaded into Lightroom before sending to my Dropbox as jpgs rather than RAW.
Long exposure photography refers to images captured using a long, or slow, shutter speed—often in the seconds, rather than fractions of seconds.
Ideal subjects for long exposure photography are sunrises, waterfalls, fireworks, night shots and more. A tripod is essential and a shutter release cable, or camera remote, a bonus.
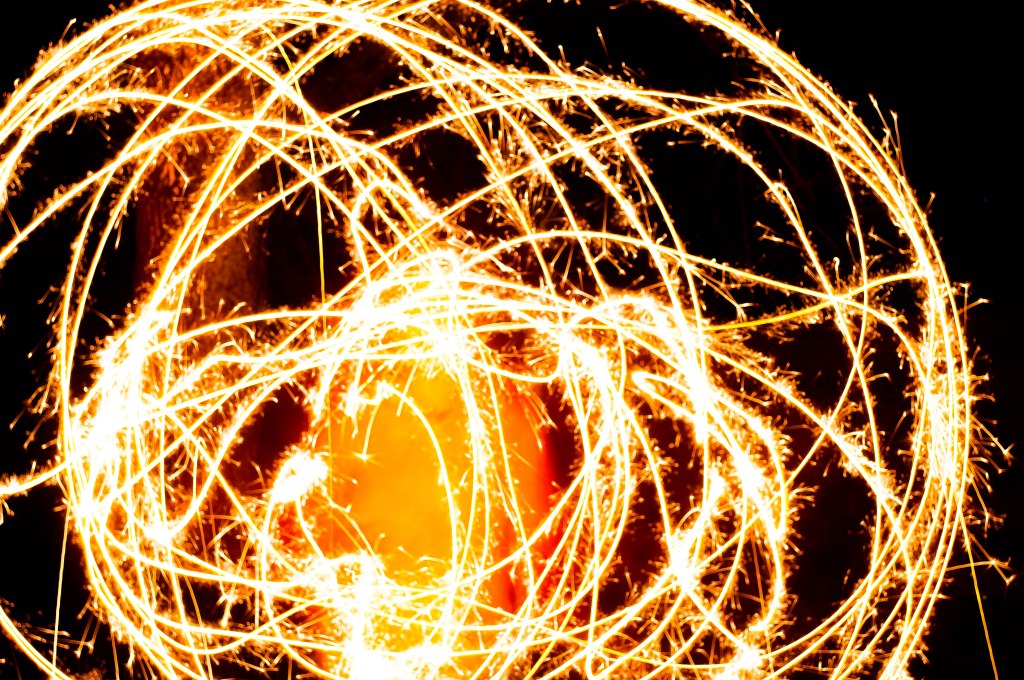
Activity 5.4: Light painting
Light painting is a technique which involves moving a portable or handheld light source, such as a torch, while taking a long exposure.
The light source can be used either to illuminate the subject or to shine directly at the camera.
The Results
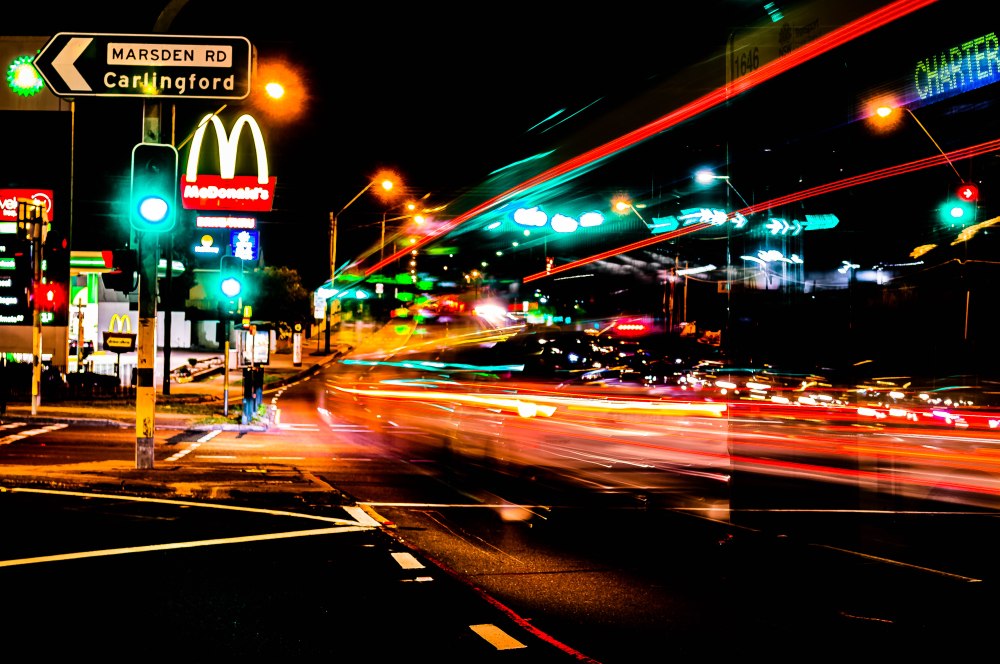
Long exposure photography has long been a favourite of mine or as I like to call it Playing with Light. I don’t get out as often as I should to capture beautiful sunrises , waterfalls, fountains or light trails. For my long exposure in this exercise I chose to nip around the corner to Victoria Road and capture some light trails. For the light painting we used sparklers as I couldn’t find the finger lights. The featured image is one I took at Homebush Bay Near Wentworth Point on The Parramatta River, looking across to Rhodes from Homebush Bay /Olympic Park at Sunset, I used a Nikkor 18-55 mm lens Nikon D3200 ISO 100 F/36 1 sec 55mm and also a pink graduated filter to enhance the pinks and purples in the clouds.
This set of exercises was a great deal of fun, and I got to indulge in one of my favourite activities and get my daughter to join in by letting her dance around with sparklers. It took her a few goes to get what I wanted and while I didn’t get the perfect shot I was after it was fun and it’s more for the technique for the excercise in Camera and Capture module 5.
The location for the light trails isn’t the most interesting as I just popped down around the corner to Maccas because know it’s busy and I could focus easier on the signs in the dark.
For all of the light trails and light painting shots, I shot in bulb mode with tripod and camera release remote so I could shoot for longer periods of time without camera shake.
I really wish I’d had a filter on when I was shooting the light trails so the street lights looked better in the photos but that’s about my only gripe and something I’ll remember next time as it was on my 55-200 mm lens and not on the 18-55 lens I was using when I was shooting.
My favourite shot is the bottom one where you can just see the charter sign on the bus as it takes off.
For your first task this lesson, we will experiment with shutter speed to see how the various settings effect movement and motion.
Find a moving subject such as a person running, car driving, water flowing or birds flying. For best results your subject and its movement should be predictable and repeatable. For this reason, finding a friend or family member to run laps at the local park, for example, is an ideal solution.
With moving subject ready, set, go! – capture a series of images cycling through the shutter speed settings from fast (e.g. 1/2000, 1/4000) to slow (e.g. 1/2, 1”) and compare and contrast the results
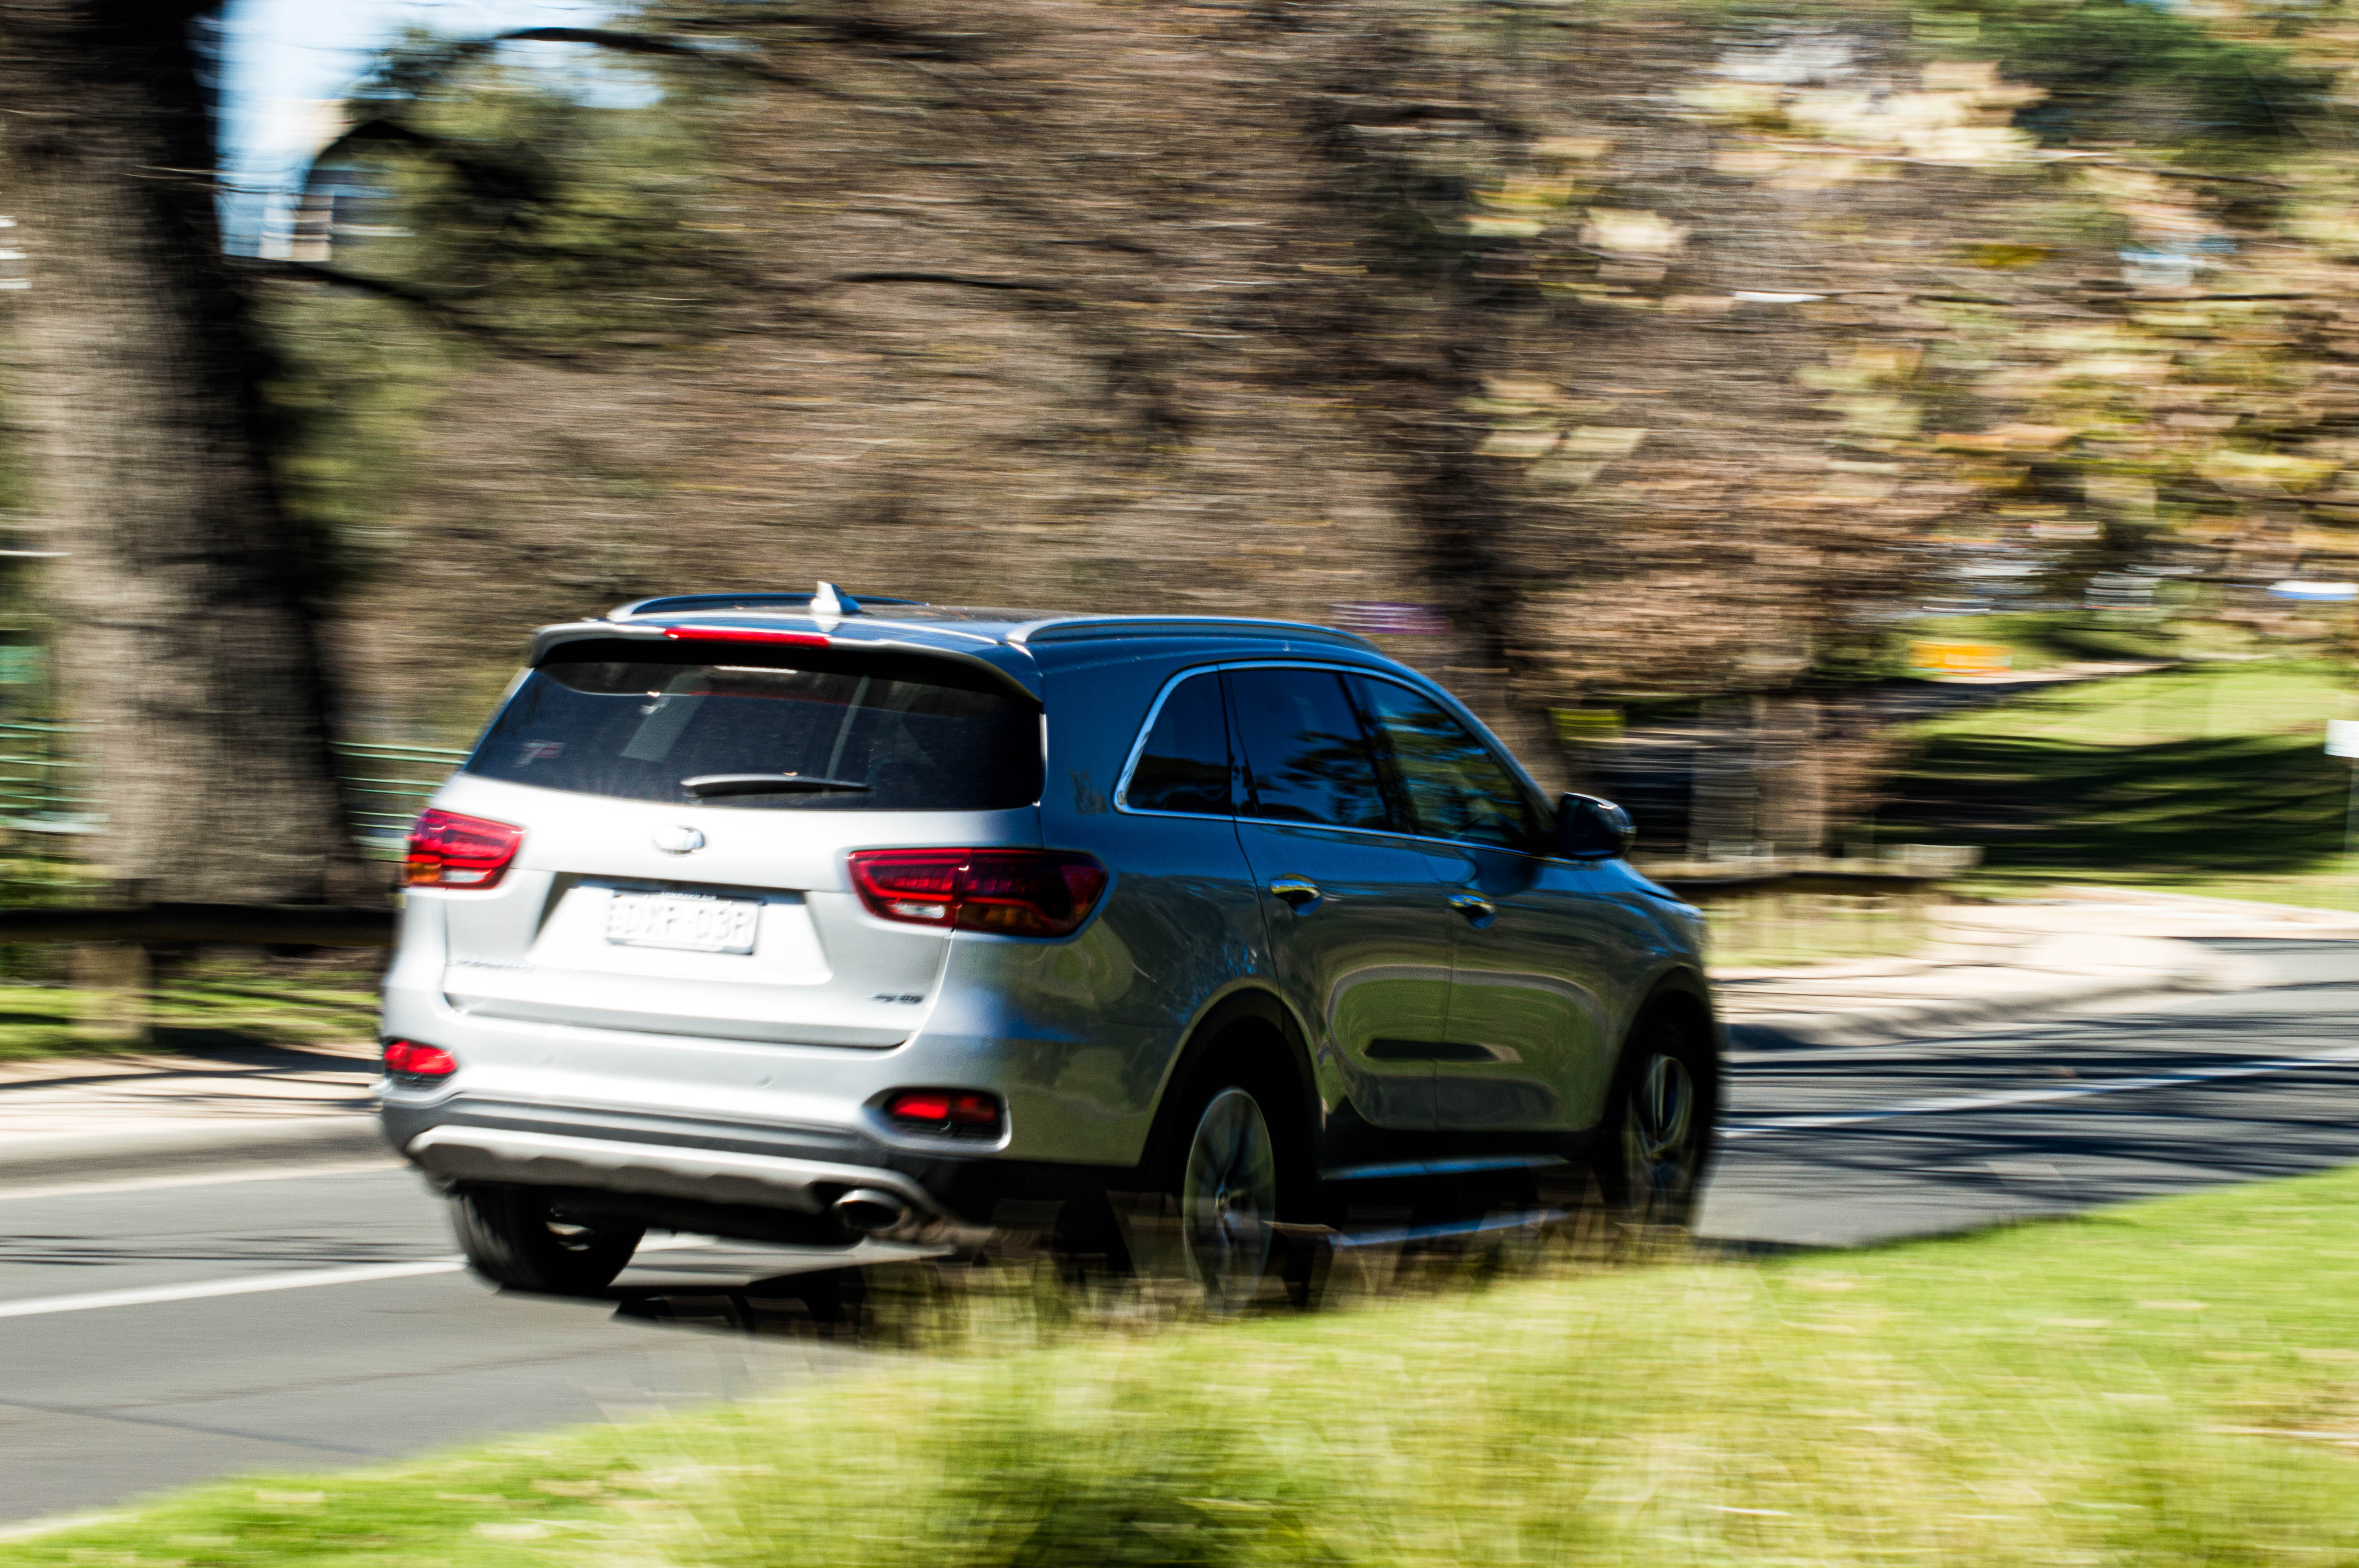
Activity 5.2: Panning
Panning is a shutter speed technique which freezes a moving object whilst blurring the background.
It’s a lot of fun and the results can be spectacular. However, it also requires a lot of trial and error – not to mention plenty of patience!
Like the previous activity, for best results you will need a subject in motion whose movement is predictable and repeatable. You may use the same subject for this exercise if you choose.
Panning works by choosing a slow shutter speed (e.g. 1/8, 1/4) while you track your subject’s movement, either horizontally or vertically.
The exact shutter speed required will vary depending on the focal length used, the speed of your subject and the distance between the camera and your subject. It’s best to pick a starting shutter speed of around 1/8 or 1/15 and then work from there by adjusting the shutter speed until you find the right one, then taking lots of shots.
The Results
For this activity I went to Parramatta plaza and Parramatta Park as there is a great variety of subjects and a roadway for cars, joggers and cyclists. I also needed a break from my family as prior to this it had been raining for weeks. I found the slower the speed and the quicker I moved which I will say was difficult with a shoulder injury the crisper the panning image and I like the little white hatch the best. And of course the faster the shutter speed the more things were frozen as seen with the cyclist and the people frozen whilst in motion in the plaza . Too slow and the image takes on an abstract painterly look as people walk past. I think my favourite was the man standing still while others walked past displaying crisp sharpness and motion blur in the one image, I used manual for that shot and a really slow shutter speed of about 3 seconds and a Nikkor 70-300mm lens, and my tripod and camera remote.
I really enjoyed just getting out with my camera and getting creative with techniques I haven’t thought about using in years. I’ll definitely be using more creative work in future photography projects.
This task called for us to capture a portrait and a landscape or cityscape using wide normal and telephoto length lenses. It’s been a while between camera and capture posts with internet issues and hospital appointments for my daughters Crohns Disease management and my autistic sons psychology and TAFE days , also with my partner having been away for almost a month I was having issues with my time management and the realisation it’s impossible to be in two places at once. So I will be posting all the exercises this week that I haven’t had a chance to blog about as well as working on my assessments for all four subjects.
Portrait
Activity 2.1
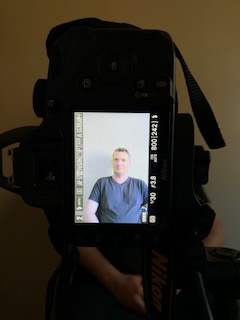
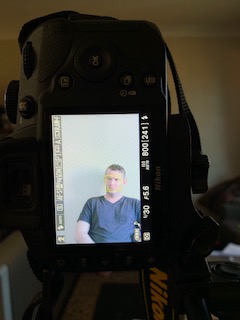
The portrait task was made more interesting by the fact that we had to keep the same framing at the three different focal lengths which meant moving around and using my reference shot changing lenses as well as using my iPhone as well to guide myself with where my camera should be for each shot. My partner kindly obliged to be the subject for this exercise. I personally prefer the telephoto length shot as my partner is 6’2” ft And I’m a lot shorter, I didn’t feel like we were cramped into a small space and it has a slightly softer quality to the image.
Guide shots for camera position
Activity 2.1 composing my portrait shot
Cityscape
Activity 2.1
I scouted a few locations until i found the one i wanted and decided to shoot at night. I had a few goes until i found a spot on the river i was happy with but here is one of the locations on Marsden Road that i had initially thought of then dismissed and then decided to have a go because the view over Paramatta is amazing but i just couldn’t get the shot I was after, I did get an okay light trail though.
For my cityscape focal length shots I chose a view from Ermington Boat Ramp looking across the Parramatta River to Rhodes and Olympic Park. Essentially the idea was the same as with the Portraits except that this time the camera and tripod stayed in place and the idea was to zoom in from wide to telephoto to see how the composition of the image changed.
Todays task was to explore the neighbourhood with my trusty Nikon D3200 DSLR for a practical assessment for Camera and capture unit of study. The brief was colour themed and I took two Nikkor lenses 18-55 mm and a 55-200 respectively and shot in JPEG quality with Programmed auto mode which was something different, as I normally shoot in RAW and either use manual and landscape or auto macro modes for most of my outdoor photography.
Camera settings for Assessment Task At Lockyers Reserve Ermington with my camera for an assignment
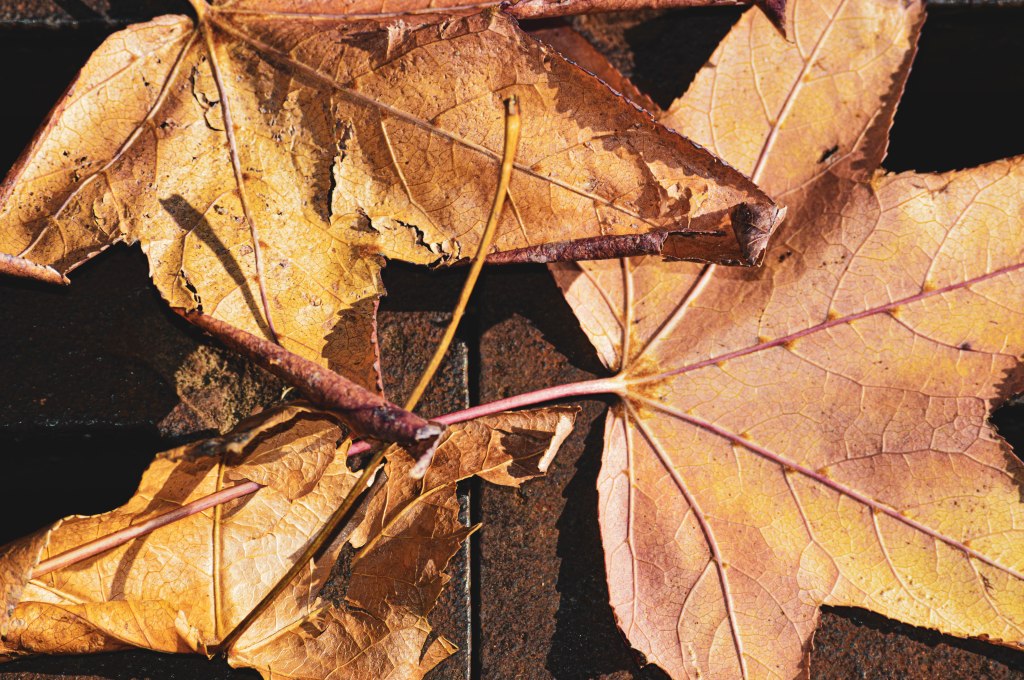
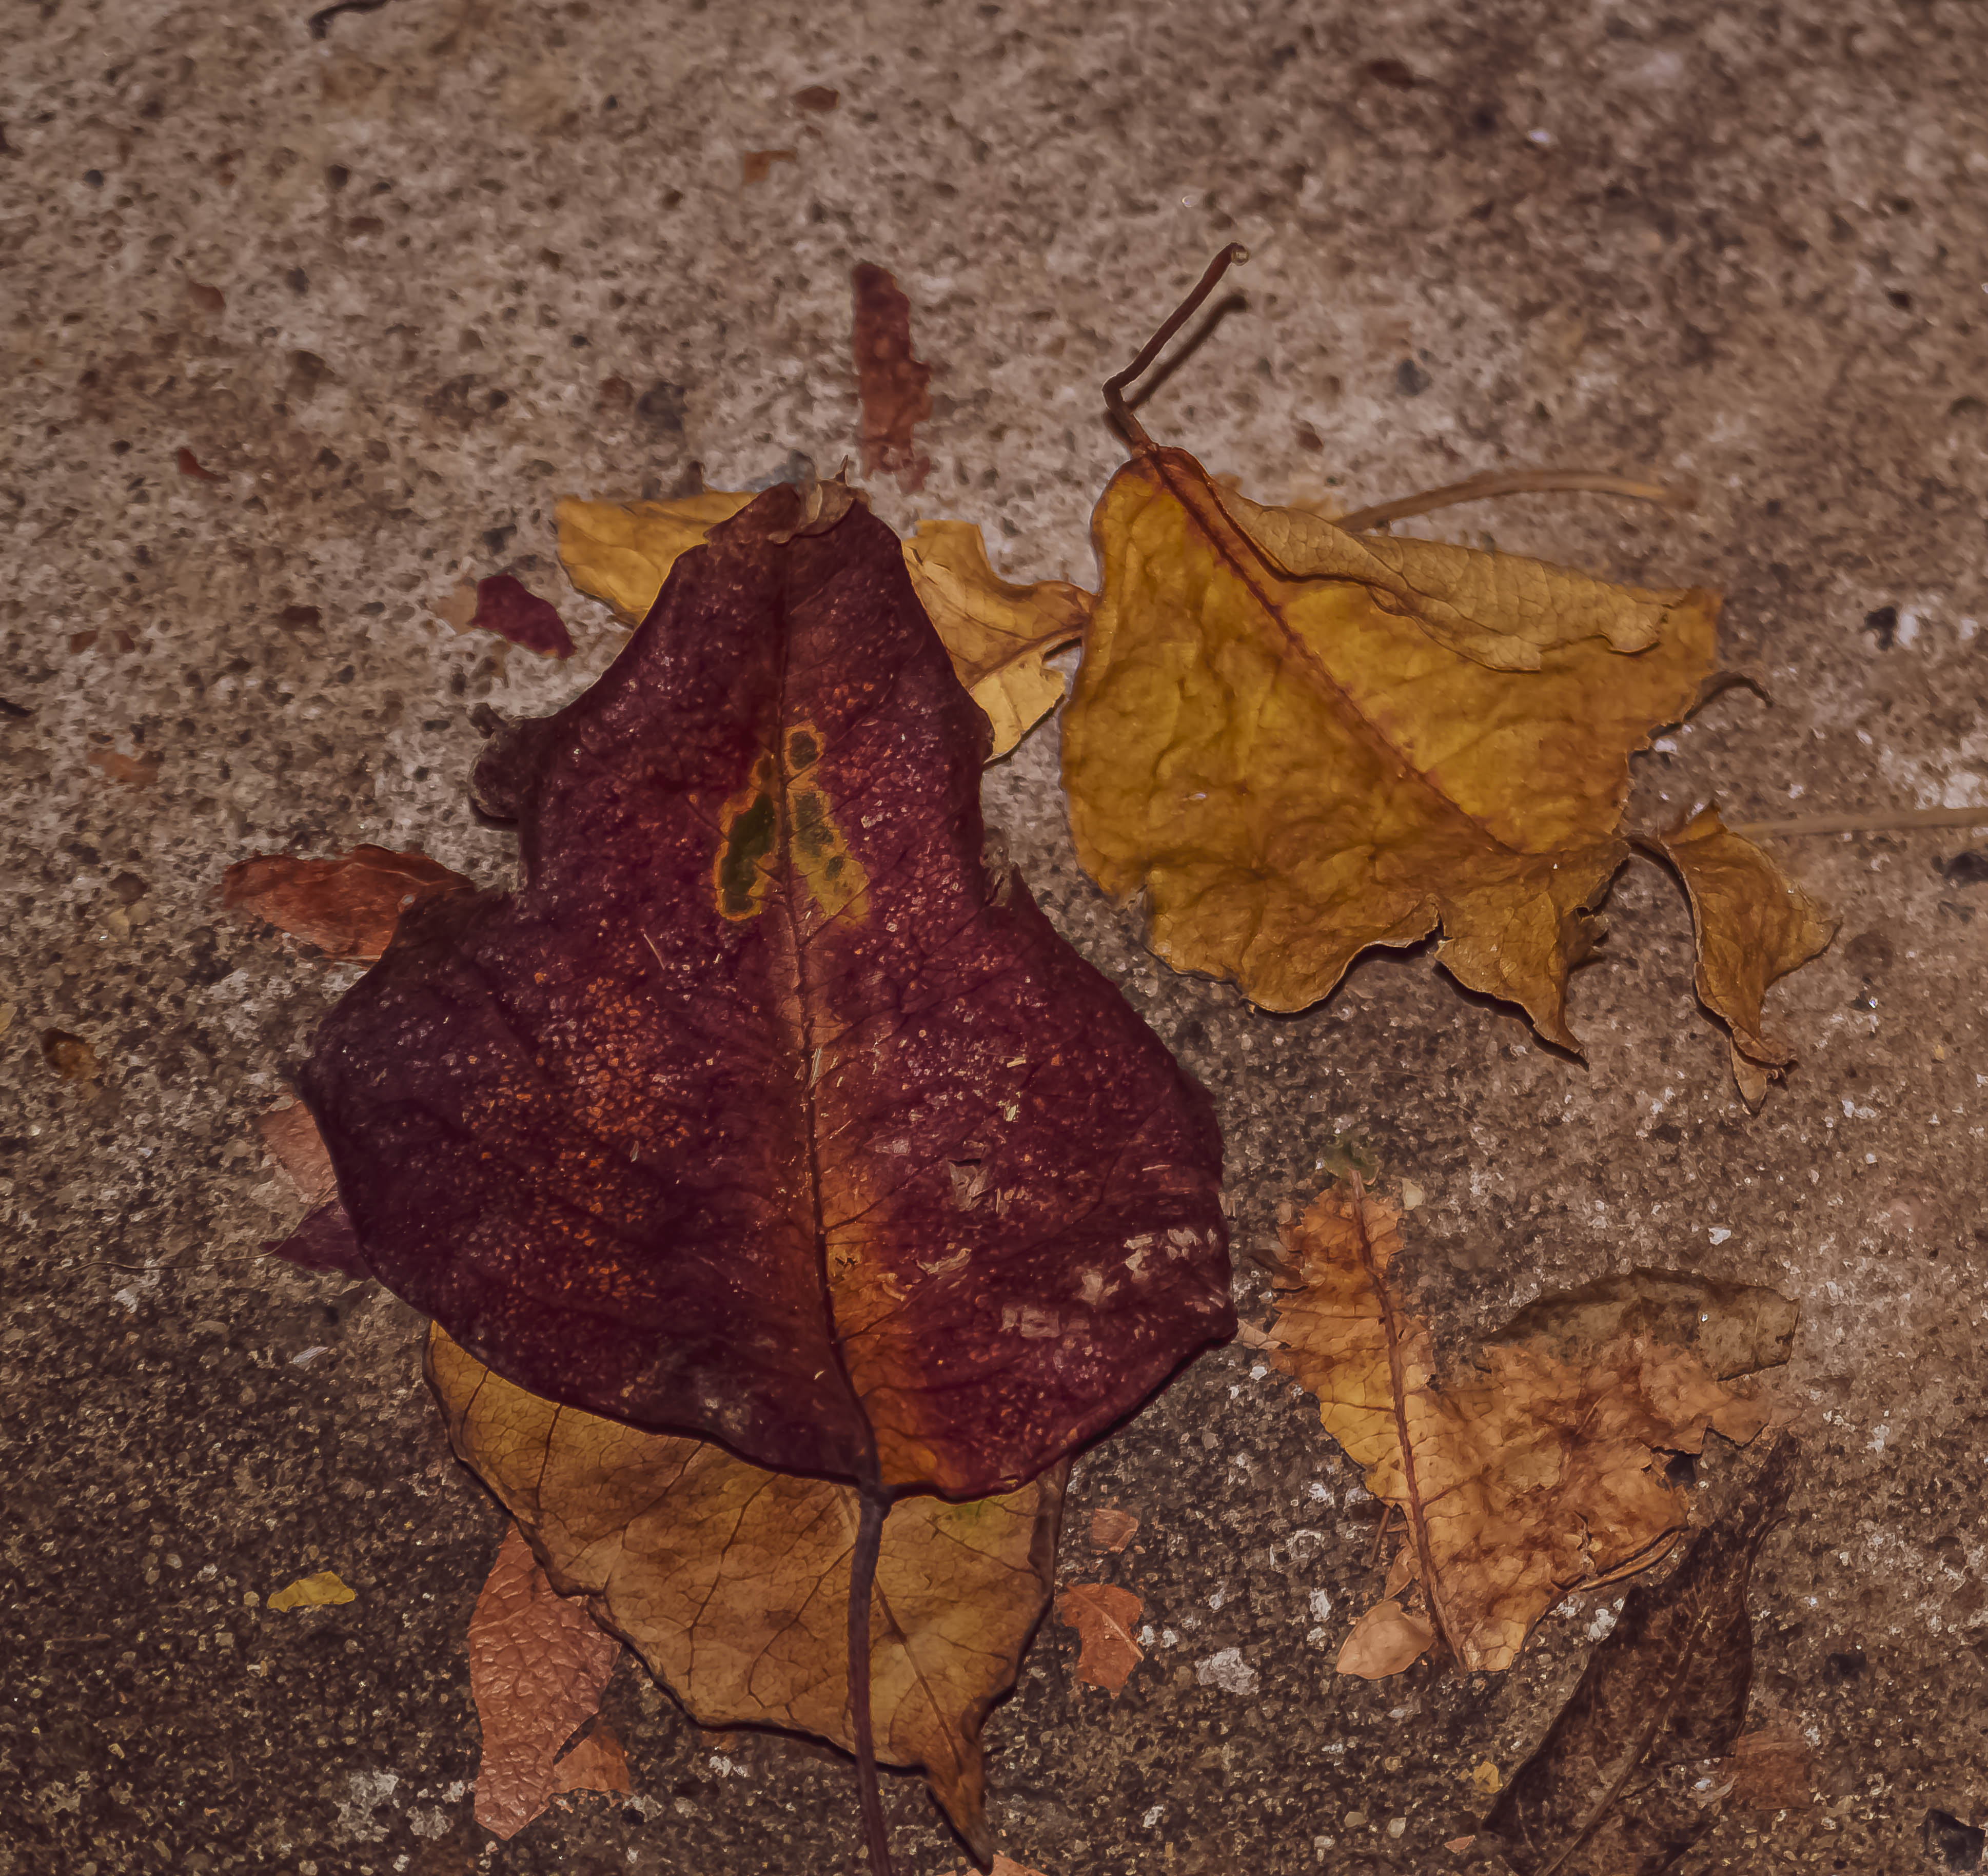
I won’t kid you, I had green in mind as I set off to the local park but I discovered the beauty of shades of brown in lines of grates, moss covered stone, bark and trees, so the common thread trying all my images together on today’s excursion into the world outside my door was a most interesting shade…. Brown.
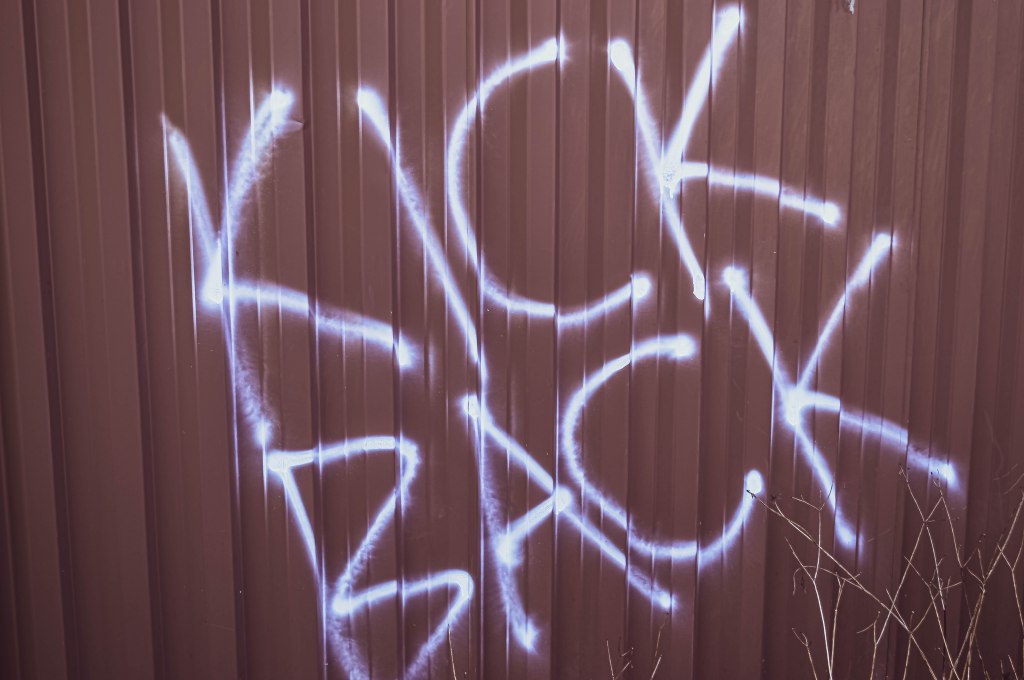
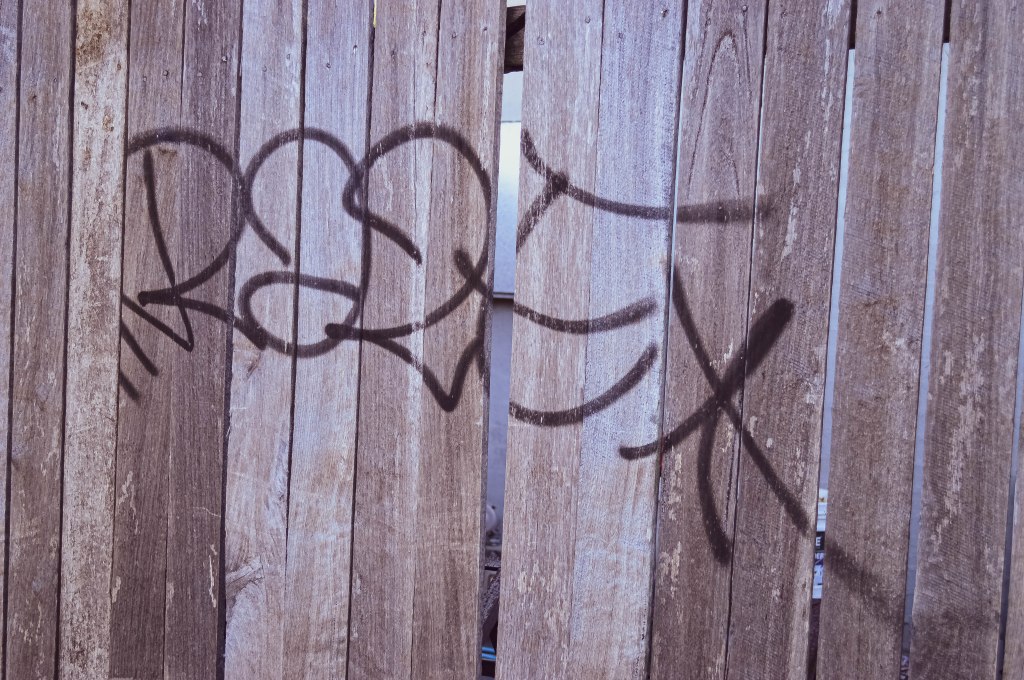
Graffiti on a colourbond fenceGraffiti on a wooden fence