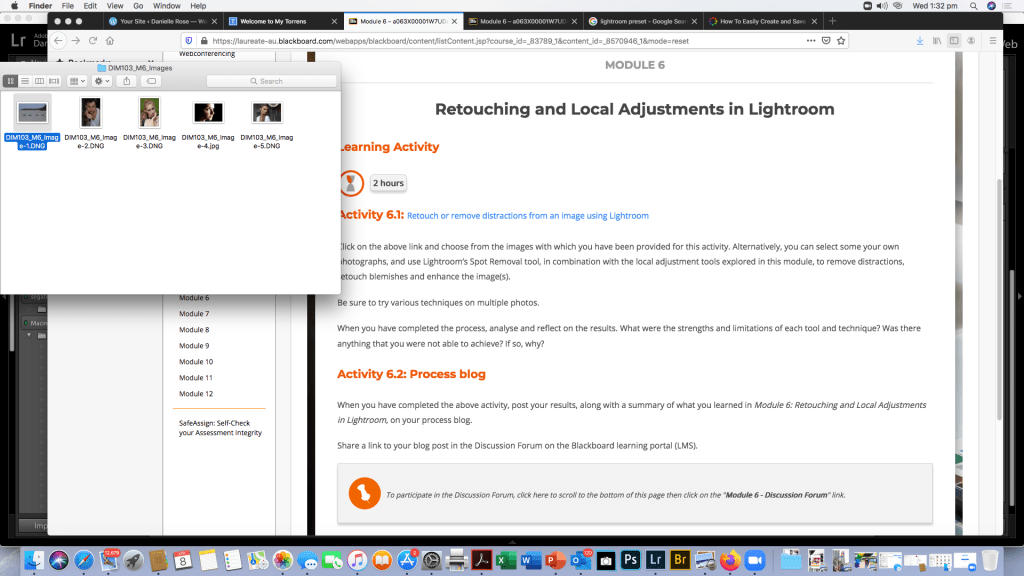
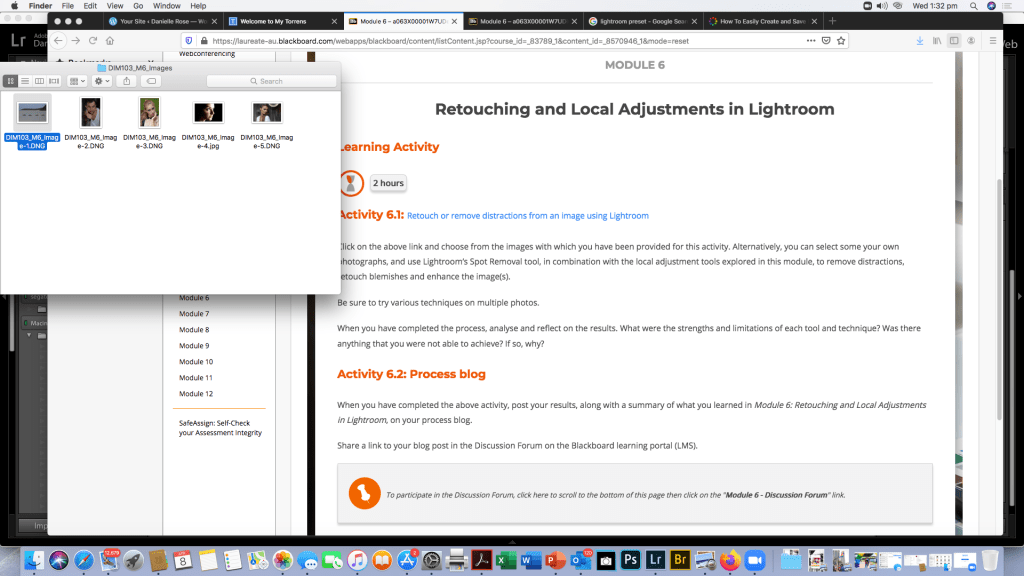
Click on the above link and choose from the images with which you have been provided for this activity. Alternatively, you can select some your own photographs, and use Lightroom’s Spot Removal tool, in combination with the local adjustment tools explored in this module, to remove distractions, retouch blemishes and enhance the image(s).
Be sure to try various techniques on multiple photos.
When you have completed the process, analyse and reflect on the results. What were the strengths and limitations of each tool and technique? Was there anything that you were not able to achieve? If so, why?
Activity 1a
Last time I chose to edit the JPEG portrait and converted it to black and white because that’s my style and I felt it looked better and had less distractions in the image.
This Time I’m going to edit another portrait and a landscape image from the files provided for the class to use.
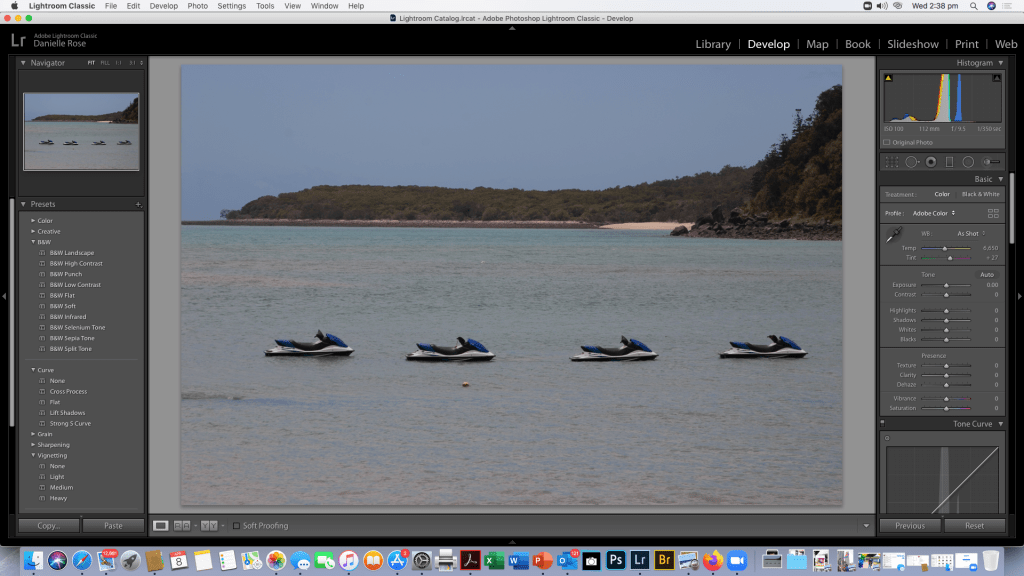
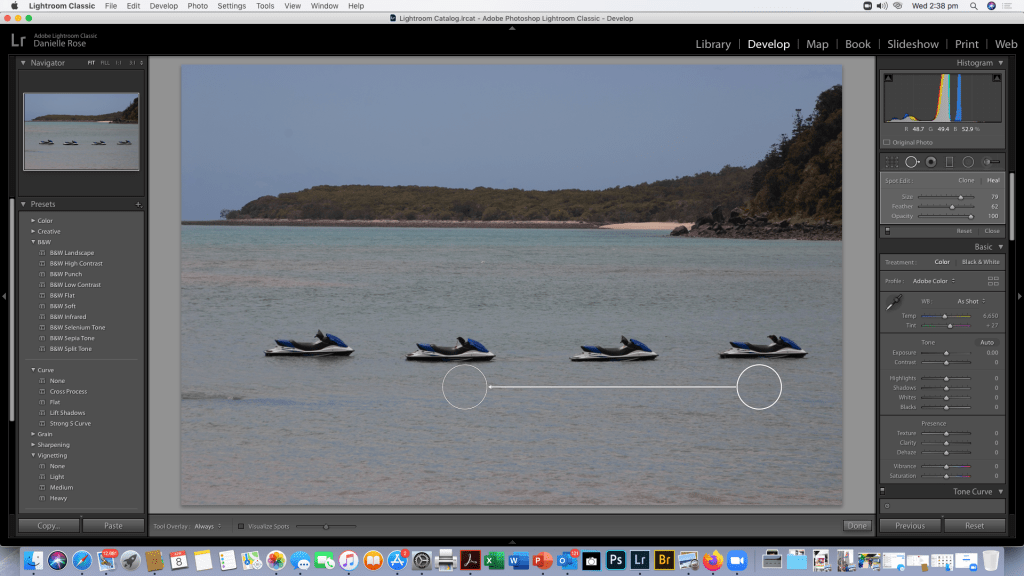
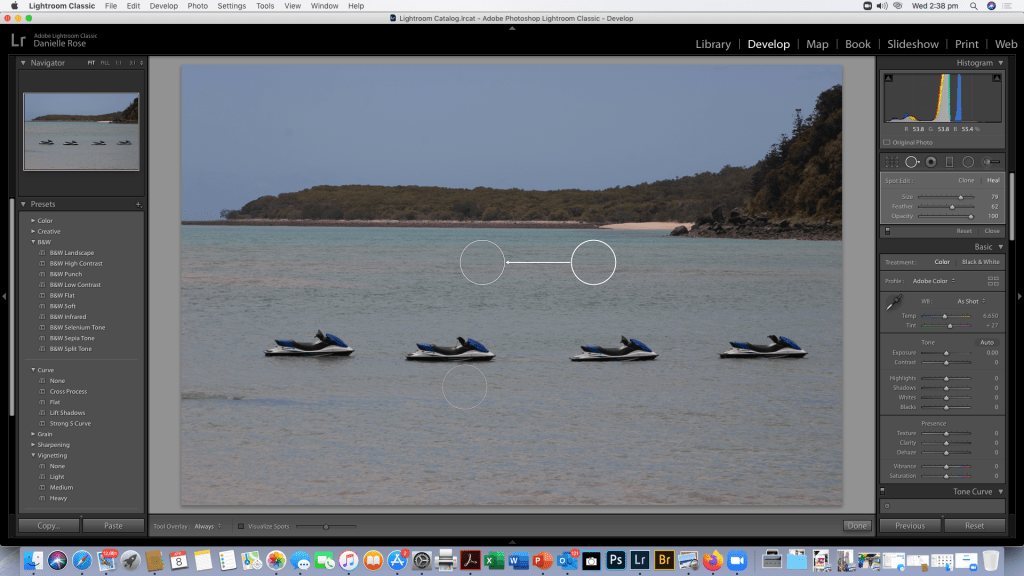
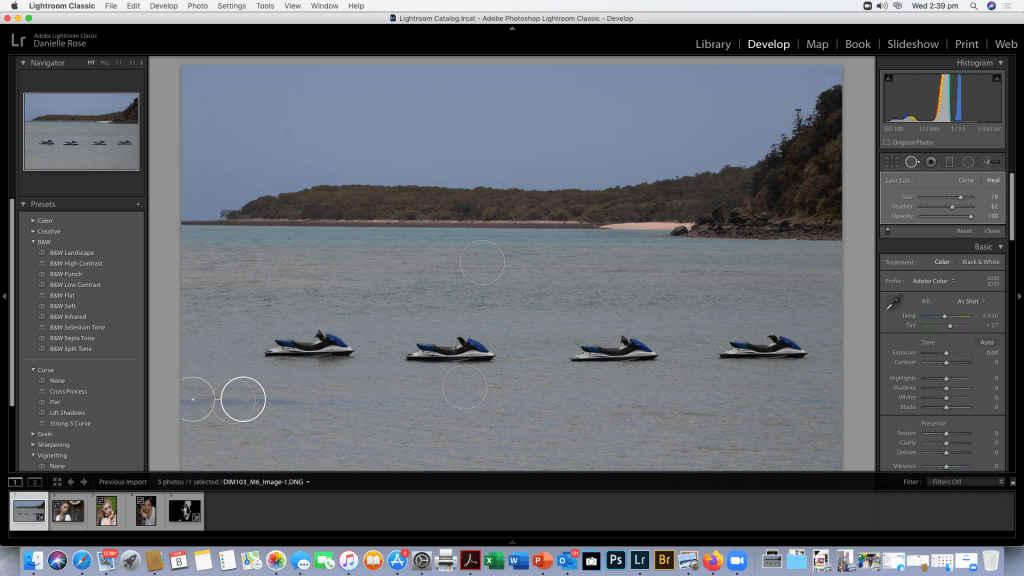
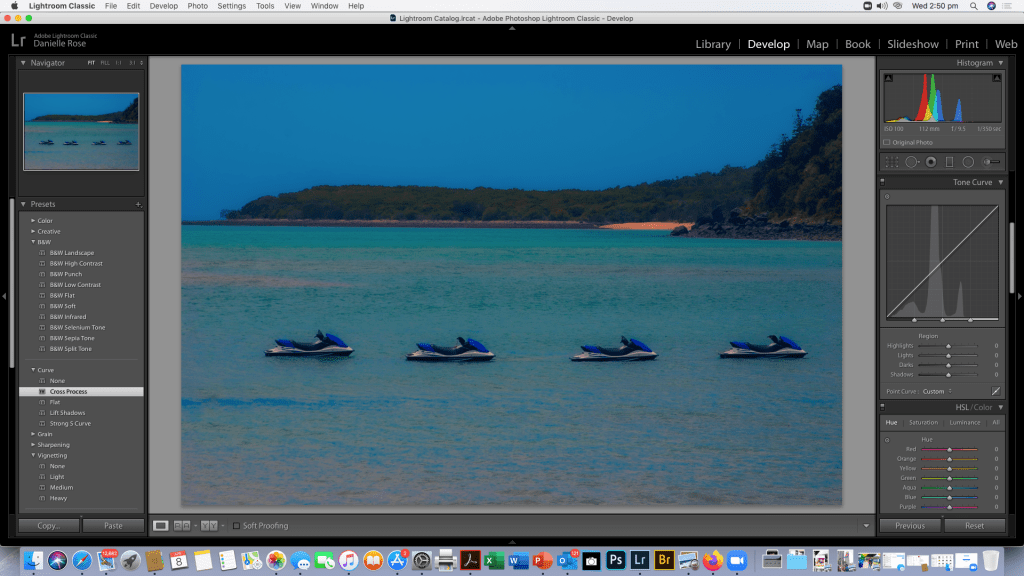
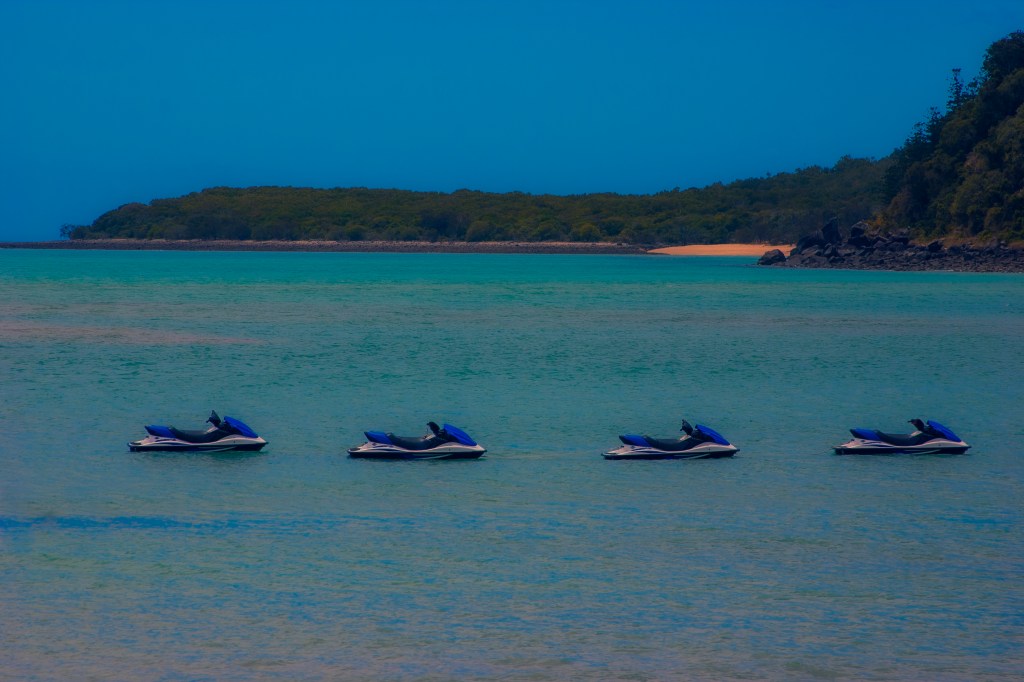
The first image I’m editing is the Landscape with the jet ski’s there a few things in the image I find distracting so I’m going to use the spot removal tool to get rid of the things that are annoying me in the image.
After removing the floating bits and aspects of the waves i didn’t like, i will now have a play with slider and presets to enhance the image to my preferences and make the image pop.
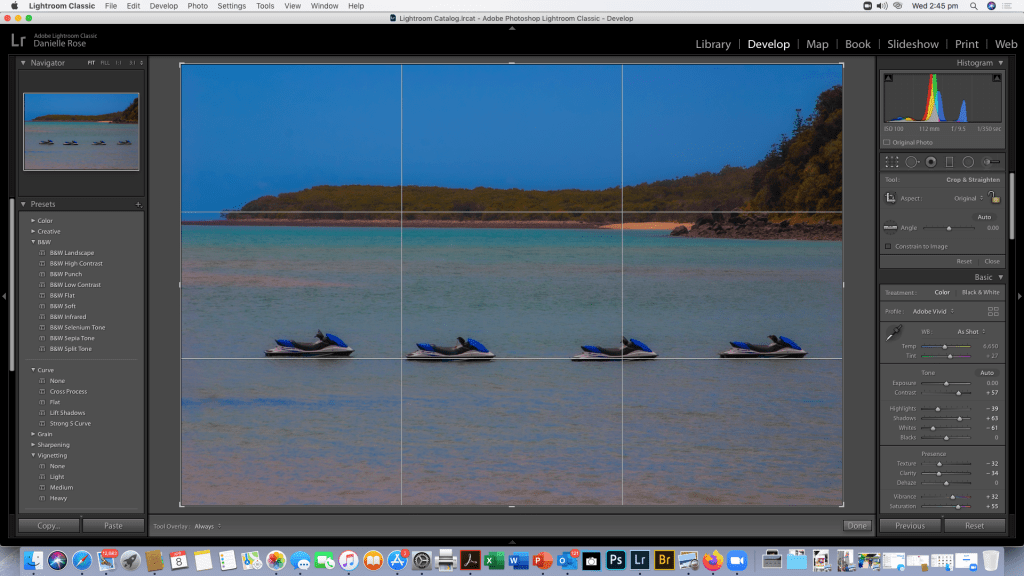
As you can see I’ve had a play with the Colour and Tone settings as well as the Presence to make the colours more vibrant.
I’ve also brought up the grid to see if i want to crop the image and to see if my horizons are strait. At this point I’m also thinking about presets for the Tone Curve or if I’ll manually adjust it and what kind of impact I want the final image to have. I’m thinking I’ll go with a cross process tone curve as per the image below.
Activity 1b
For part two I’m going to chose one of the other portraits.
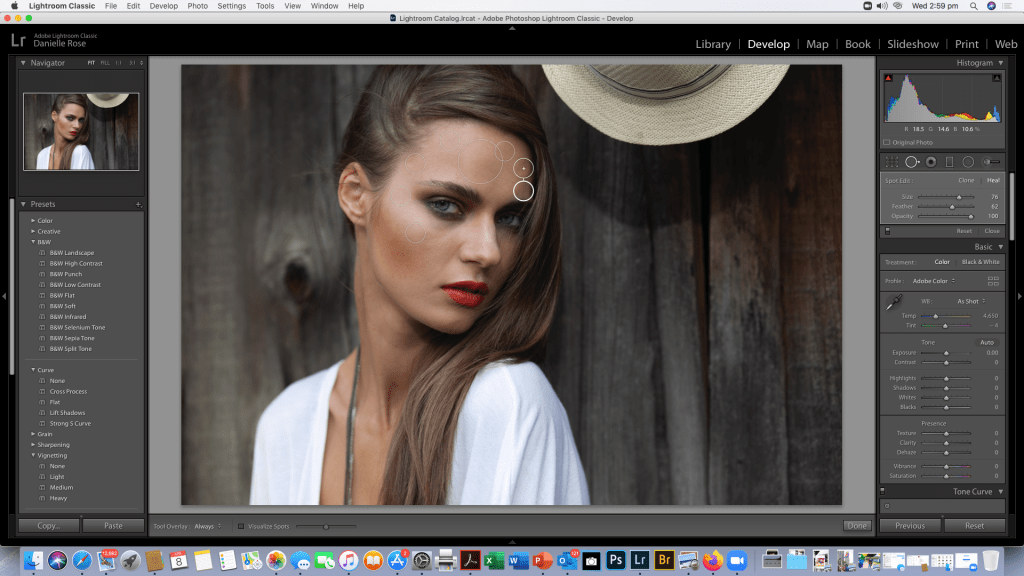
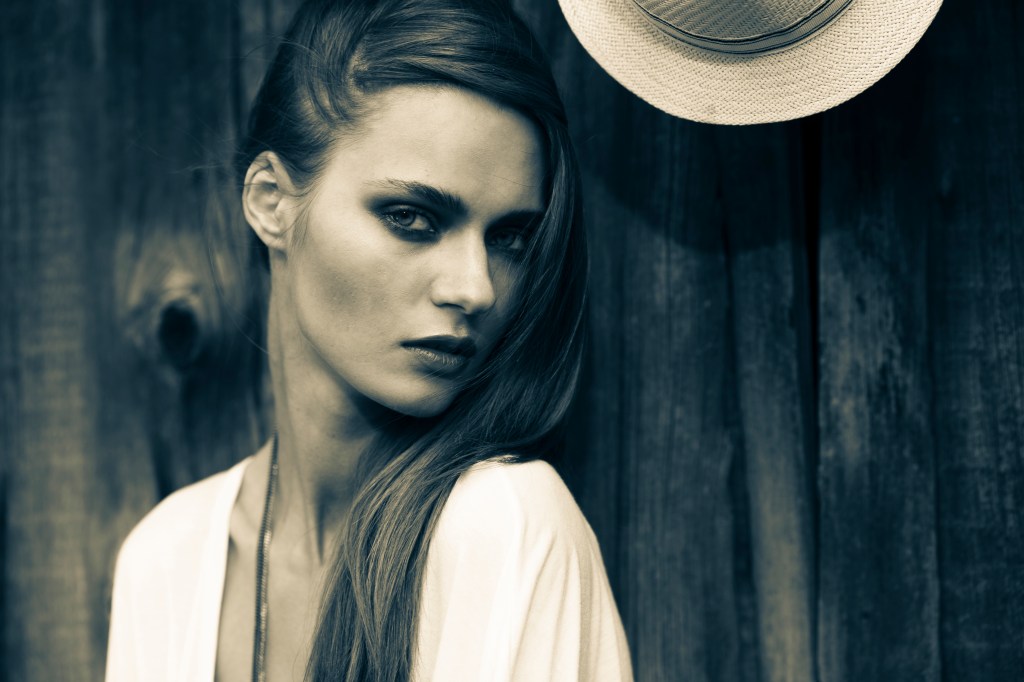
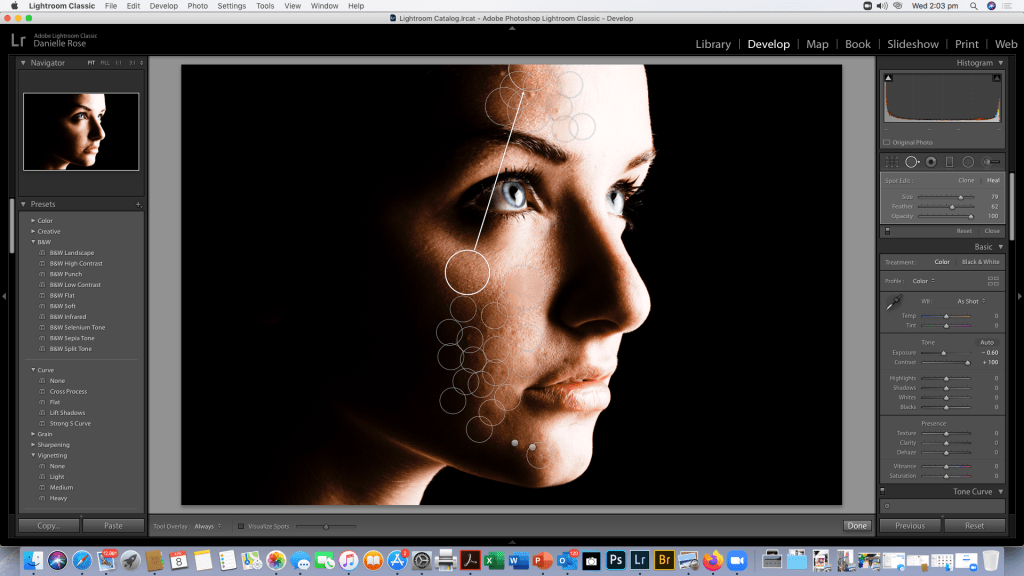
This is the image I’ll start with and I’ll see what adjustments with skin tone and spot removal/healing I need to do.
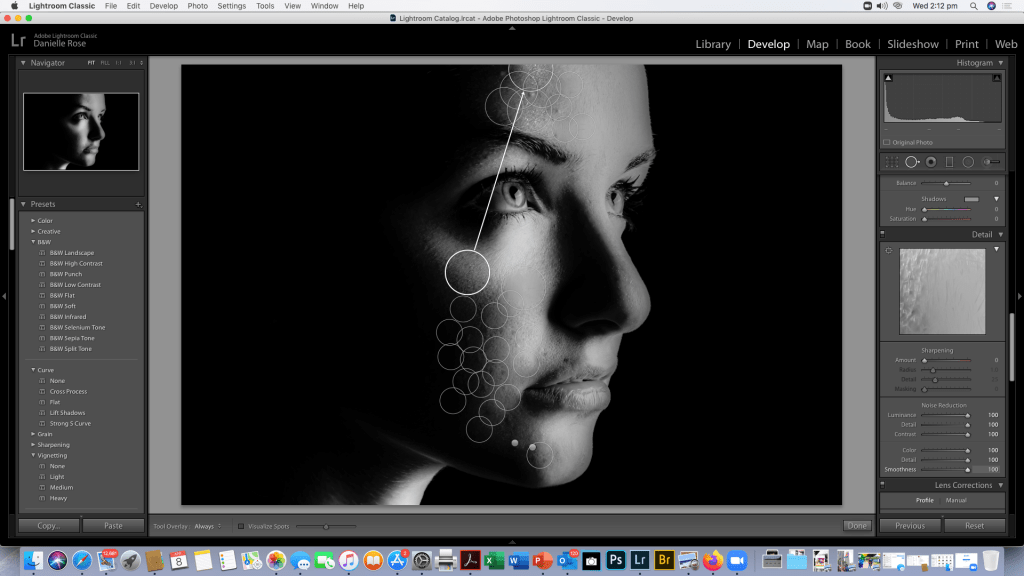
As you can see i have identified a few areas that needed some spot removal but her skin had a lot less acne than the JPEG image model in PART A
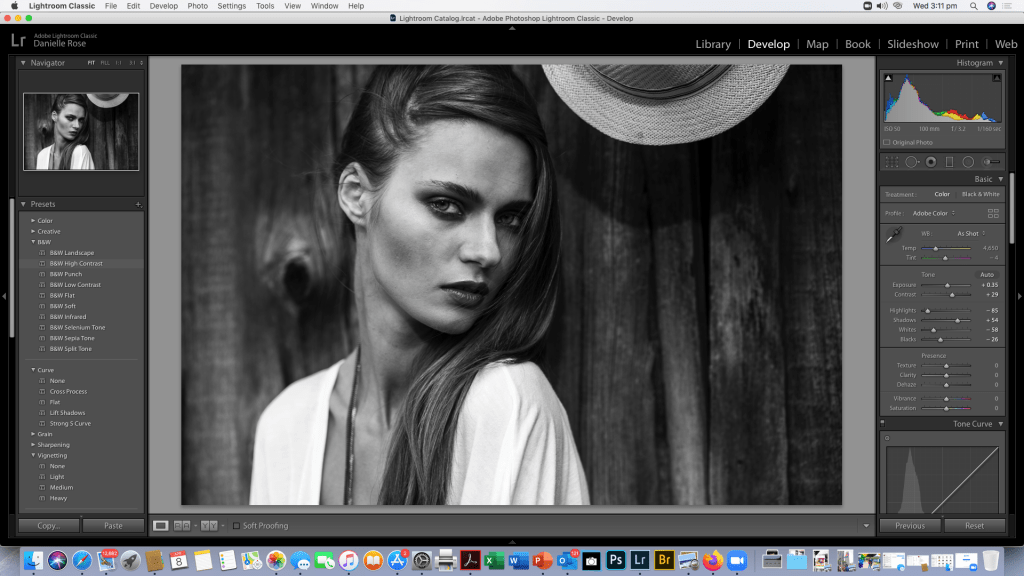
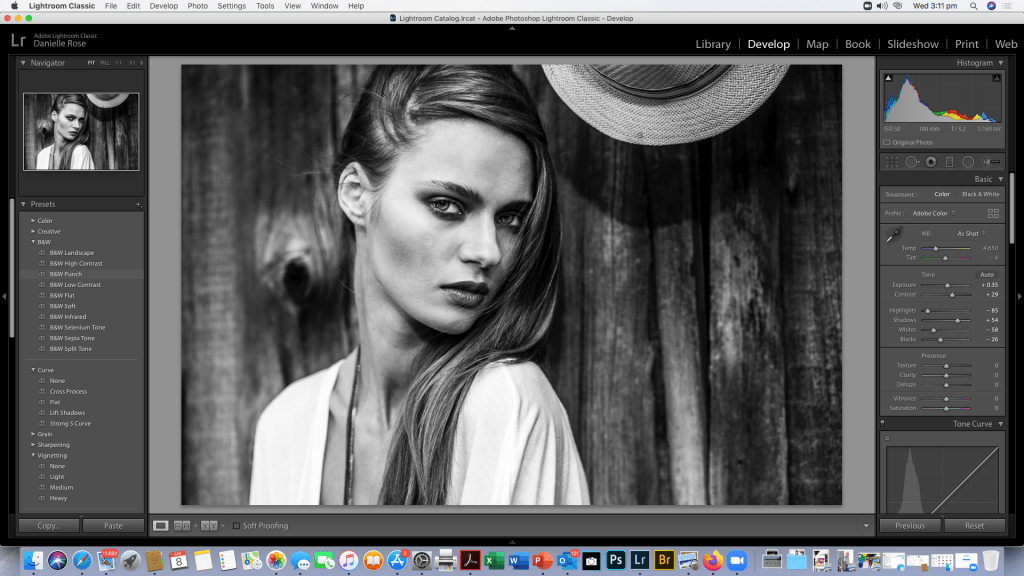
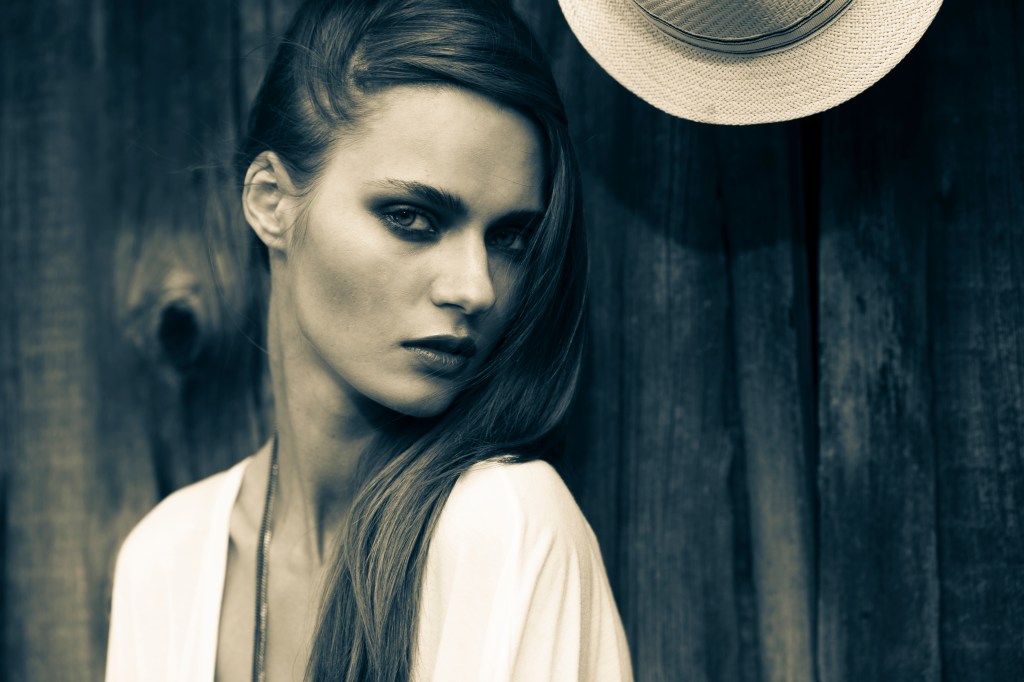
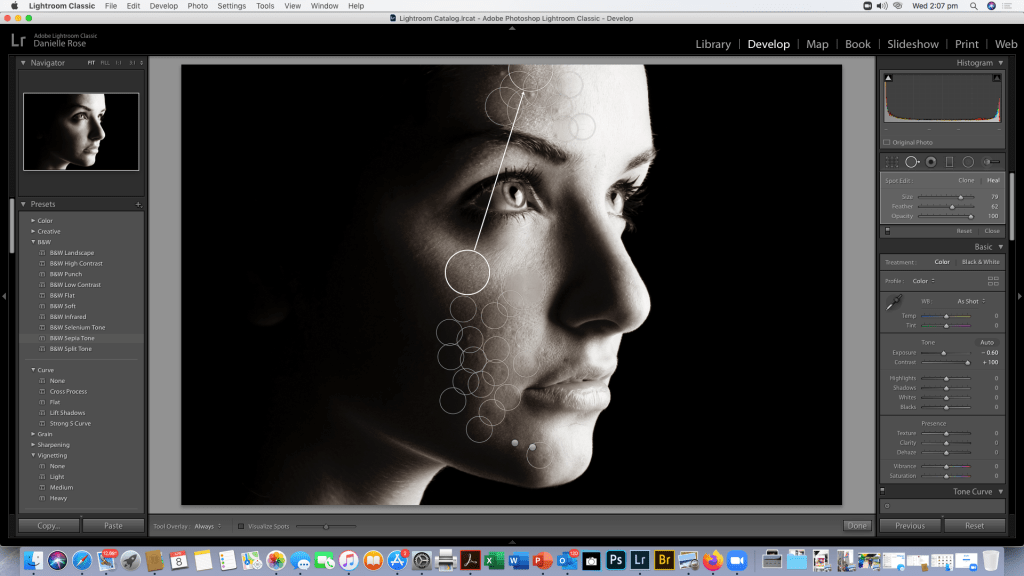
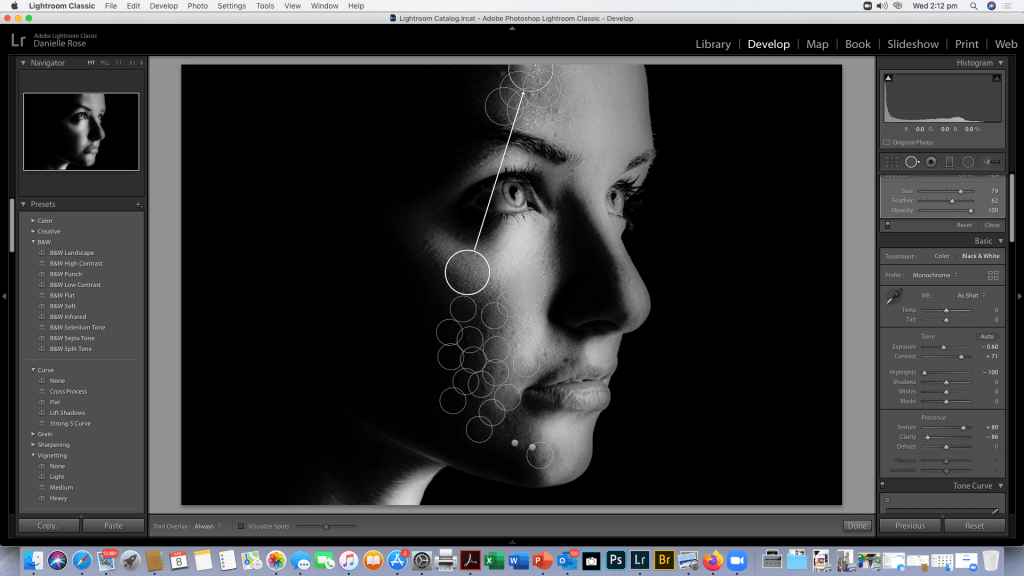
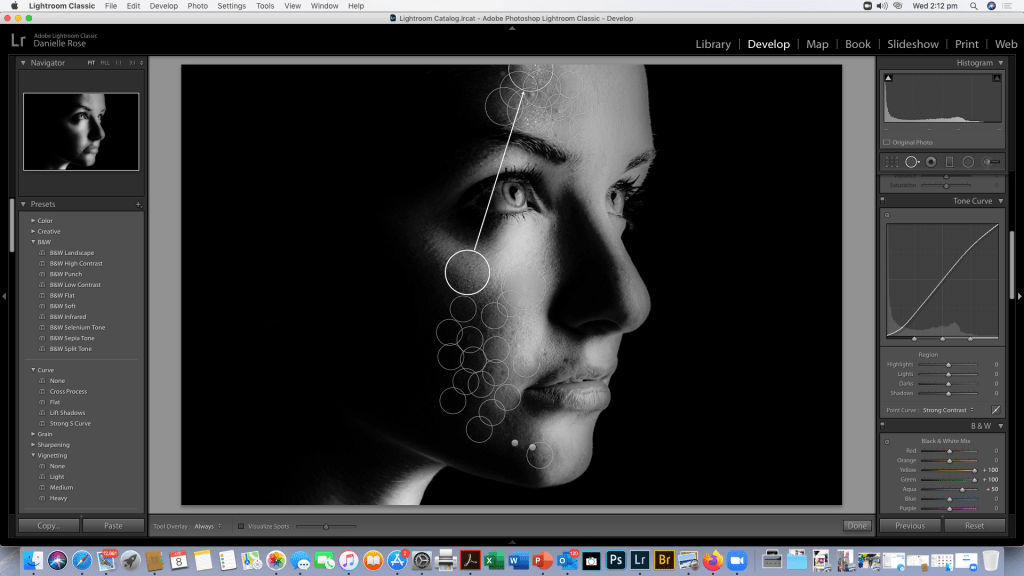
After finishing healing the image I’ve played with the sliders a little to see how much i want to adjust the exposure and contrast and the highlights on this image. Again I’m thinking of converting the image to black and white because that’s my signature style with portraits. So i’ll screen shot a few different edits before i upload my final edit of this image. I find the hat a little distracting and purposeless in colour and if this was a photo shop exercise I’d probably create a mask and remove it if I couldn’t find a preset I liked or created in Lightroom.
As you can see different preset filters give the portrait a slightly different feel and brig out different tones in the image.
The Final Image ……
All of a sudden i like the Hat !
The difference in editing a DNG and a JPG is huge and you can compare the quality of the images side by side. JPEG editing is very limited which is why you should always shoot in RAW.
The healing spots ad sharpening of the image are a lot more noticeable on the portrait from part A
Click on the above link and choose from the images with which you have been provided for this activity. Alternatively, you can select some your own photographs, and use Lightroom’s Spot Removal tool, in combination with the local adjustment tools explored in this module, to remove distractions, retouch blemishes and enhance the image(s).
Be sure to try various techniques on multiple photos.
When you have completed the process, analyse and reflect on the results. What were the strengths and limitations of each tool and technique? Was there anything that you were not able to achieve? If so, why?
Retouching an Image in Lightroom
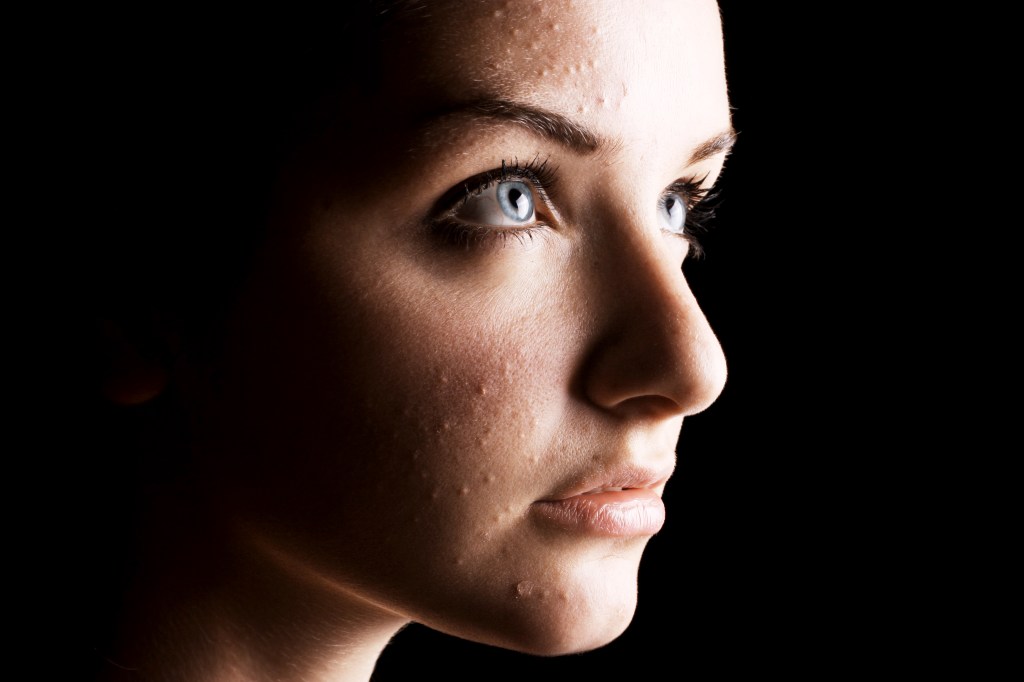
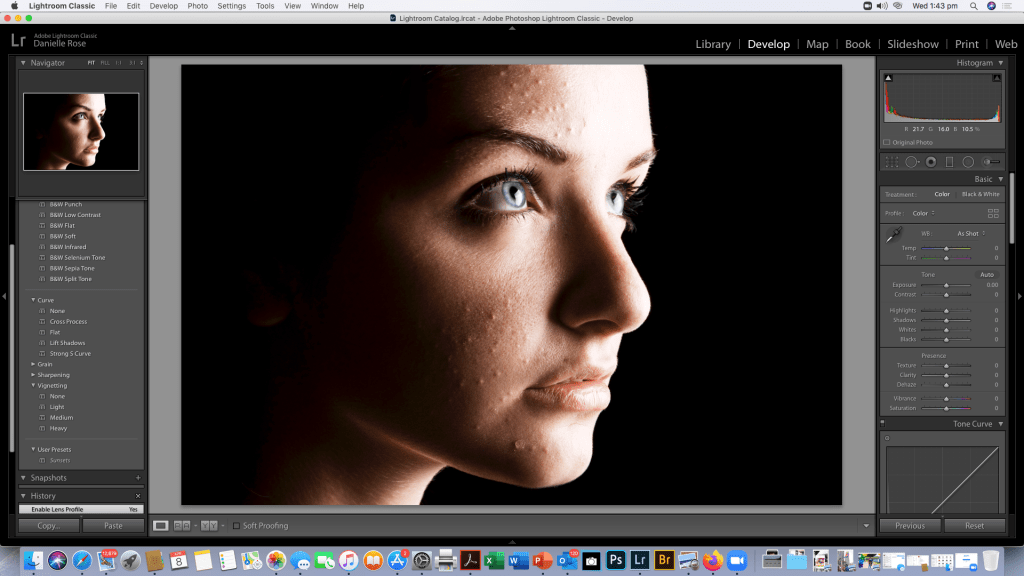
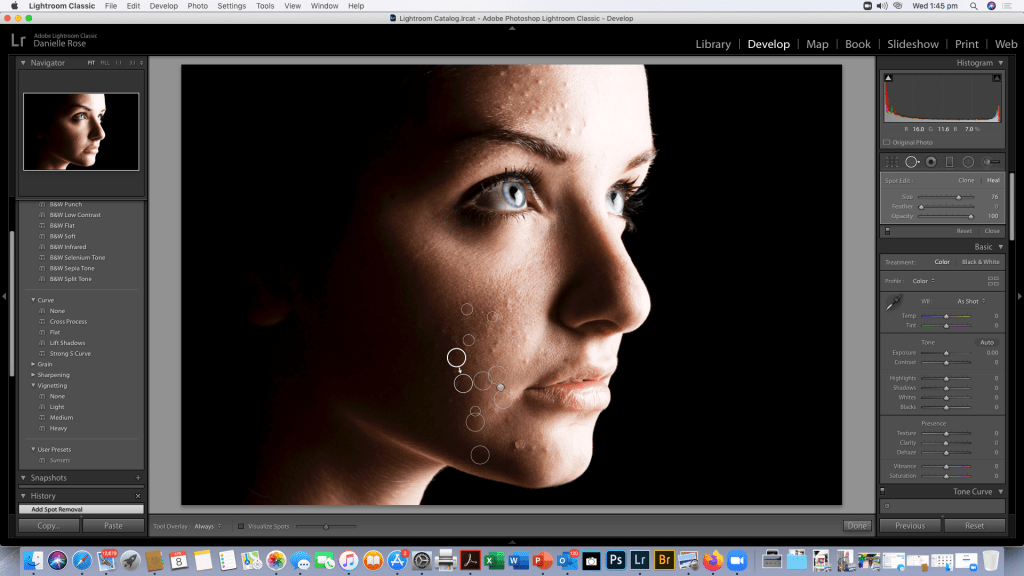
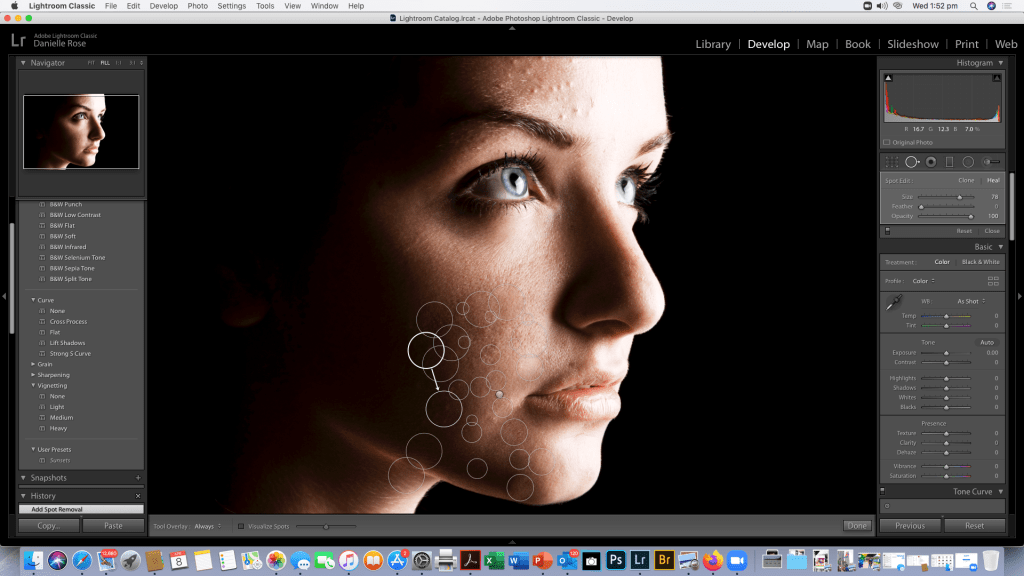
So for this exercise the first image I’ve chosen is the above portrait from the files given to us for the exercise, and I will be removing the blemishes from the models face. This file is a JPG file so there is a limited amount of editing i can do do enhance the quality but i can use the heal spot tool to remove blemishes.
Being a Jpeg there are limitations to the adjustments you can makeand the changes are noticable with the noise in the image as adjustments are being made which makes the healing tool grab some crazy pigments and it’s limited to how may blemishes on her skin i can retouch, normally i would do this in Photoshop and create a mask and additional layers, so to take the noise distraction away I had a little play with filters.
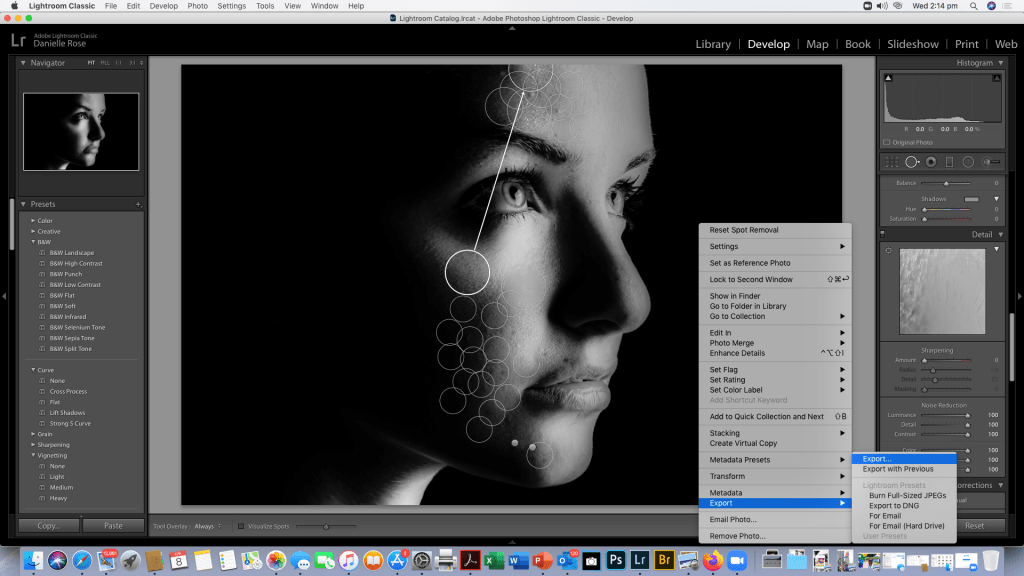
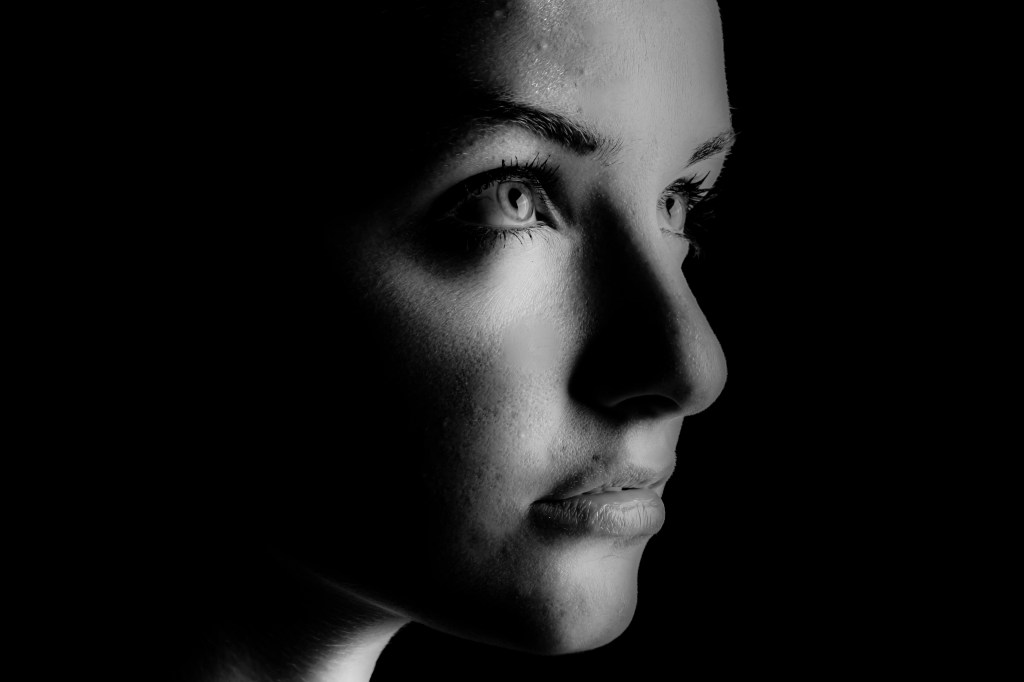
I converted the image to black and white as that’s my particular preference using the presets Infrared preset and adjust the contrast and noise before saving it .
Being a JPEG there are some obvious points where you can see blemish removal and Lightroom is limited in this way, I’d use Lightroom to retouch or heal spots in a landscape but not on a portrait i would normally use my Anthropics software or Photoshop if i had a lot of time on my hands. The out come would have been slightly better if I’d had a RAW DNG to work with.
To illustrate my point there was a landscape and a few other portraits in DNG format that i will have a play with and upload in part 2 of this post.
In Lightroom Classic, Develop presets provide a way to save a group of settings and apply them to other photos. Once you create and add a preset to the Presets panel in the Develop module, it remains there until you delete it.
For this task, choose an edit you have applied to an image using the tools and techniques we have discussed during the last two modules, then save those edit settings as a preset.
Next, apply that preset to multiple images, and compare the results.
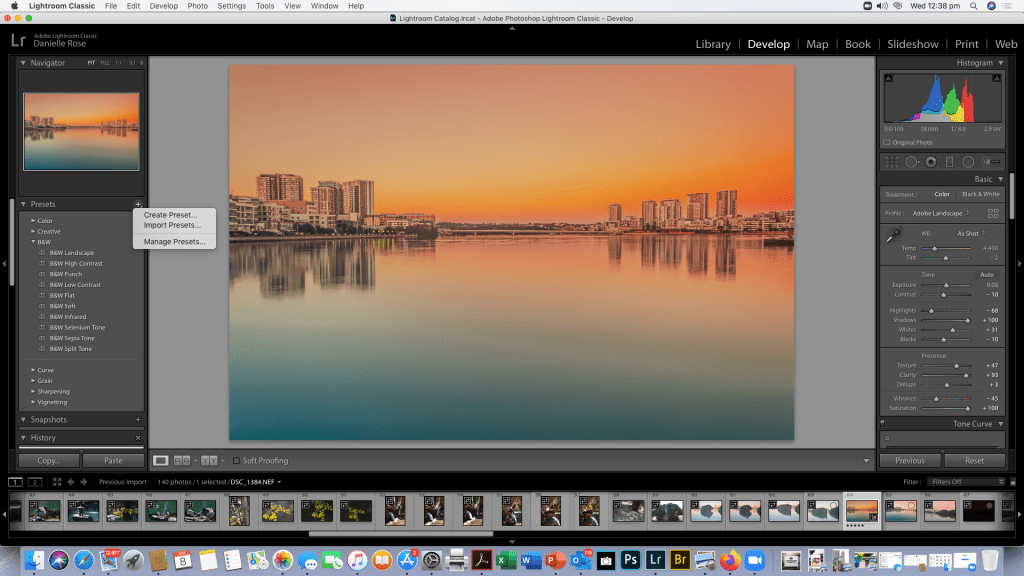
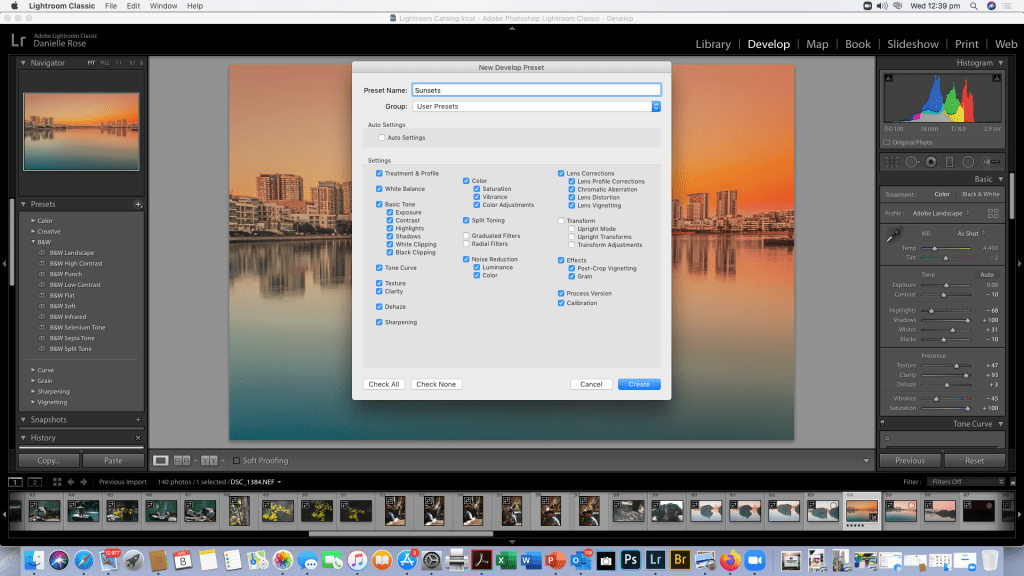
Creating a Develop preset
To start making your preset, go to the develop tab in Lightroom and you will find 9 options for developing your Digital Negative. Once you’re happy with your result, click on the plus sign on the left side of your screen. This will open a new window, to save your preset simply give your preset a name and select the settings that you used. You can either save your preset in a specific folder or in a general folder entitled User Presets. Once everything is how you want, click on Create.
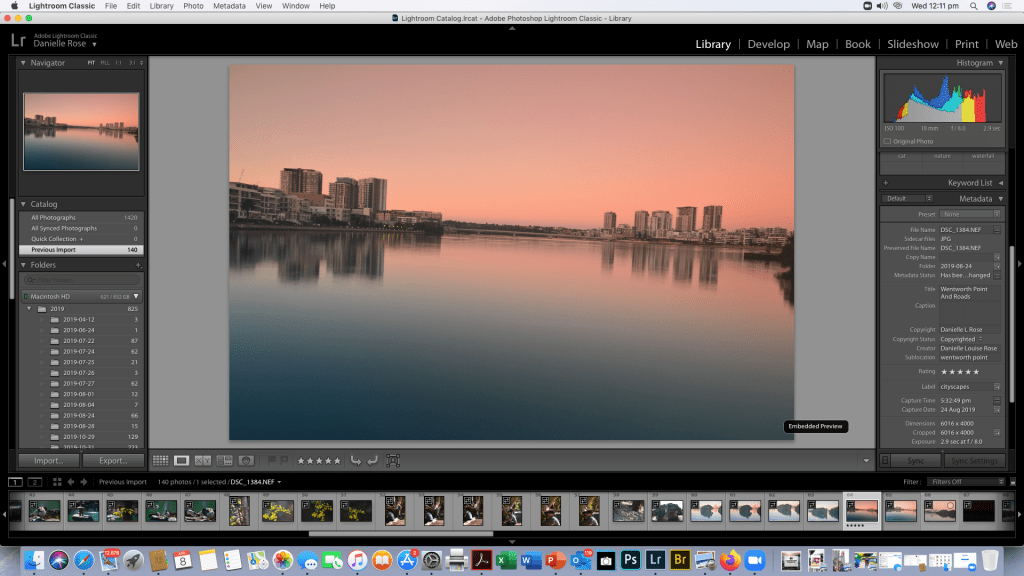
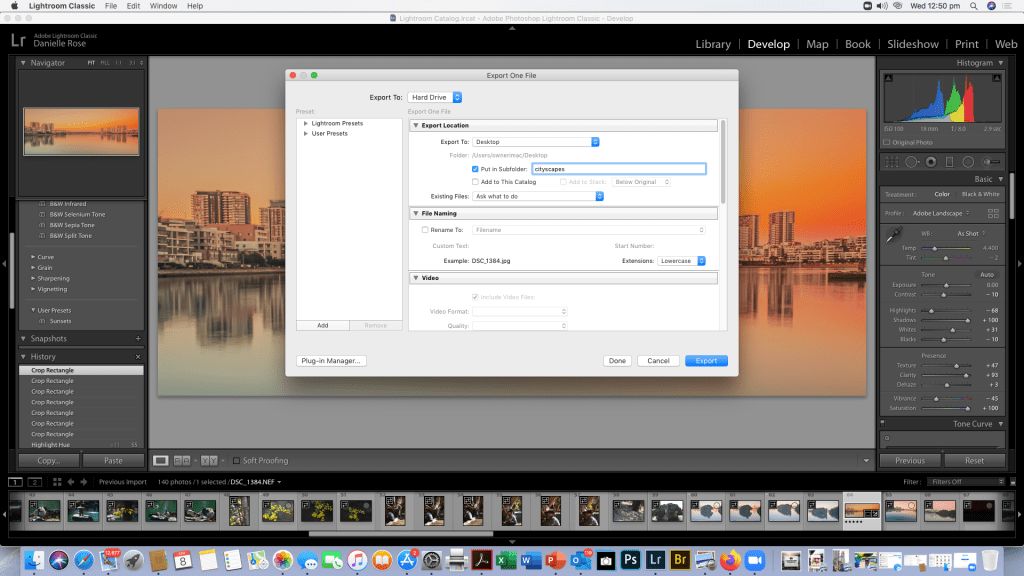
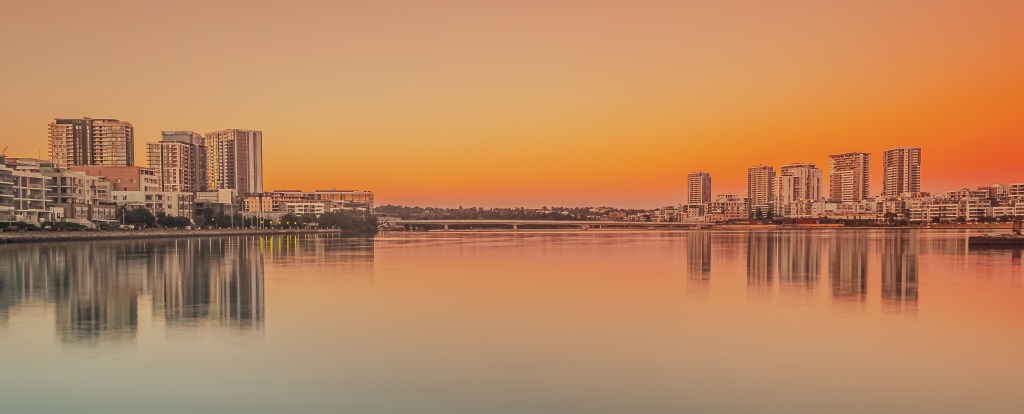
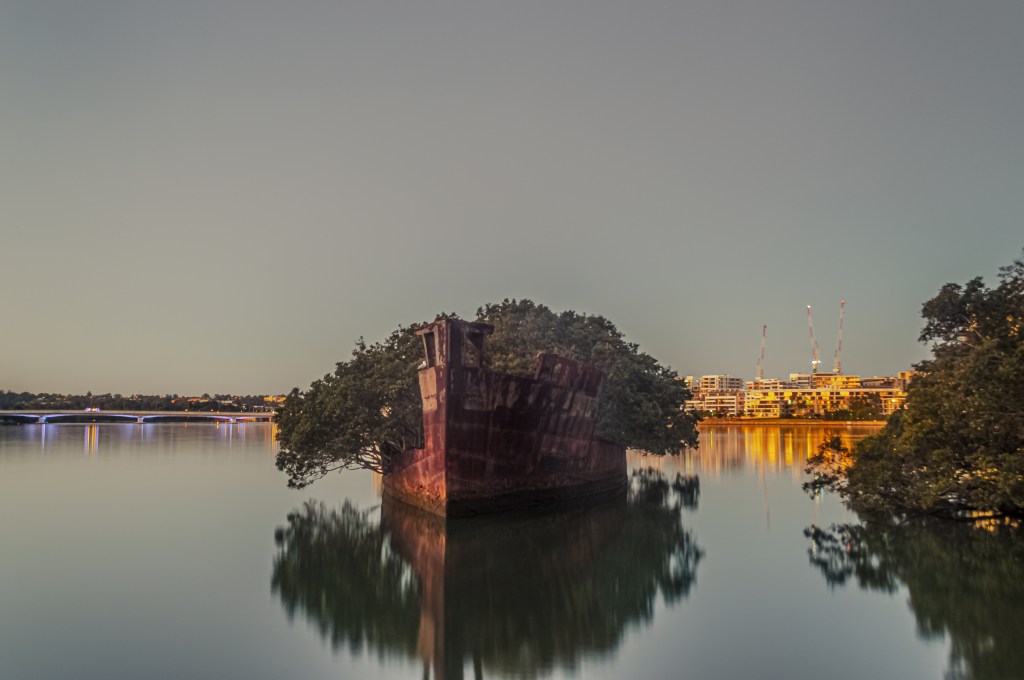
So the Photo I’ve chosen for this exercise is a Cityscape taken last year from Wentworth Point looking across to Rhodes on the Parramatta River NSW Australia.
After choosing my RAW image Ive started by calibrating my monitor (there was an incident with a cat and an air conditioner which resulted in a broken LCD on my 27inch iMac and a broken Pelvis)..(furry little bugger is fine in case you’re wondering!)
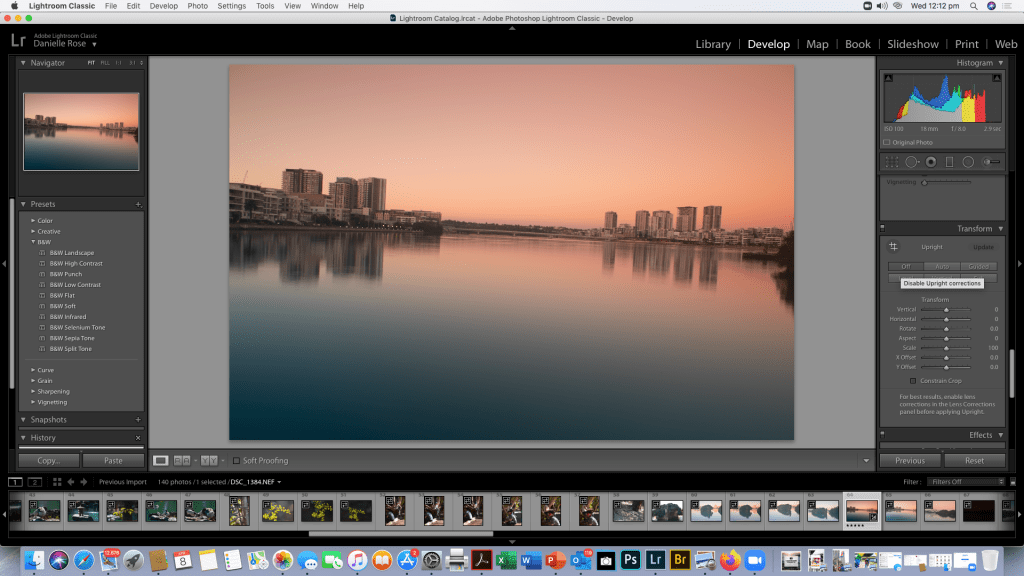
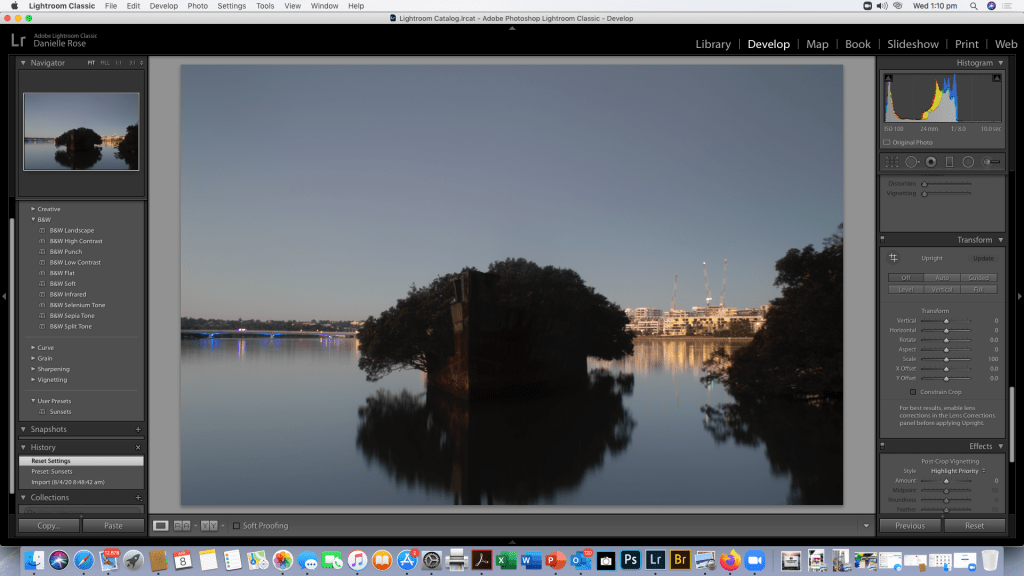
As you can see in the screen shot the horizon is a bit wonky as i knocked my tripod but the light was perfect so I took the long exposure as i knew i could correct it easily in Lightroom. So after putting my copy right details into the Library
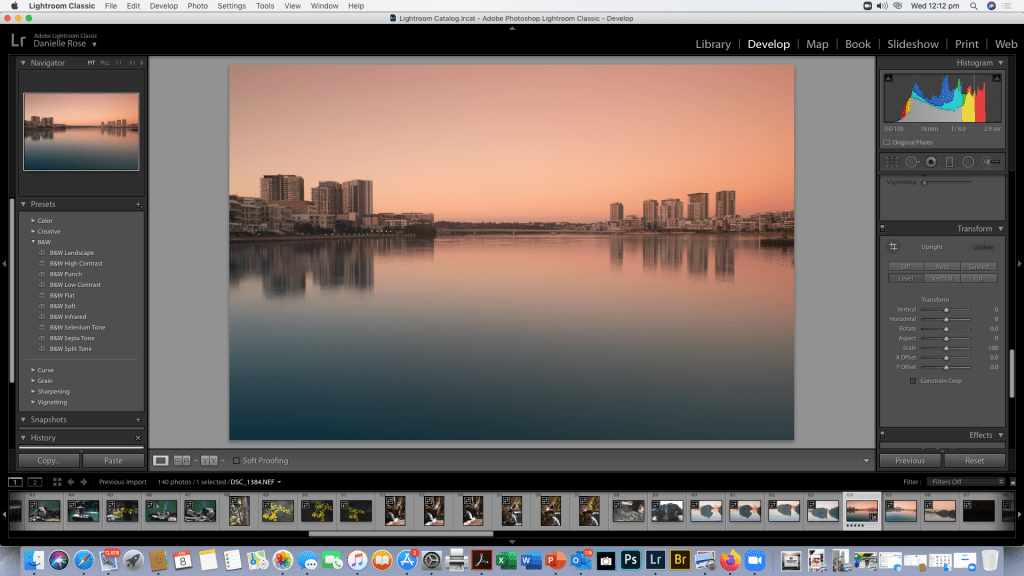
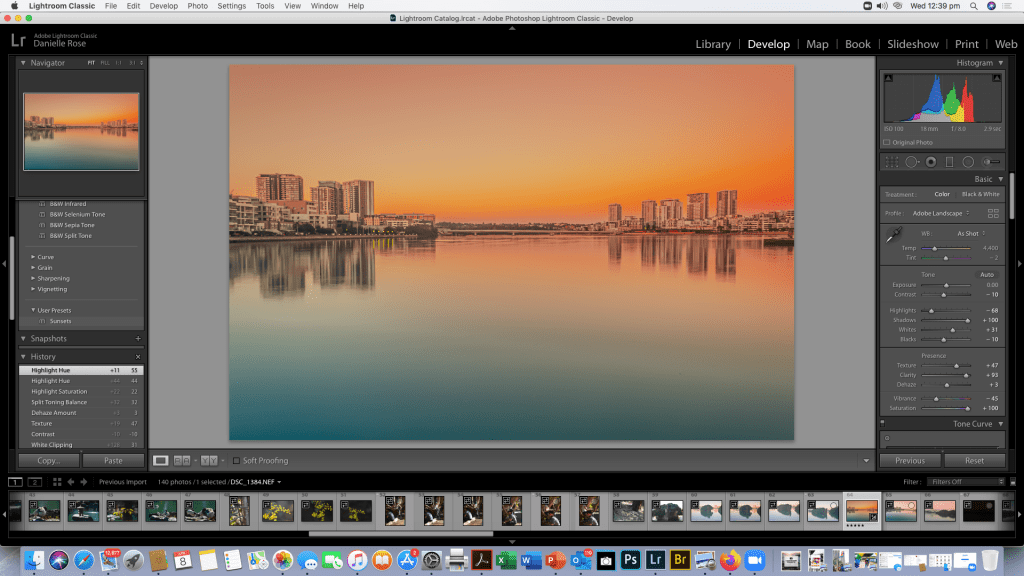
Now that the horizon is level in this shot i will go a head and adjust my image to what i think will look best and screen shot the process of developing my RAW image.
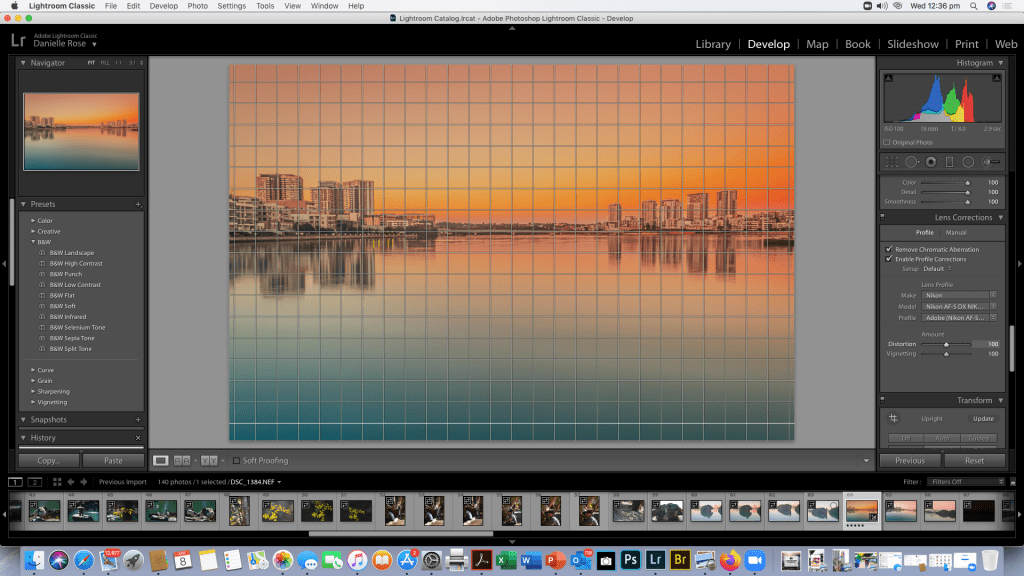
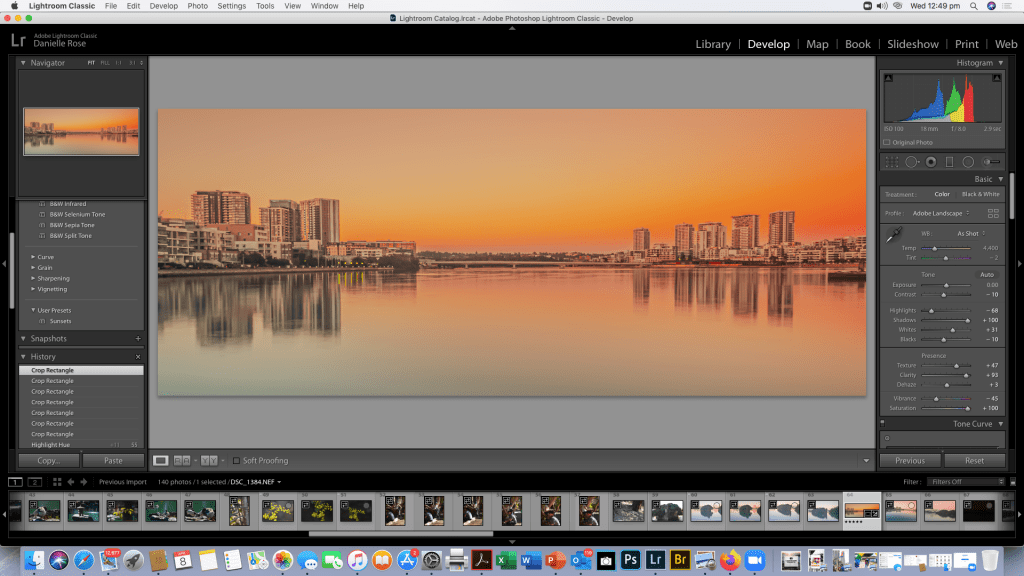
Now that the preset is saved i have decided to crop my image and then export it to the desk top for printing at a later date.
Now that’s all done, here’s the final saved Image saved in it’s file
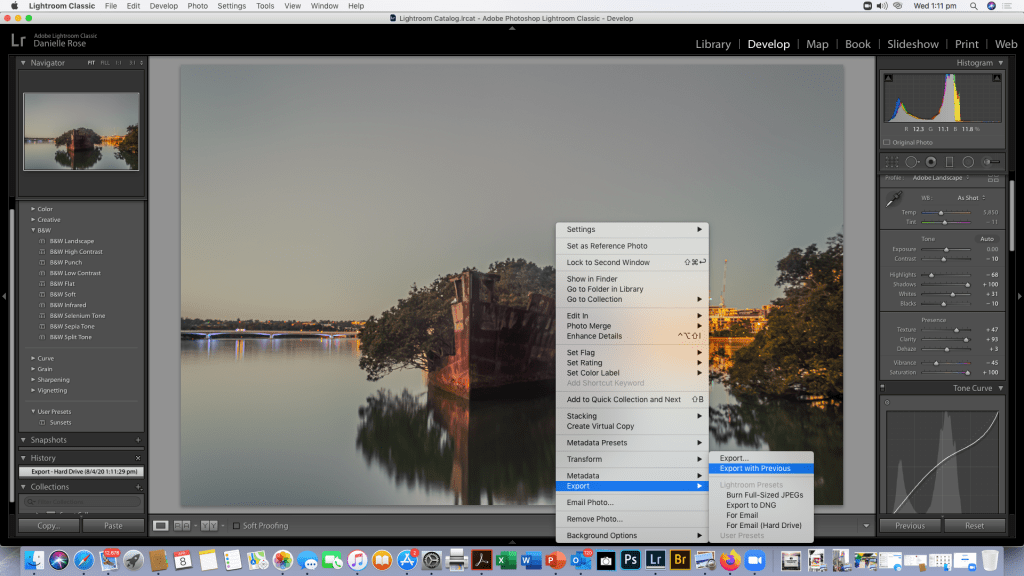
Normally i probably wouldn’t saturate the colours so much i generally prefer a pinky twilight colour rather than an orange glow but the great thing about Lightroom is that now i can go back and reset the image to the original raw data and edit it in a completely different way as this version is saved on the hard drive or i could us this preset again for another image as per below:-
This weeks task is to edit a series of RAW images (sometimes refered to as Digital Negatives images strait out of the DSLR camera containing all the sensor information as well as metadata etc and a non lossy format perfect for editing)
I use a Nikon D3200 24MP camera for the majority of my work at the moment, it’s not too heavy and a great little camera, so my RAW files are in the NEF format which is Nikon’s RAW file format.
The RAW images i will be processing in this exercise were taken before i fractured my pelvis at The Chinese Gardens in Darling Harbour in Sydney early February and will form part of assignment 2 for digital imaging. (……no i didn’t fracture it in a fall at the gardens in the wet…it was an incident with an air conditioner, a cat , an iMac that now has a cracked glass screen and broken LED and a bed side storage box…..the cat suffered no injuries and continues to life a spoilt happy life and a comsol cable constant data back up to the cloud and a spare monitor from my sons room mean i can resume working…..)
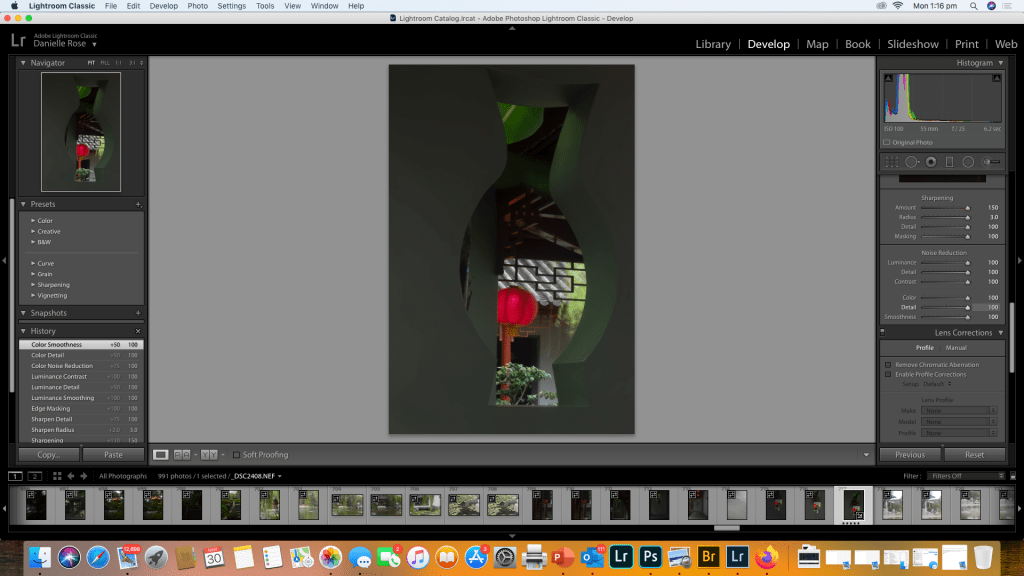
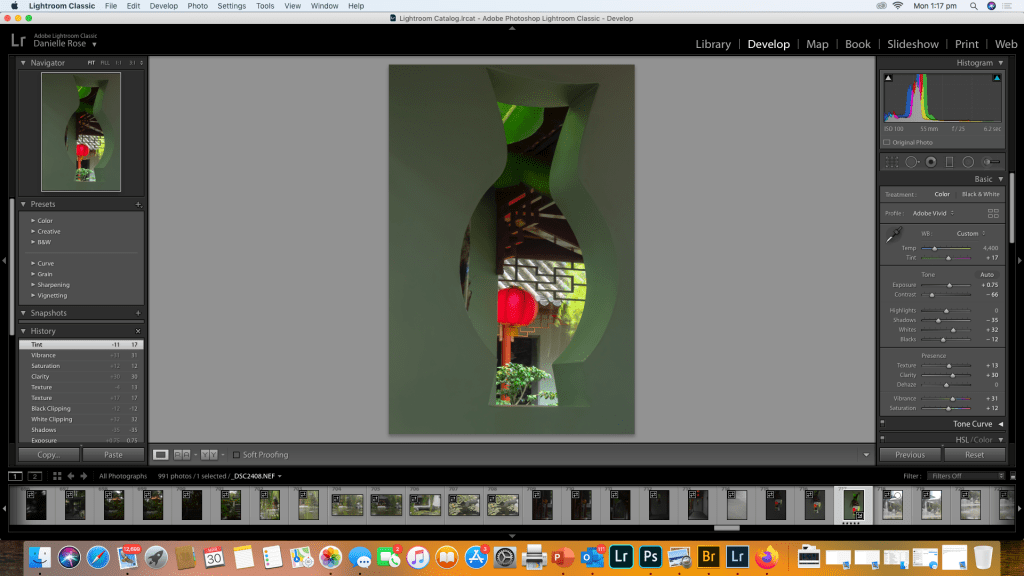
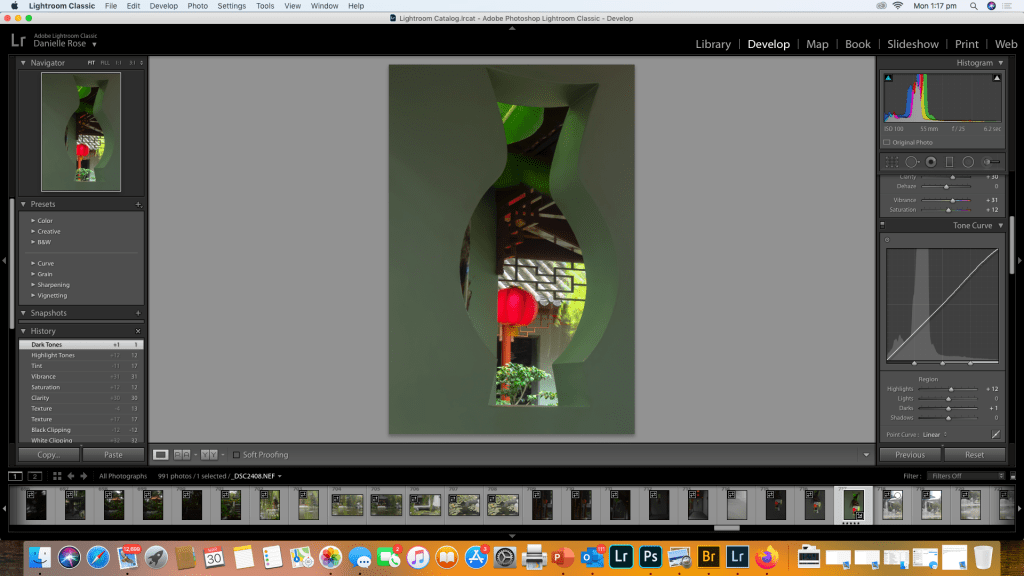
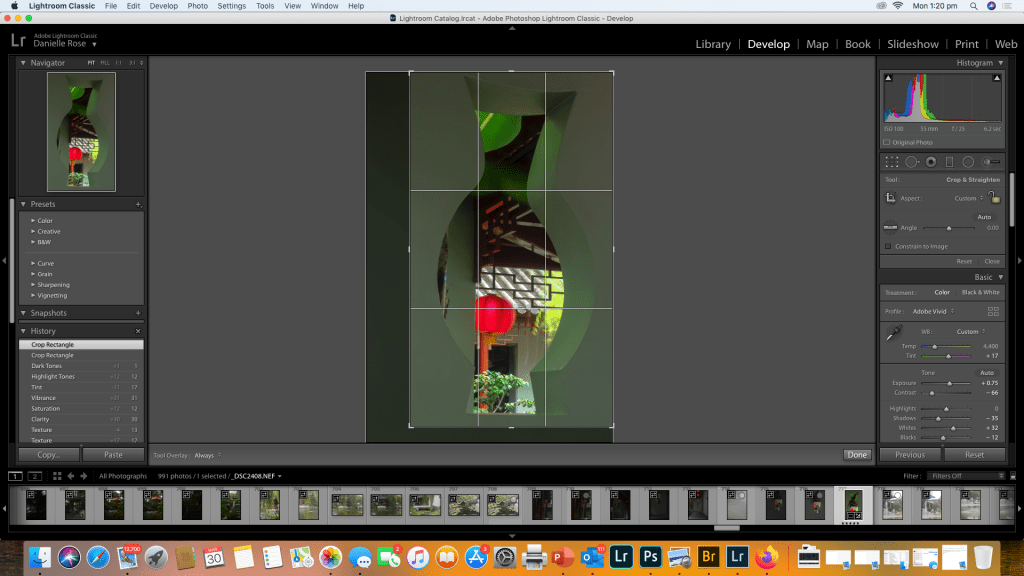
All images will be edited in Adobe Lightroom Classic and I will screen shot my process as I edit each of the 3 images I’ve chosen for this exercise.
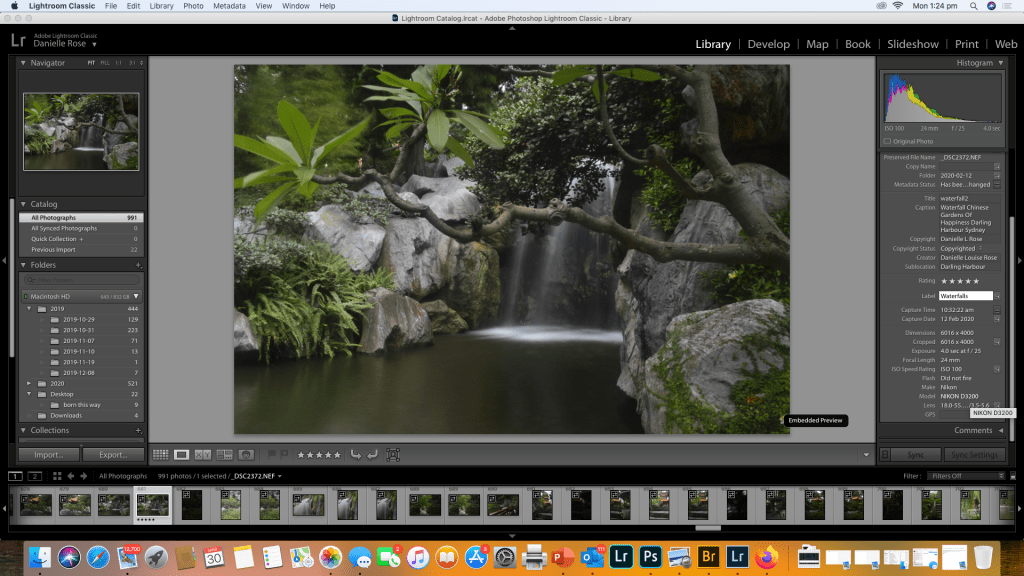
Image 1
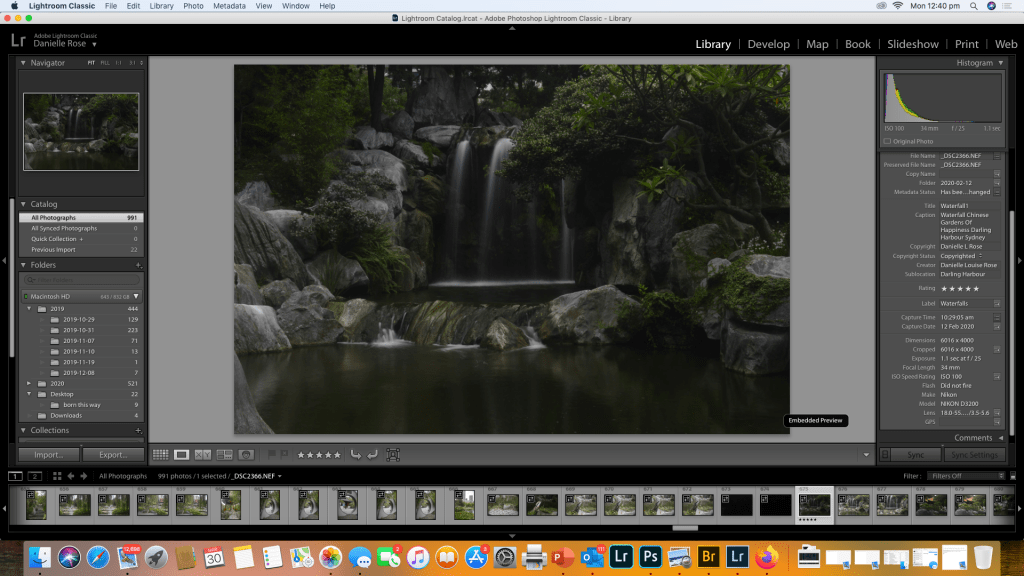
Waterfall – Chinese Gardens Of Happiness
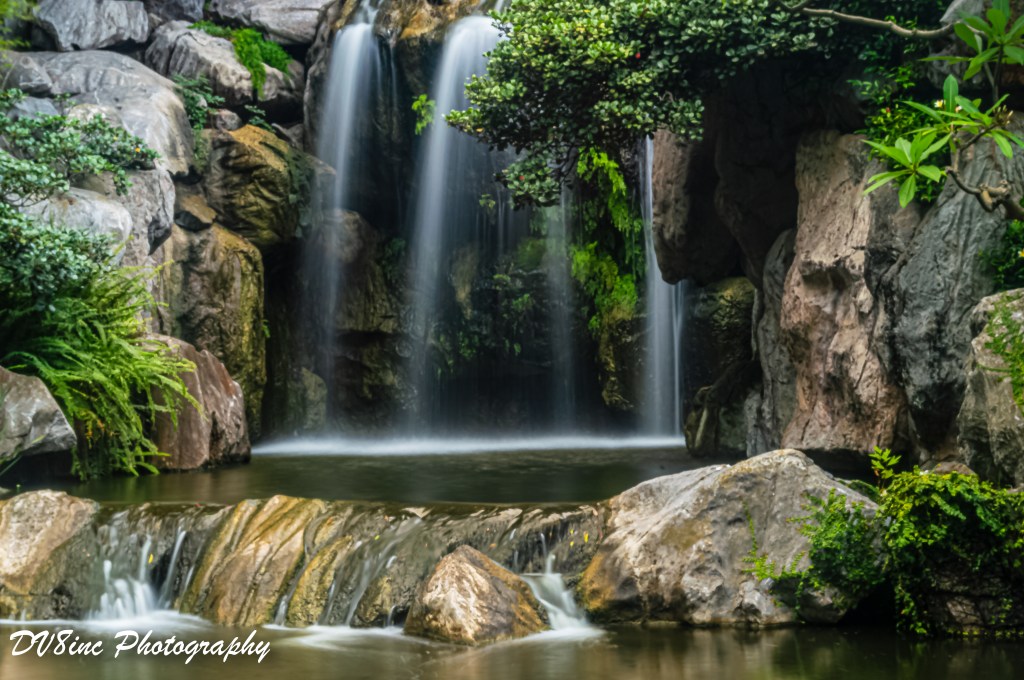
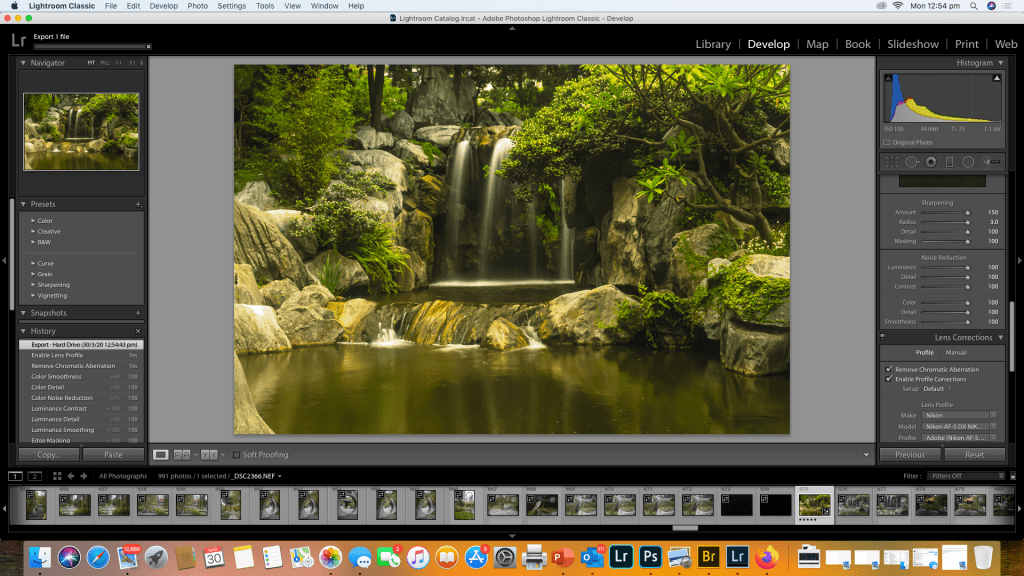
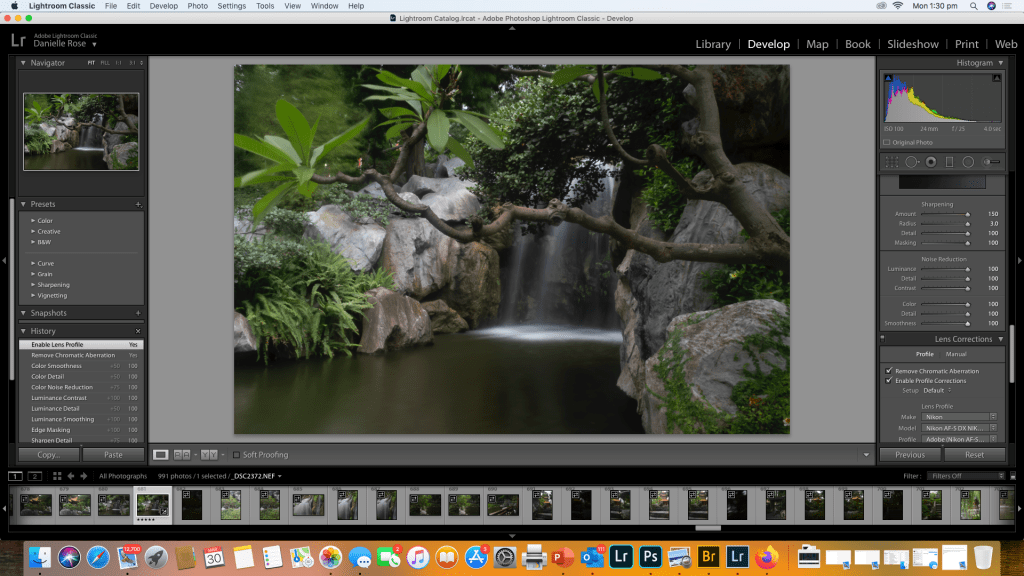
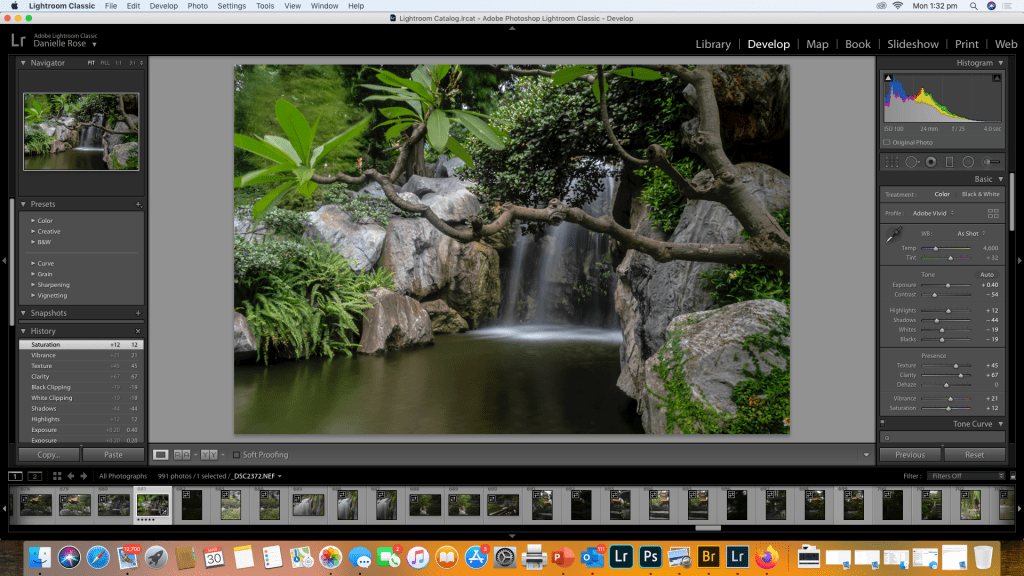
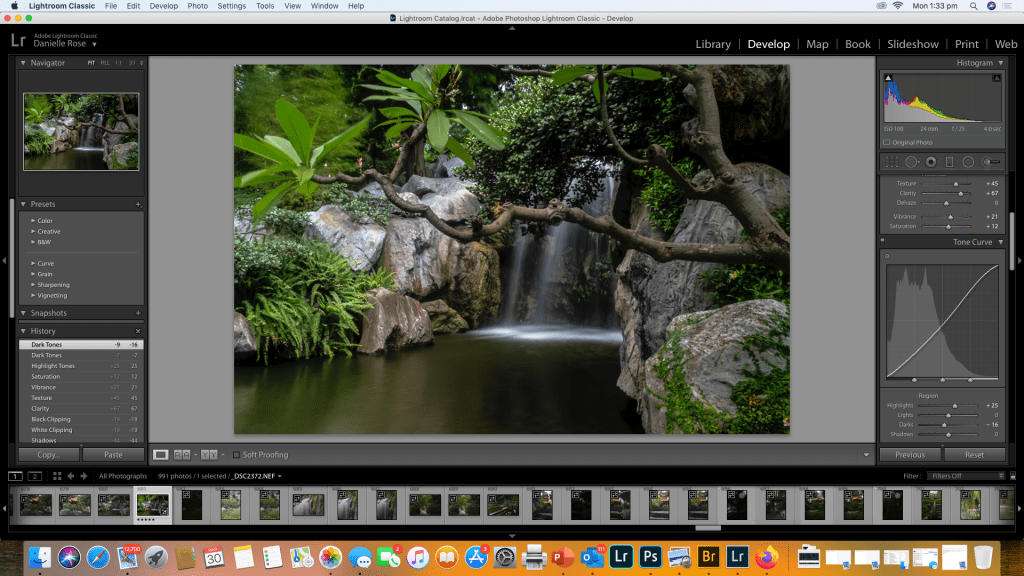
This is the raw image strait out of the camera with no editing and as you can see from the meta data it’s a long exposure of 1.1 sec focal length 34mm on an 18-55mm kit lens with an ISO of 100 i also used a ND filter as i was shooting during the day. The next series of images will demonstrate the use of the sliders in adjusting the contrast and overall tone and colour corrections in the image as well as image sharpening and any noise reduction.
Image 2
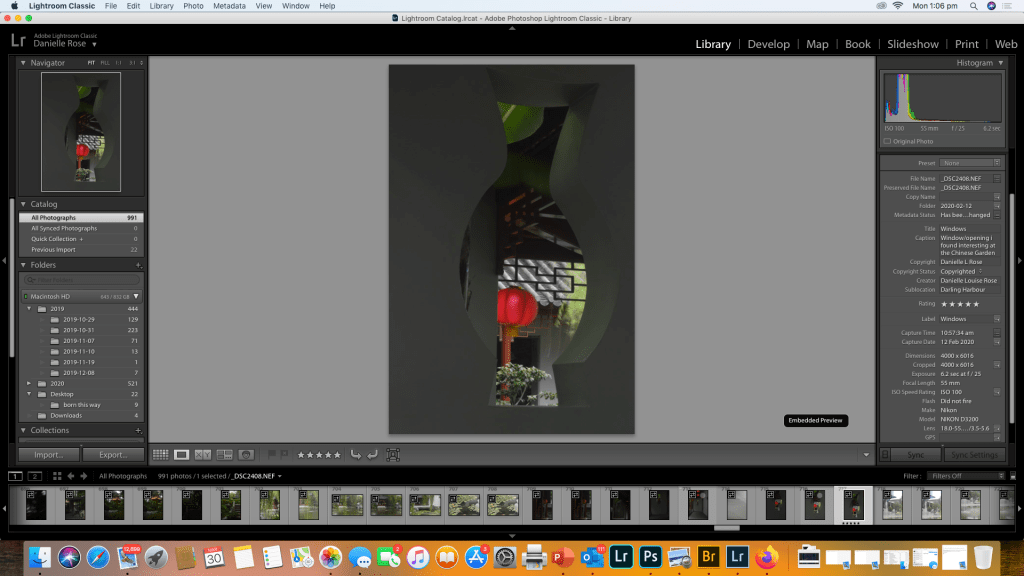
Window – Chinese Gardens of Happiness
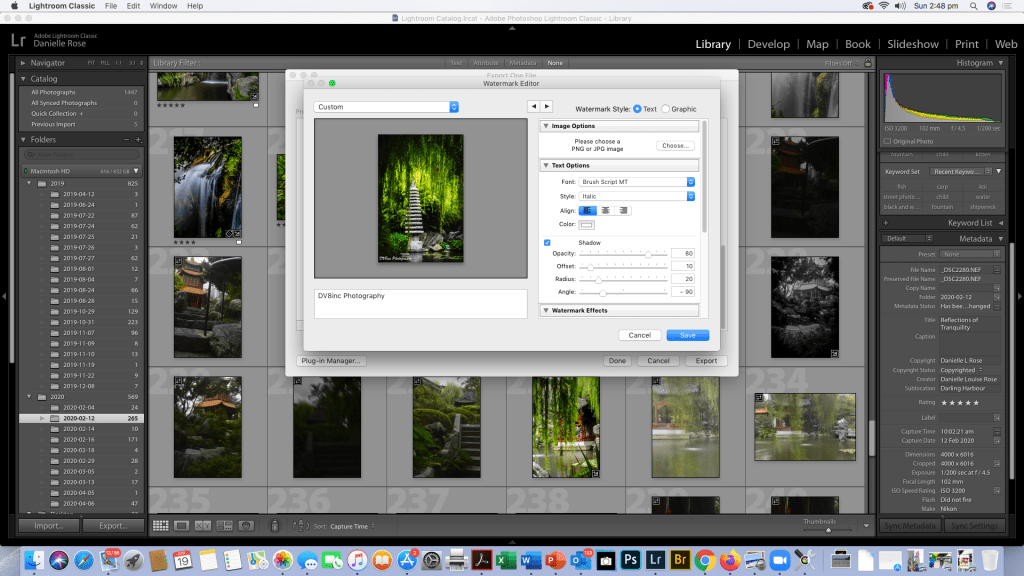
I’ve added my copyright details to the Metadata and i really love this shot as the shape of the window opening in the wall was just such an interesting asymmetrical shape. This was also another long exposure to try and bring a softer tome to the wall and it was quite dark as t was a cloudy rainy day. The exposure was 6.2 seconds at 55mm f25on the 18-55mm kit lens no ND filter as it was inside a corridor with an ISO of 100
Image 3
A Different Angle on the waterfall
I zoomed in to get a different angle on the waterfall in this shot. Long exposure once again 4.0 sec at f25, focal length was 24mm using 18-55mm kit lens with an ND filter and ISO 100
Reflection
I love landscape photography, so i probably have over 100 unedited waterfalls from my travels, but i took this set in February with this module and the assignment in mind.
Normally when editing landscapes or other types of photos i have presets i would use for waterfalls, night shots of cityscapes etc and i would apply that when I’m adding my copyright to the metadata in the library and then do any additional adjustments to the tone curve if needed.
I quite enjoyed the exercise in demonstrating the steps i take when editing and the subtle differences between the colours and tones is apparent from the screen shots. Editing ones work is a highly personal choice what i like in an image someone else may do differently, I like vibrant colours and soft but sharp images with lots of clarity. I love Lightroom for that reason because it’s non destructive meaning once I’ve saved this edit I can reset it to original raw data and try another preset or create a preset or even make it black and white. The endless possibilities for creating a final image in Lightroom make it an invaluable tool and an essential part of a photographer work flow.
This weeks task was to download Adobe Lightroom and create a catalogue of images. Already having been a long time user of Adobe Lightroom I have an excellent catalogue system already in place, and generally try to associate keywords with images such as animals, faces, locations etc so I can find images quickly if I need to. As such I didn’t have anything other than a blog post to create for this weeks digital imaging task. If you don’t use Lightroom or have never used it before for image workflow and asset management I can’t recommend a programme that’s going to make your life easier than this one.
Module 2 asked us to research and implement digital asset management with 3 tiered storage.
I already have a system in place for my digital image asset management. I use two laptops currently for working on mainly as one is better suited to graphic work than the other and the other is my main image storage onsite but i use adobe creative cloud so i can work between devices and my iPad or iPhone if I’ve shot on those rather than my DLSR.
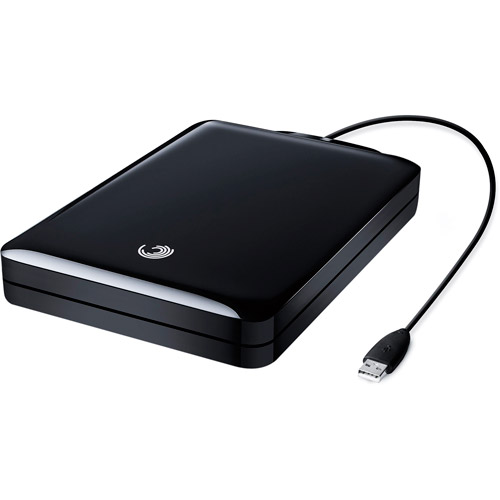
At this point in time I’m currently utilising 20gb of storage i have on Adobe Creative Cloud and 50gb at the moment on my iCloud, as well as archives dating back to 2009 stored on my terabyte Seagate drive in case of catastrophic failure of any other devices and storage methods.
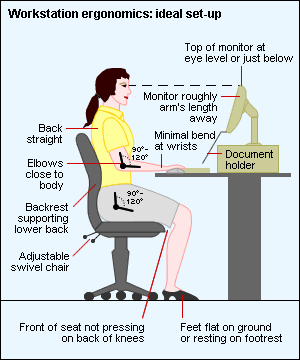
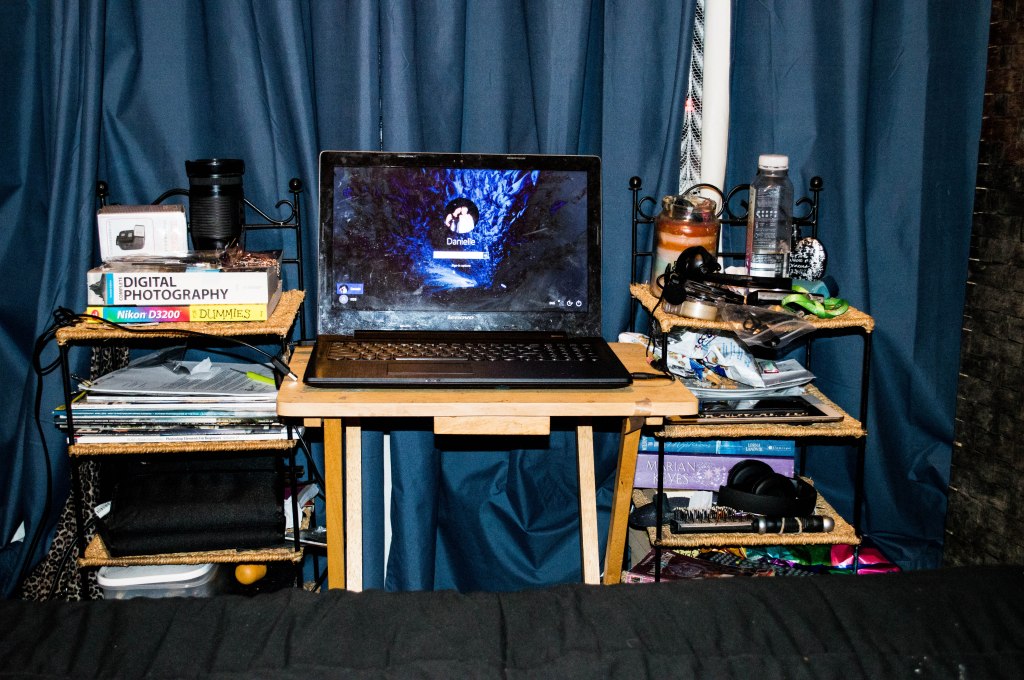
I began my study Journey with a less than ideal work space and have updated to my current work space, it’s a big difference not having room for an office and studio at home anymore, we moved from a house with an office and a lot of space after my daughter became ill a number of years ago and live in housing commission accommodation. I dropped this subject last trimester after a family crisis and am picking it up again now i’ve reduced my work load and have more time to focus on assets management and studies in general
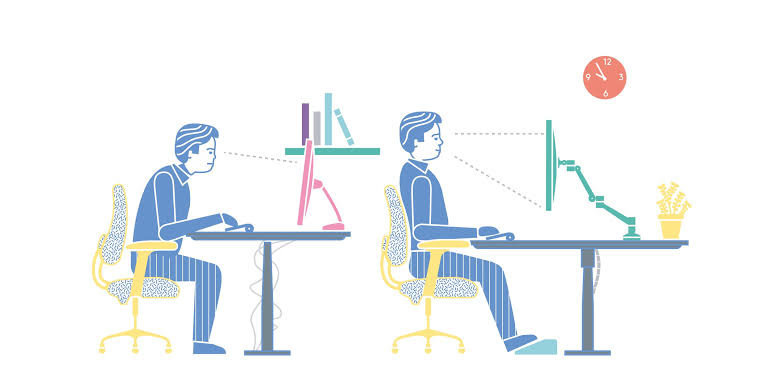
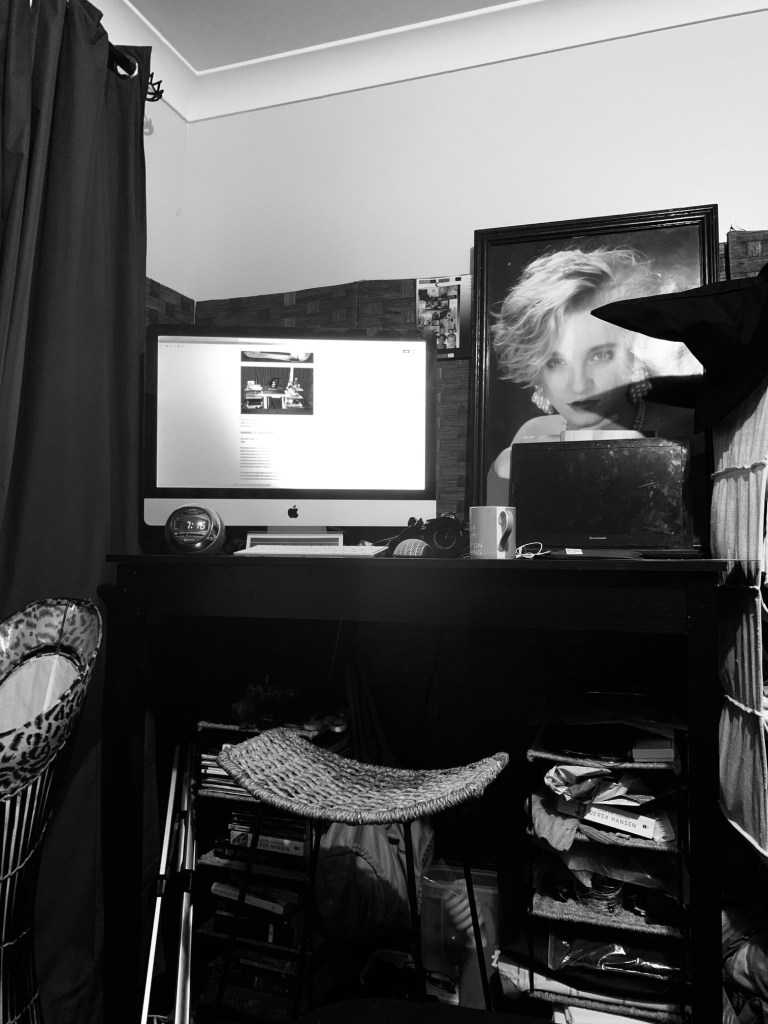
The biggest thing has been changing my work space as I really noticed the effect it was having on my back, wrists and posture. The next two photos are what i was working with from June until the beginning of September.
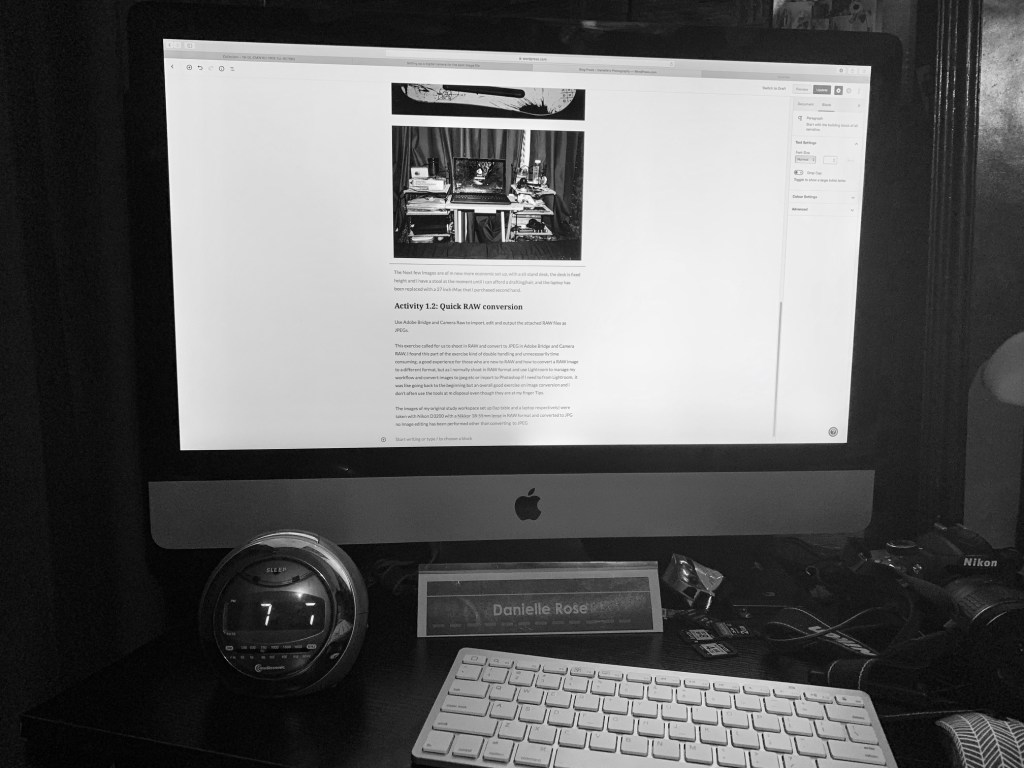
The Next few Images are of my newer, more ergonomic set up, with a sit stand desk, the desk is fixed height and i have a stool at the moment until i can afford a matrix drafting chair from Officeworks, and the laptop has been replaced with a 27 inch iMac that i purchased second hand. The larger screen size makes it easier to view what i’m reading and editing and the colour calibration and management is a lot better than my old dying laptop which sadly no longer connects to the internet and the track pad works sometimes.
new work spaceThe Mac and editing the blog.
Activity 1.2: Quick RAW conversion
Use Adobe Bridge and Camera Raw to import, edit and output the attached RAW files as JPEGs.
This exercise called for us to shoot in RAW and convert to JPEG in Adobe Bridge and Camera RAW, I found this part of the exercise kind of double handling and unnecessarily time consuming, a good experience for those who are new to RAW and how to convert a RAW image to a different format, but as I normally shoot in RAW format and use Lightroom to manage my workflow and convert images to jpeg etc or import to Photoshop if I need to from Lightroom, it was like going back to the beginning but an overall good exercise on image conversion and i don’t often use the tools at m disposal even though they are at my finger Tips.
The images of my original study workspace set up (lap table and a laptop respectively) were taken with Nikon D3200 with a Nikkor 18-55mm lense in RAW format and converted to JPG no Image editing has been performed other than converting to JPEG

















 Danielle Rose Photography